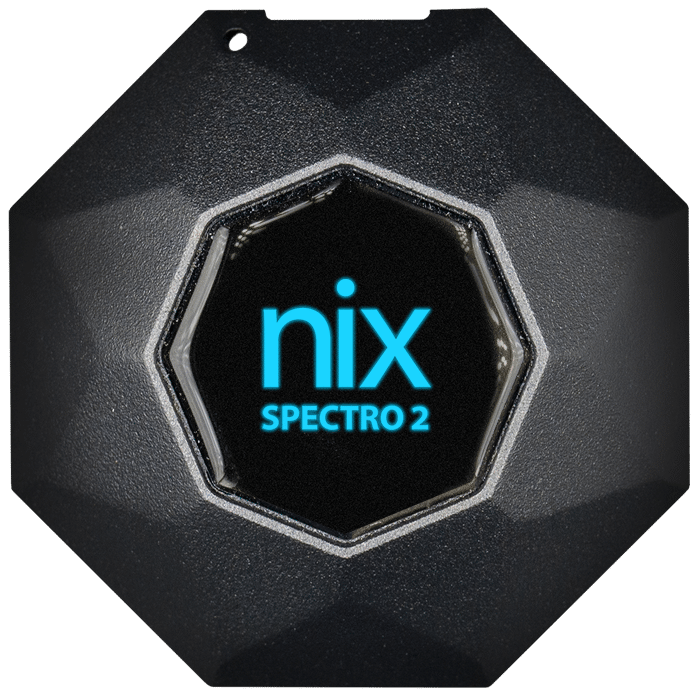
Getting started
Congratulations on purchasing a Nix Spectro 2! Let’s get you set up with this simple video. Don’t feel like watching a video? You can find our instructions written out below.
What's in the box

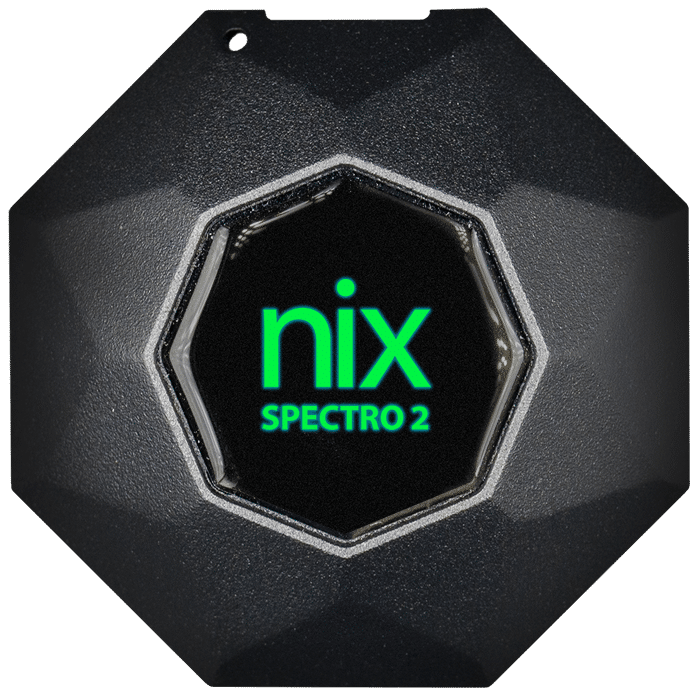
Nix Spectro 2

Inspection certificate
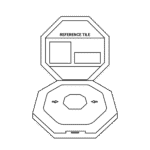
Ceramic reference tile

USB-C Charging Cable
Microfiber carrying pouch

Lanyard

Microfiber pouch

2 mm positioning jig
Set-up steps
Step 1
Wake up your device
Wake up your Nix Spectro 2 by plugging it into the USB-C cable, and the cable into a charger. The lid of the device will indicate it’s connected to power. As it’s charging, it will slowly pulse orange 4 times, then stay dimly lit. Once charging is complete it will slowly pulse green 4 times, then stay dimly lit. Make sure to allow your device to fully charge before unplugging (about four hours).
Step 2
Download the app
Download the free Nix Toolkit App from either the Google Play store or Apple App Store.
Step 3
Enable location + wireless connectivity permissions
You must allow location services and wireless connectivity on your device for your Nix Spectro 2 to function.
Step 4
Connect your device
Step 5
Start scanning and measuring colors
Tips + tricks
Maintaining your device:
- Charge your device every month when not in use.
- Keep the lens clean of all dirt, lint, and smudges. Always store your device in the included industrial carrying case.
- Dust and debris can be removed by gently wiping the lens with a dry microfiber cloth. Do not use a cleaning solution on your device.
- If your reference tile requires cleaning, wipe it with a dry microfiber cloth (provided). Never use any cleaning solution on the tile. Use only the provided cloth, as other materials may be dyed and can stain the reference tile.
- Avoid dropping or hitting your device.
- Don’t use outside of 5 – 35°C temperature range. If you bring your device in from outside, allow it to come to temperature slowly to avoid condensation.
- Surfaces that aren’t flat or solid can be difficult to measure accurately. To avoid poor scanning conditions, pair your device with one of Nix Sensor’s carefully crafted adapters. Instructions for using the adapters can be found below:
Lens cleaning procedure
To achieve the best results and highest performance from your Nix Spectro 2, it must be kept clean and free of all dust, fingerprints, and other debris.
Note: Only utilize air to clean the lens; alternative methods risk damaging your device.
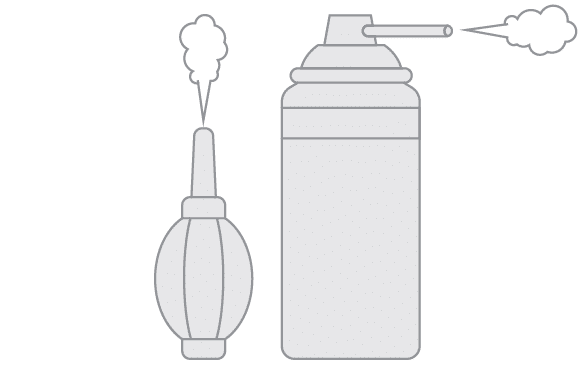
Use only compressed air canisters or manual dusters to clean your lens
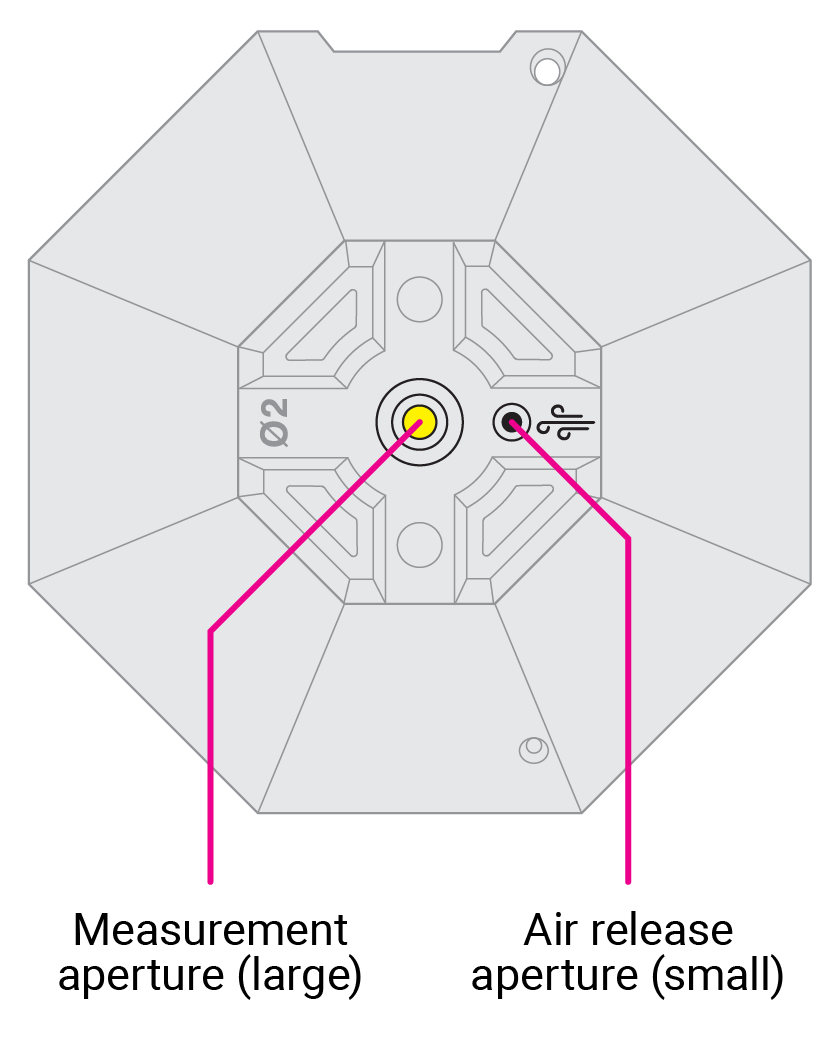
1
Start by directing the compressed air over the air release aperture (marked with a 

2
Direct the compressed air over the measurement aperture to remove dust from the center of the lens.

3
Repeat step 1 + 2 as necessary to remove all visible dust.
4
Calibrate your device in the Nix Toolkit app using the included reference tile (instructions available here).
Using the reference tile
Nix Sensor Ltd. has designed a durable platform built upon an all-metal chassis, sealed tempered glass lenses, and no moving parts. Our devices use solid-state light sources (LEDs) and automatically compensate for small ambient temperature changes. These light sources are rated for hundreds of thousands of measurements over their lifetime. Under normal operating conditions, the Nix Spectro 2 does not need daily calibration.
You may want to either check your calibration status or perform a calibration if:
- Significant ambient temperature changes (greater than 10°C) have been experienced since the last calibration.
- More than one week has elapsed since the last calibration.
- You have taken over 1000 measurements since your last calibration.
- You suspect you may have physically shocked your device.
- You are experiencing unreliable results.
Note: For proper operation, you must ensure that your device’s lens is clean and your calibration tile is well maintained. Please see the “Tips + Tricks” section for information on proper maintenance.

1
Open the reference tile that was shipped with your Nix Spectro 2.

2
From the Nix Toolkit app, open up device info and select “Perform white tile normalization”.
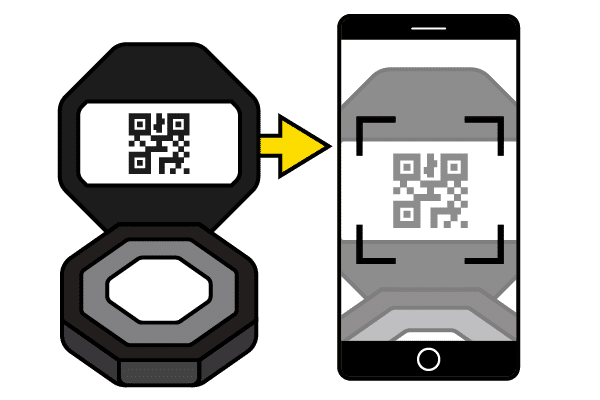
3
Walk through the steps on your app, and scan the QR code on the reference tile (make sure you enable permissions for the app to use your camera).

4
Remove any adapters or jigs from your device. Place your Nix Spectro 2 on the designated white patch of the tile. Press “Scan” in the Nix Toolkit app to run calibration.
If your device is failing calibration, submit a ticket to contact our support team.
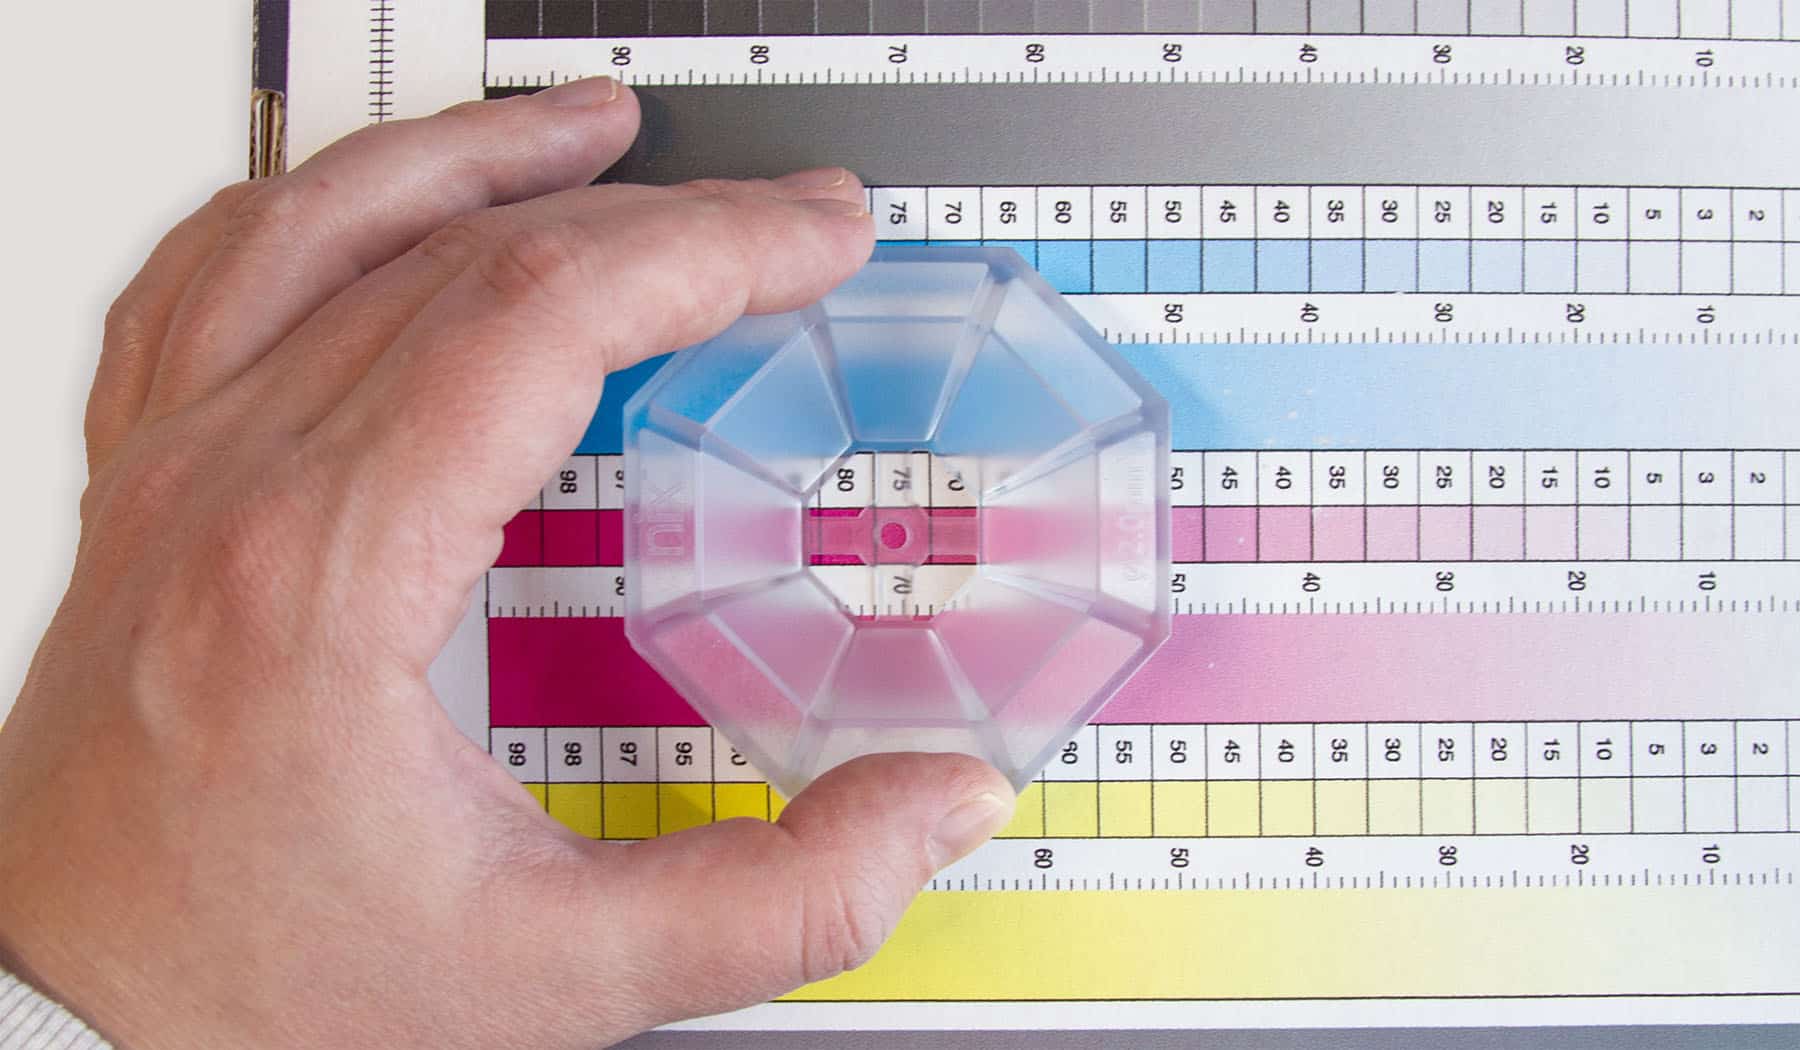
Using the positioning jig
The positioning jig allows your device to measure patch sizes as small as 4 mm. The jig does not need to be used when measuring samples larger than 16 mm. Do not use the jig when calibrating your device. If your Nix Spectro 2 is connected to a USB cable, take extra care to make sure your device is lying flat while taking measurements (the USB cable can cause the device to tilt, negatively impacting measurement accuracy).
To use the positioning jig, follow these steps:
- Place your sample to measure on a hard, flat surface.
- Visually align your positioning jig to the center of the patch you wish to measure.
- Hold the positioning jig firmly in place so it doesn’t inadvertently shift.
- Place your Nix Spectro 2 in the positioning jig. You may have to rotate it slightly to align the cross bars.
- Perform your measurement in the app as normal. Repeat the steps for your other measurements.
RGB lid indicator
The lid of your Nix Spectro L has an RGB light that indicates certain activity related to your device. For any RGB feedback not mentioned in the tables below, please submit a ticket to contact our support team and we’ll be happy to help you resolve your issue.
Plugged into power source, not connected to software
Color
Feedback
Description
Orange
4 slow pulses, then stays dimly lit
Actively charging.
Green
4 slow pulses, then stays dimly lit
Charging complete.
Red
Flashing
Charging error. Please submit a ticket to contact our support team.
Connected to software
Color
Feedback
Description
White
2 quick pulses
USB connection opened/closed.
Cyan
2 quick pulses
Wireless connection opened/closed.
Blue
Stale
Measurement in progress.
Green
2 quick pulses, fades after 5 seconds
Measurement ended successfully.
Red
3 quick pulses, fades after 5 seconds
Measurement ended unsuccessfully. Refer to the error message shown in the software for further instructions. If you keep experiencing this error, please submit a ticket to contact our support team.
FAQs
Device
How do I reset my device?
The Nix Spectro 2 automatically resets when it is connected to a USB charger. Additionally, there is a small hole at the bottom of the device. Gently use a paperclip through the hole to access a reset button.
My device seems stuck
If you’re having trouble with your device, try these steps:
- Force quit and restart your app.
- Recharge your device until the lid is pulsing green (indicating charging is complete).
- If you’re still experiencing issues, submit a ticket to contact our support team.
I've tried everything and my Nix Spectro 2 won't connect. What do I do?
- Make sure your device is close to your phone before pairing.
- Follow the set-up steps above.
- If you’re still having trouble, submit a ticket to contact our support team.
Charging time and procedure
Charging your Nix Spectro 2 should take approximately 4 hours from a standard USB charger. When charging starts the lid should slowly pulse orange 4 times, then stay dimly lit. When charging has completed it will slowly pulse green 4 times, then stay dimly lit.
Reference tile
What's the reference tile for?
The reference tile allows for periodic in-field calibration of your device for improved performance and accuracy.
How often should I use my reference tile?
You may want to perform a calibration with the reference tile if:
- Significant ambient temperature changes (greater than 10°C) have been experienced since the last calibration.
- More than one week has elapsed since the last calibration.
- You have taken over 1000 measurements since the last calibration.
- You suspect you may have physically shocked your device.
- You are experiencing unreliable results.
How do I care for my reference tile?
- Keep the protective case closed when the tile is not in use.
- Keep your tile in a clean, dry, secure place.
- If your reference tile requires cleaning, wipe it with a dry microfiber cloth (provided). Never use any cleaning solution on the tile. Use only the provided cloth, as other materials may be dyed and can stain the reference tile.
How do I replace a lost or damaged reference tile?
Your reference tile has been paired with your specific device during its manufacture. To inquire about replacements, submit a ticket to contact our support team.
Still have questions?
