Nix Print Pro
Tutorials + Support
Video tutorials
Don’t feel like watching a video or not finding what you’re looking for? Keep scrolling to find some more instructions and tutorials below.
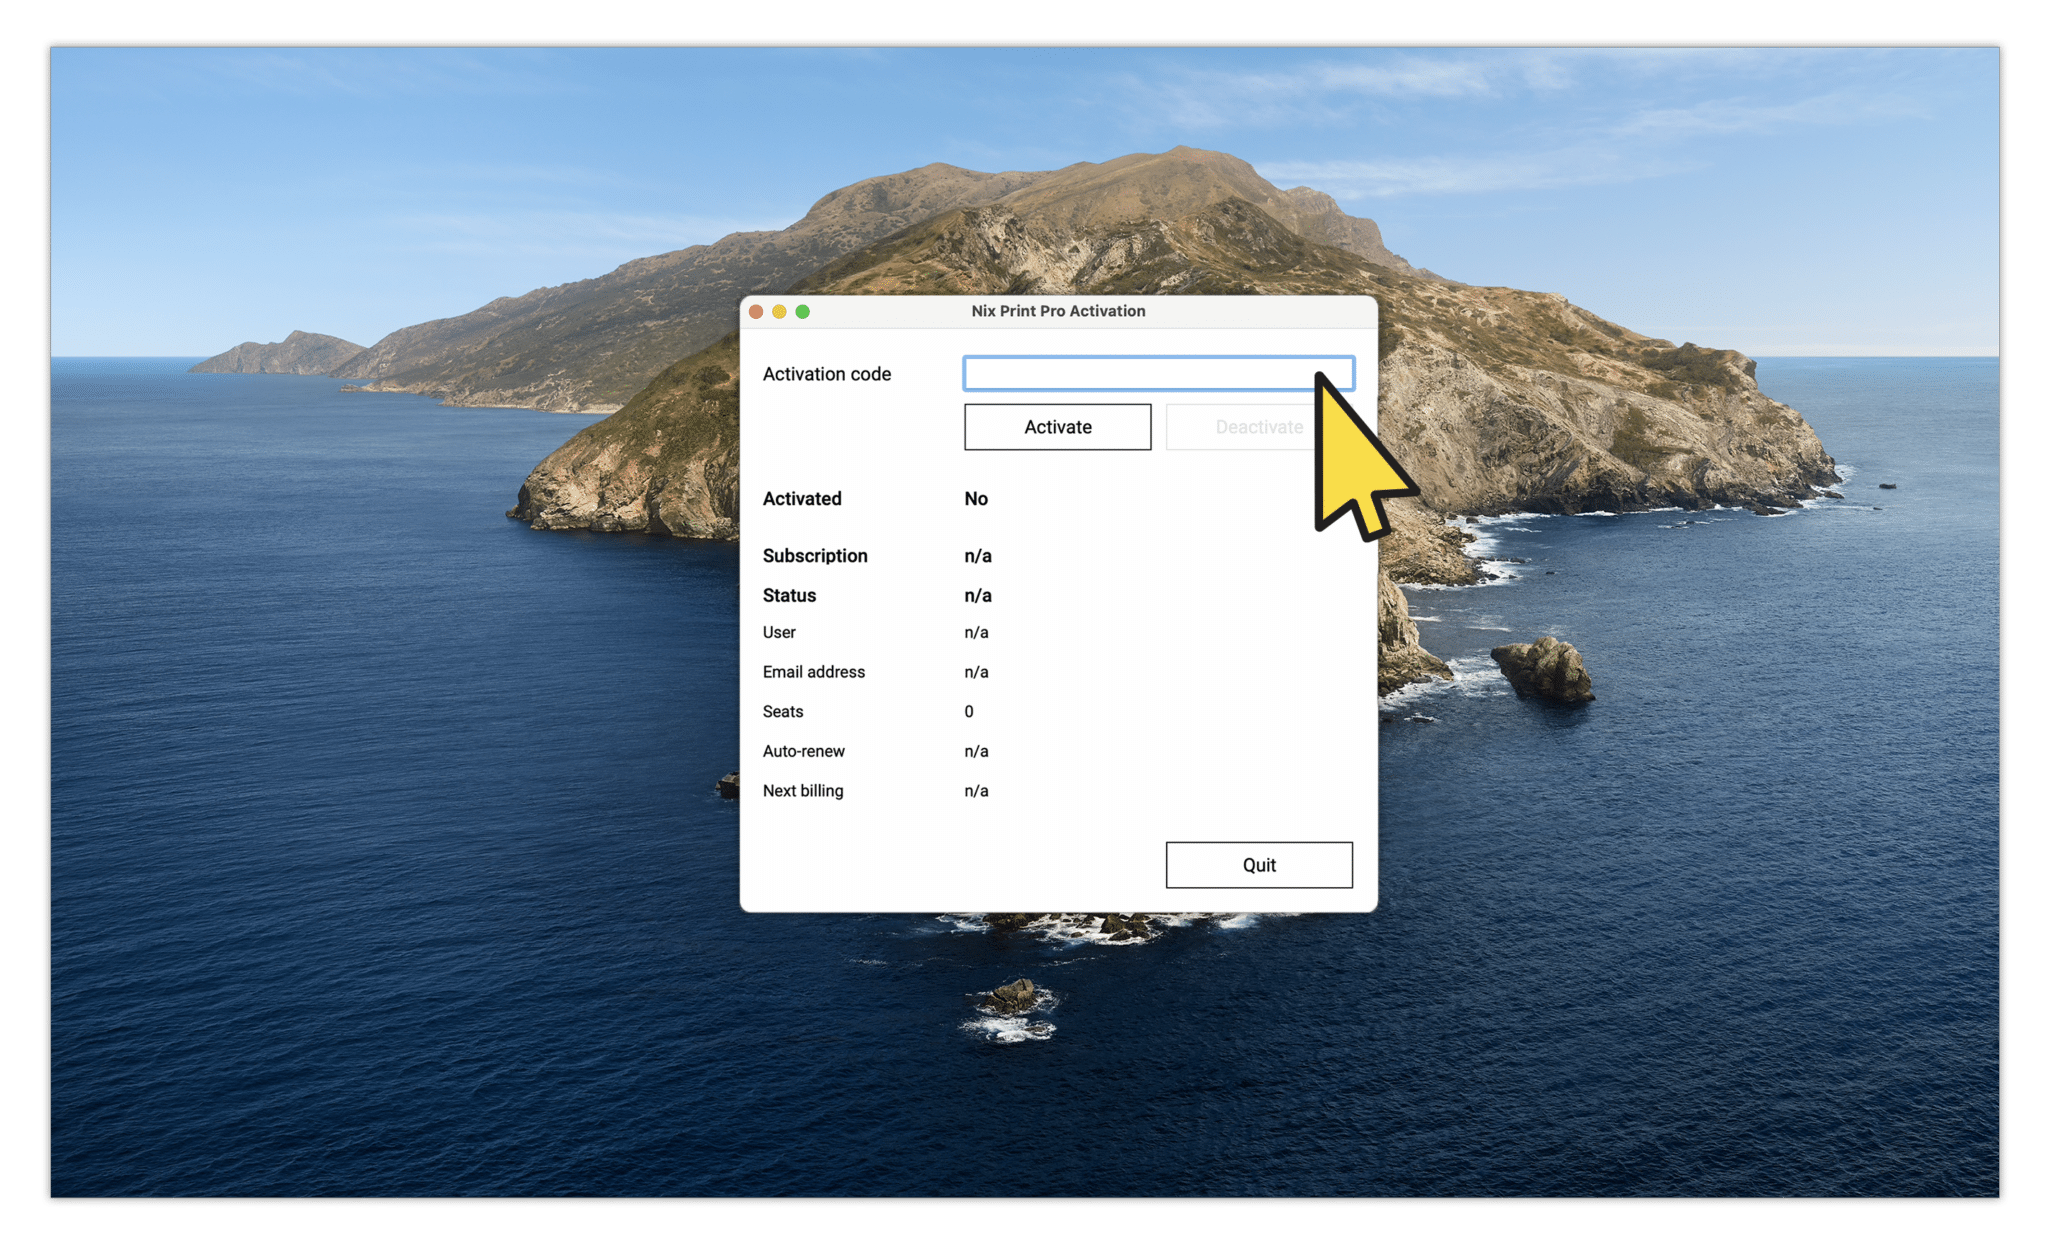
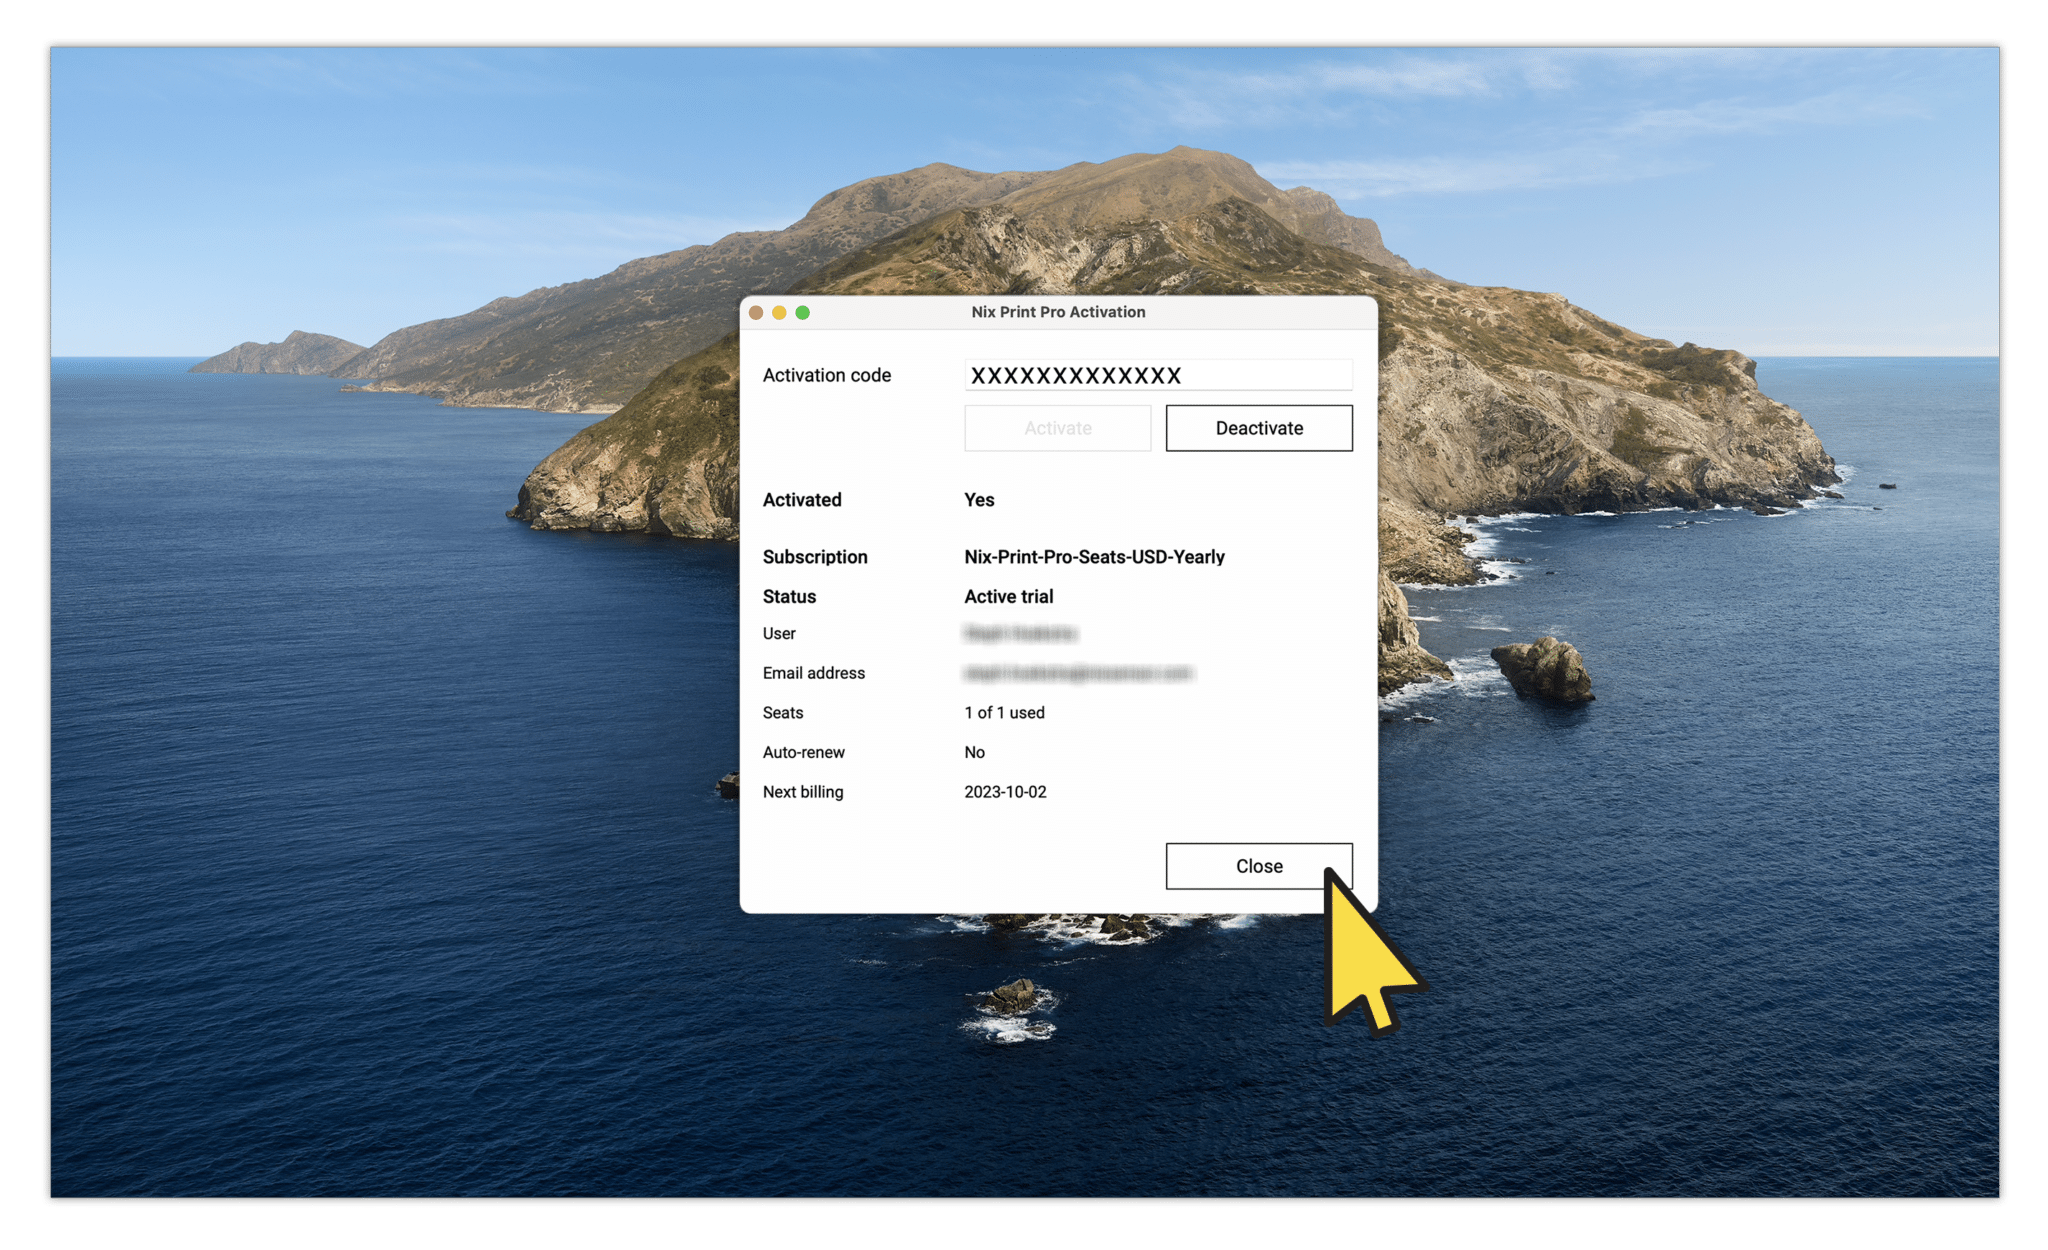
Tutorial 1: Activation
Learn how to perform the initial set-up and activation of your Nix Print Pro subscription.
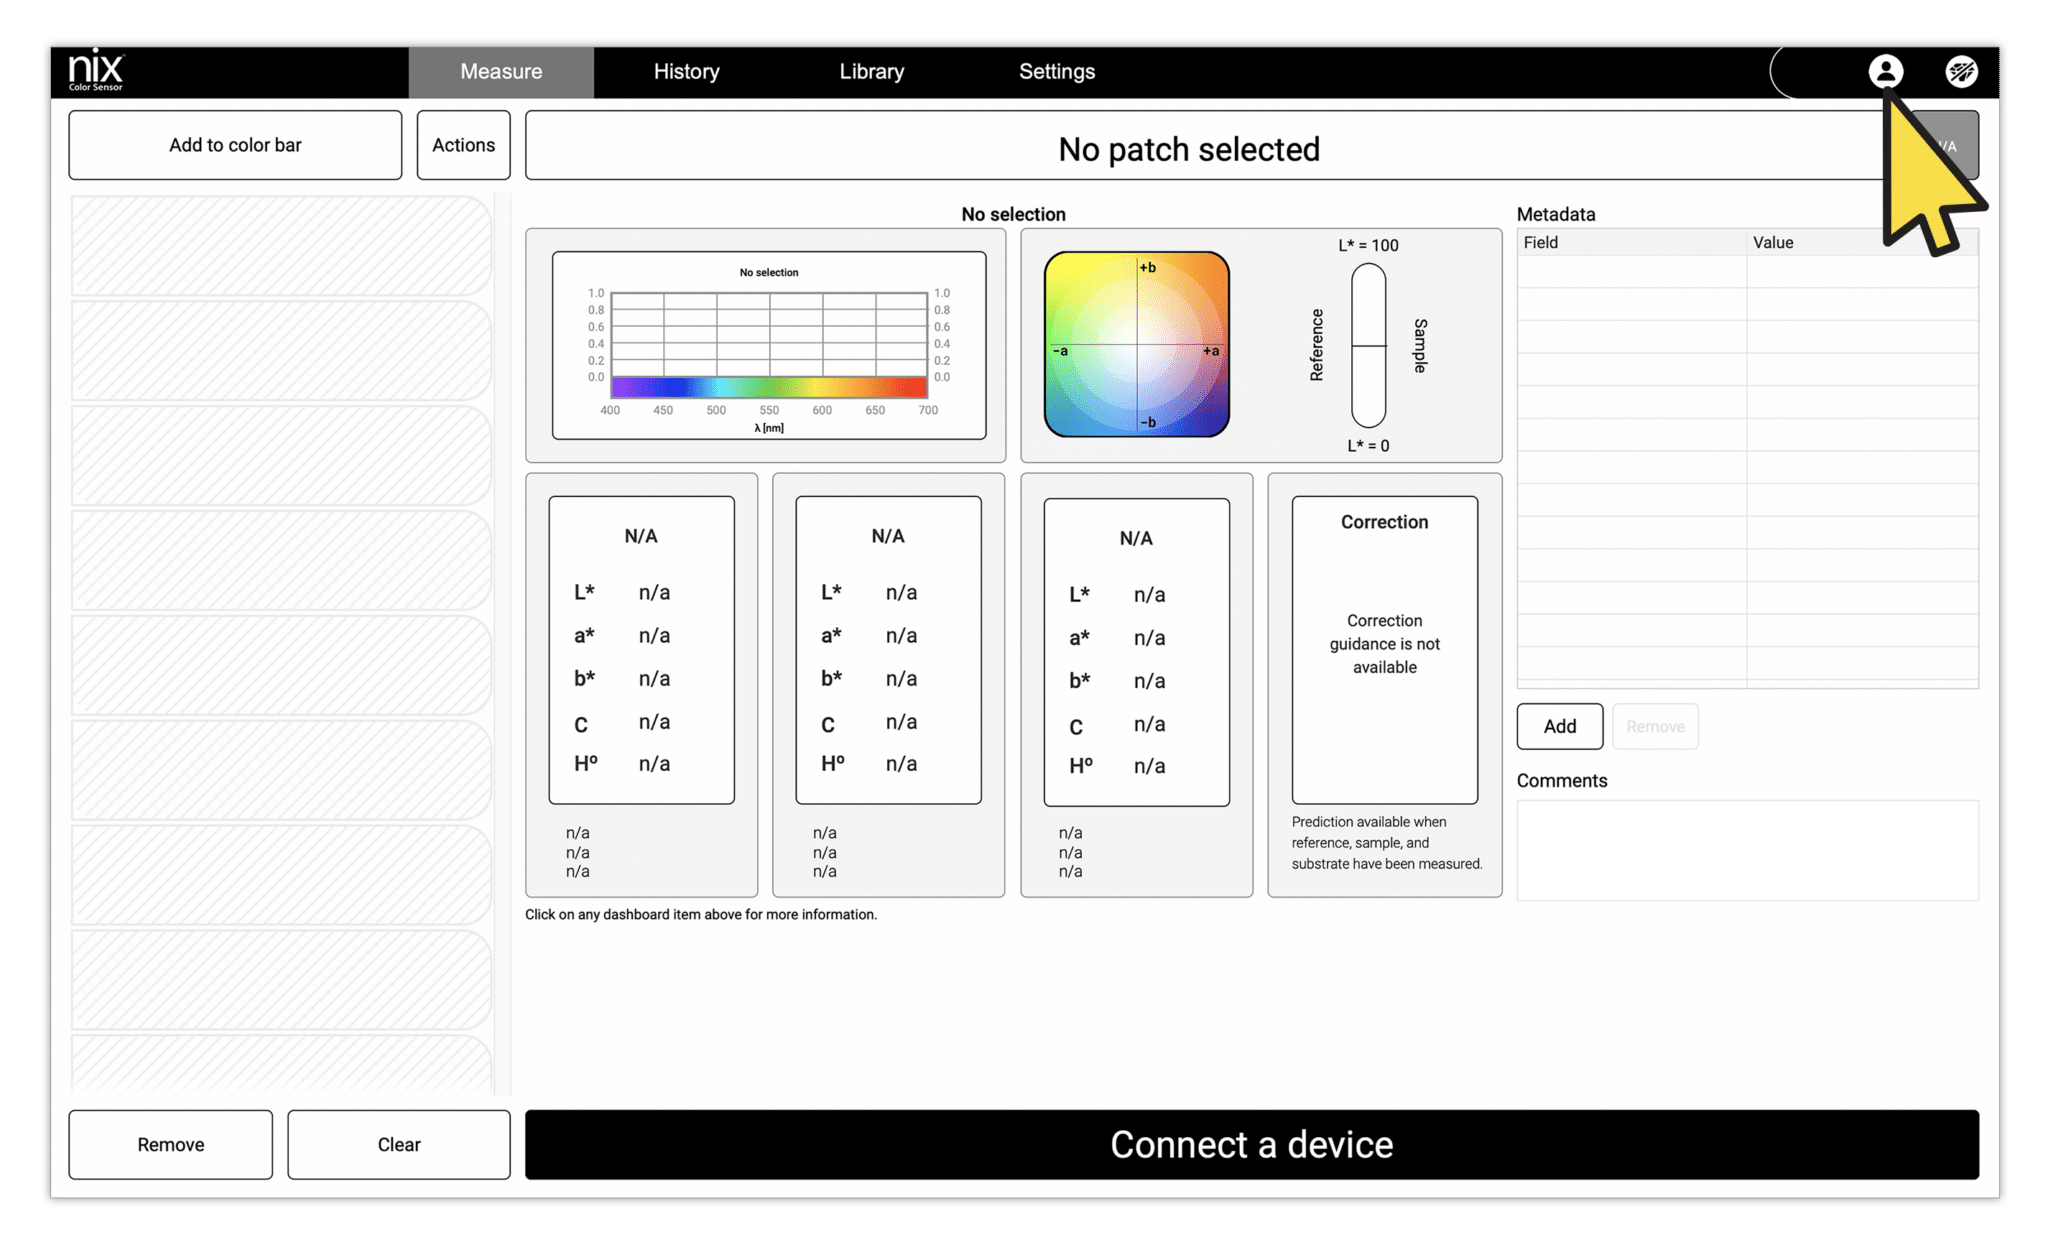
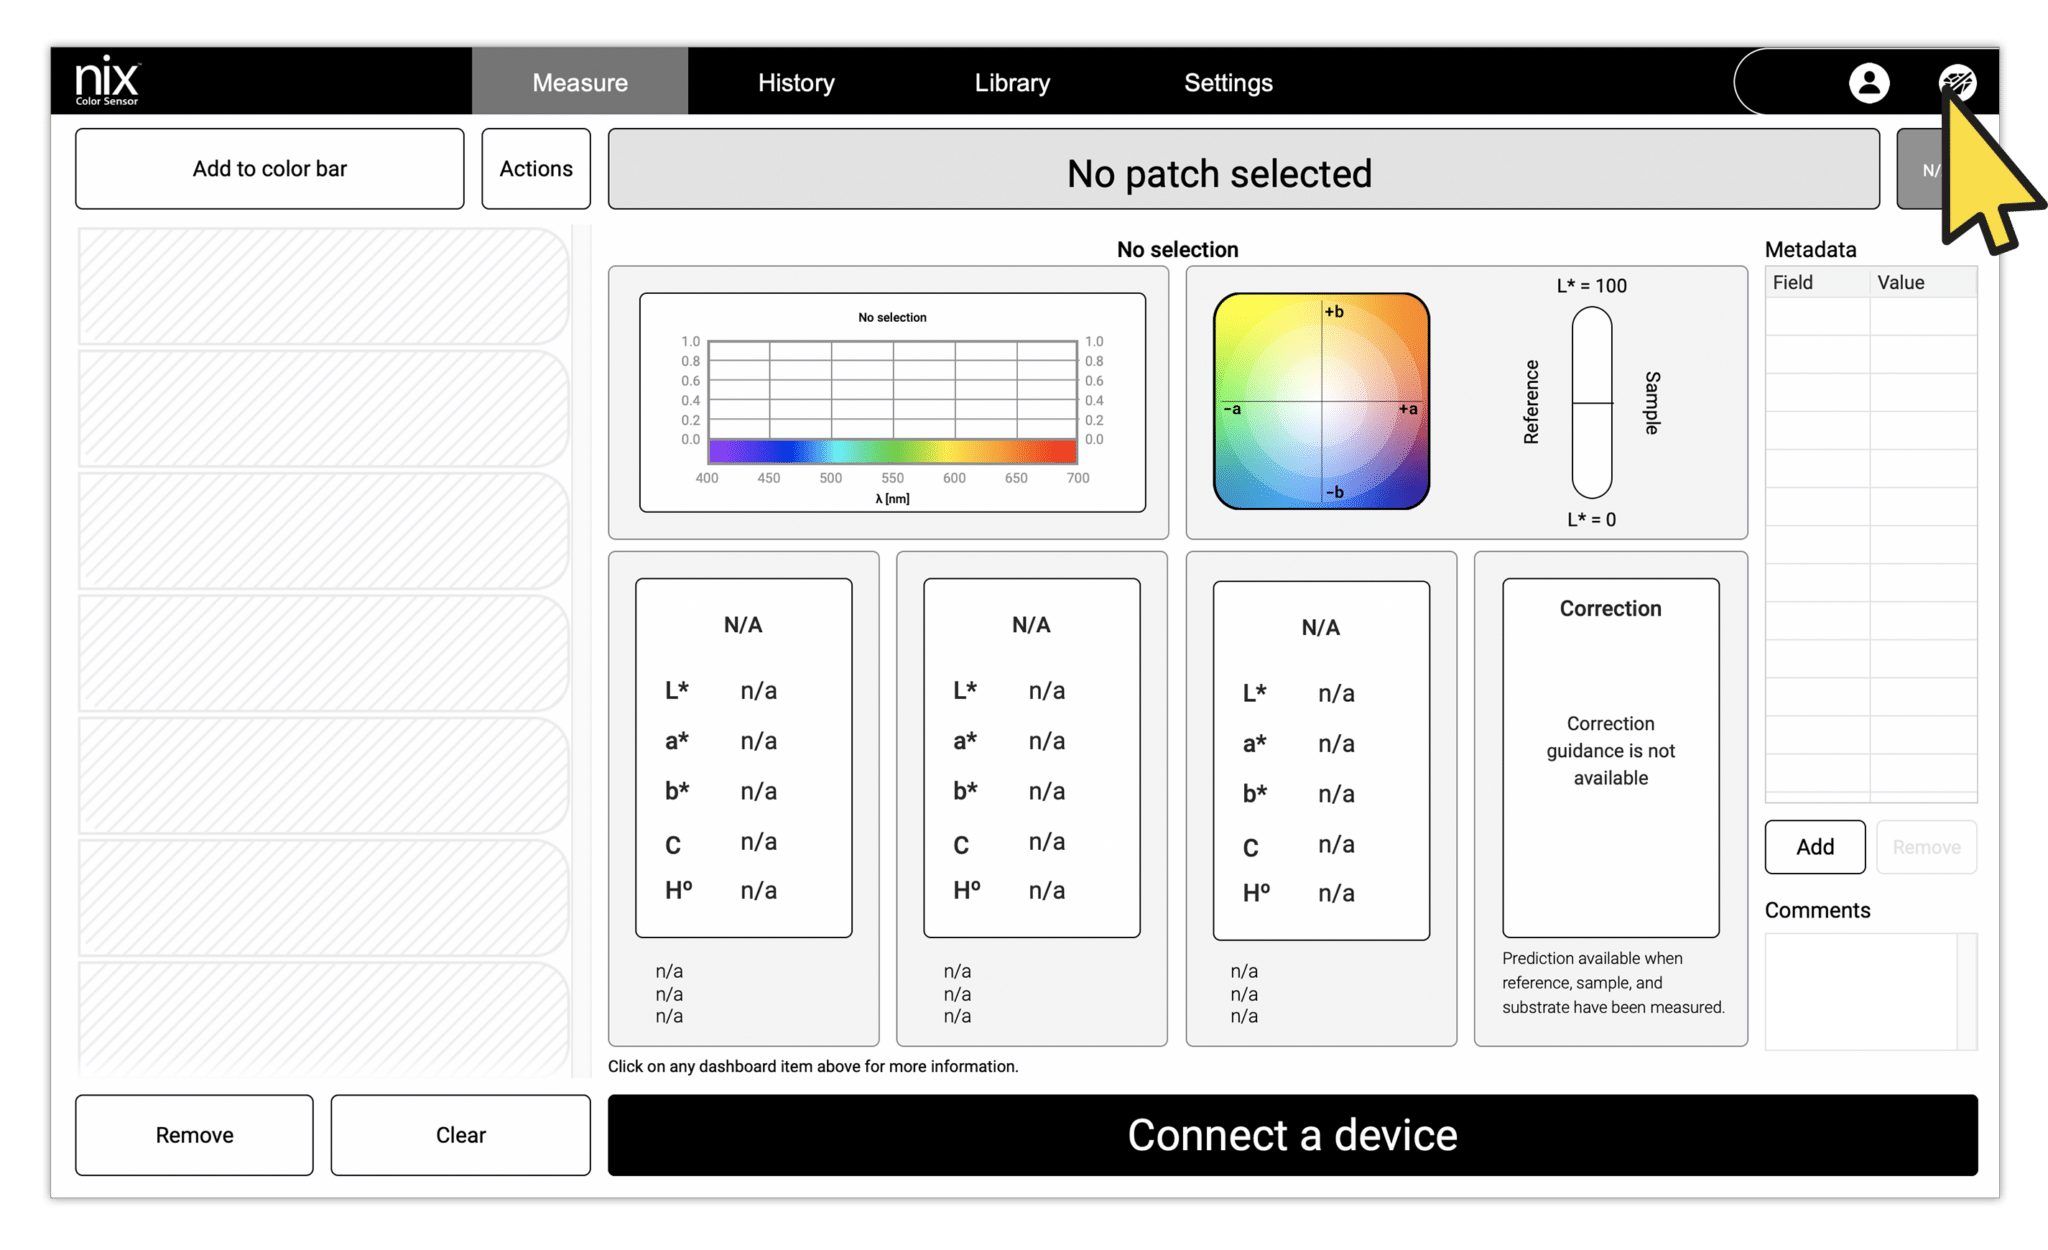
Tutorial 2: Color Measuring
Learn how to connect and calibrate your device, add subrates and colors to your color bar, measure colors with your device, understand pass/fail results, and more.
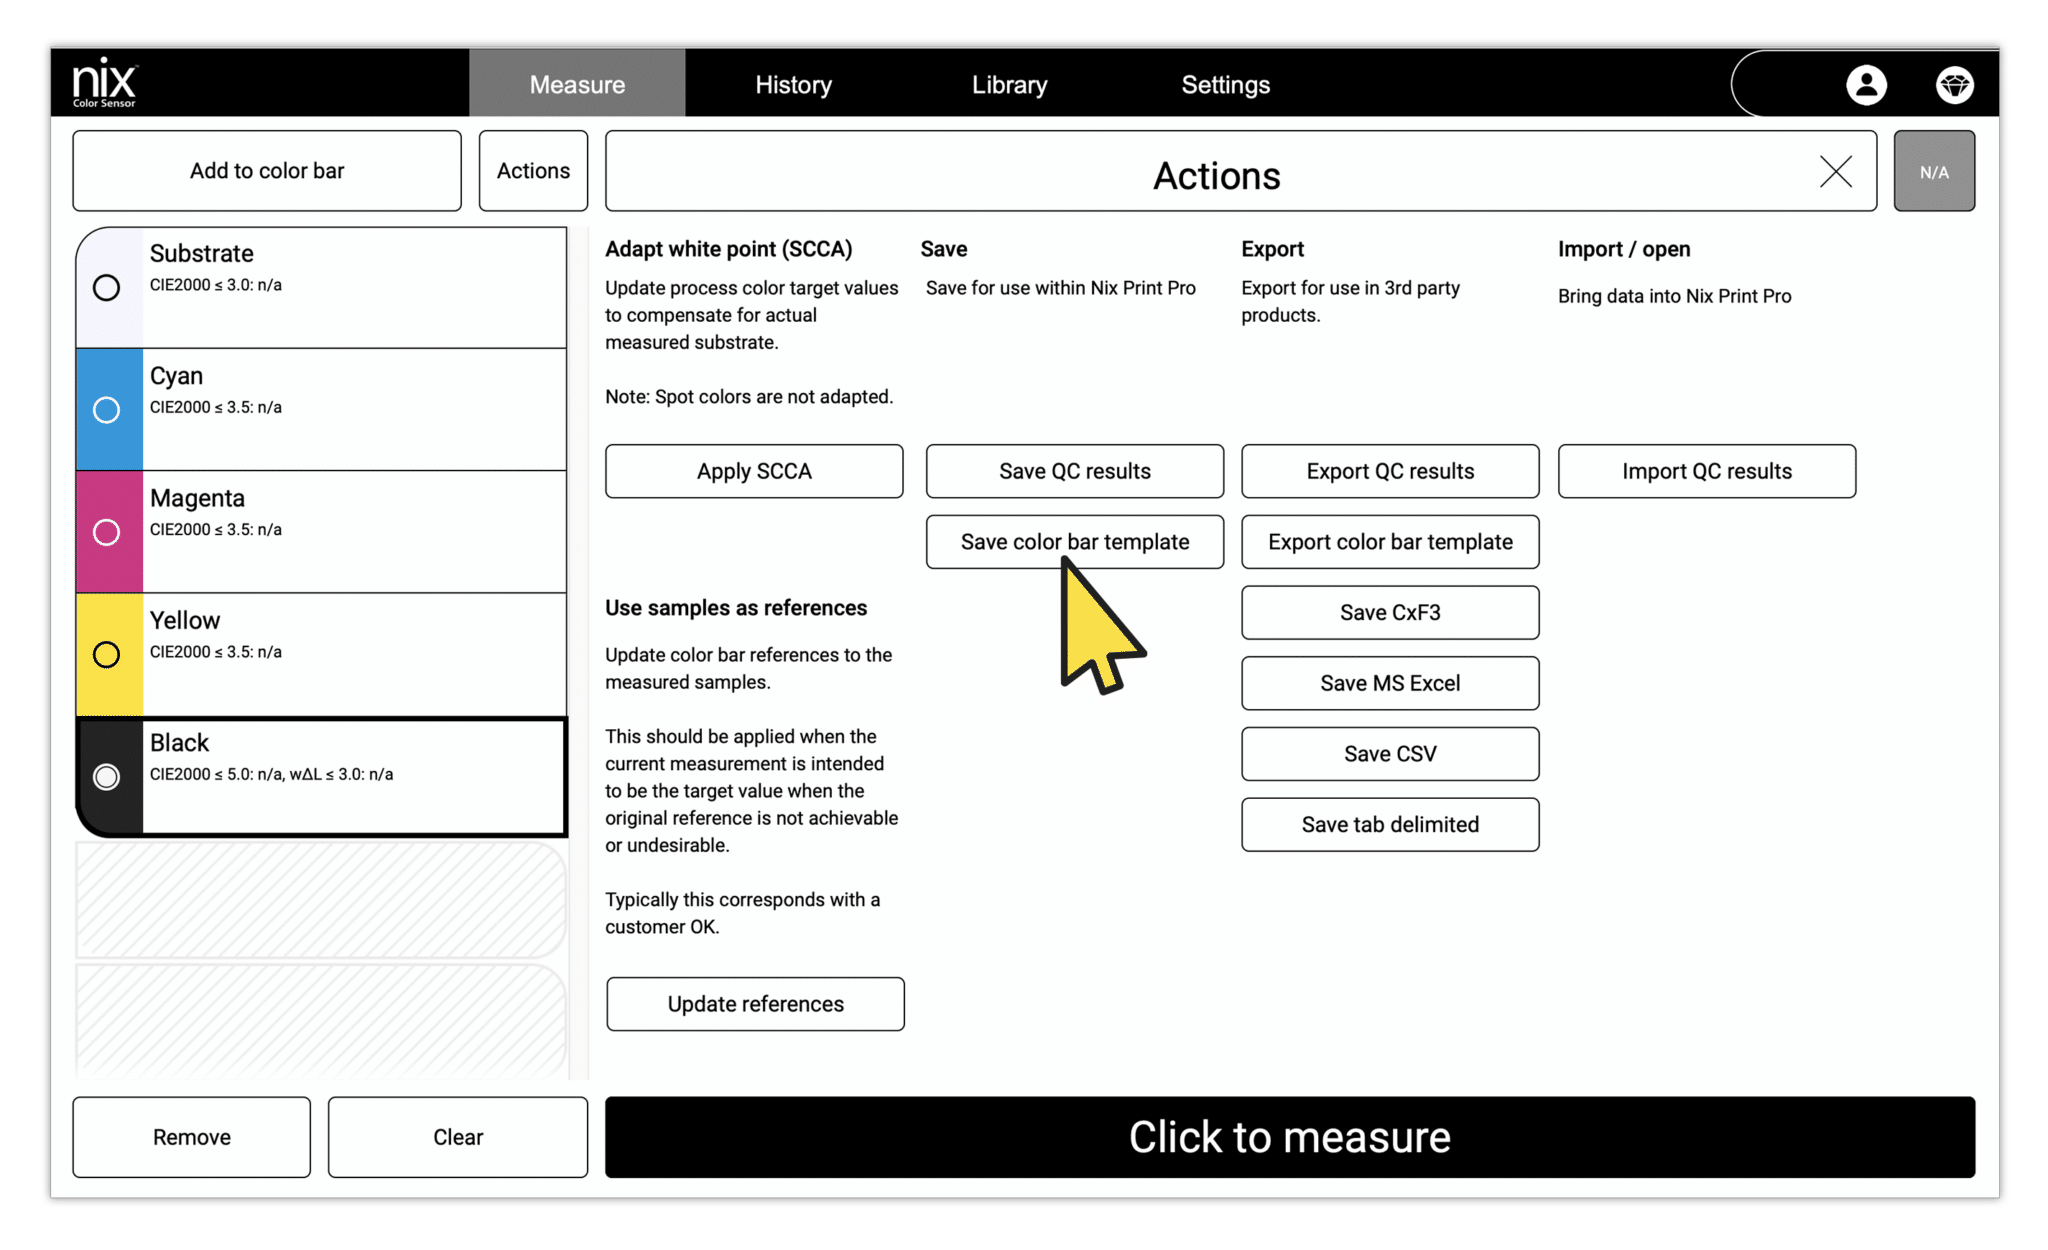
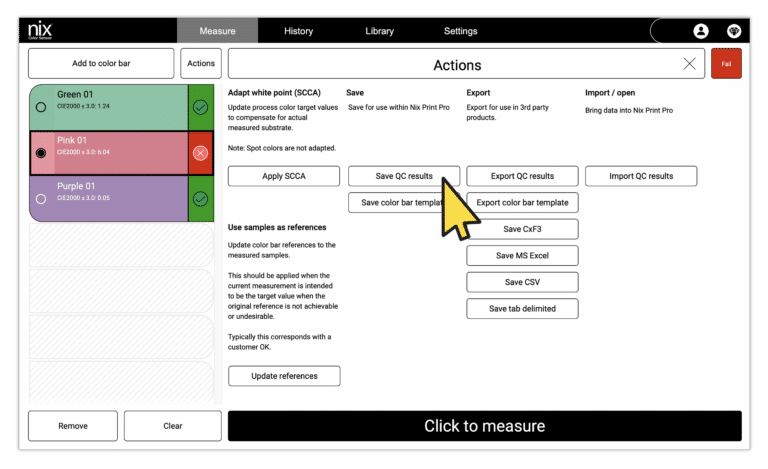
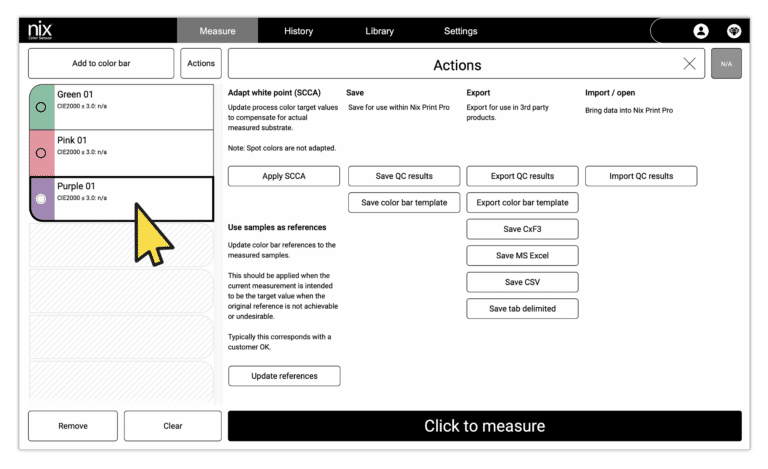
Tutorial 3: Actions
Learn how to perform “Actions” in your Nix Print Pro software. Includes updating references, saving results and templates, exporting data, and more.
Tutorial 4: History
Learn how to navigate your past jobs in Nix Print Pro’s “History” feature.
Tutorial 5: Spot Color Libraries
Learn how to create custom color libraries and add them to the color bar in the Nix Print Pro software.
Tutorial 6: Settings
Learn how to navigate and control the settings of your Nix Print Pro software.
Getting started
Activating and managing your Nix Print Pro subscription
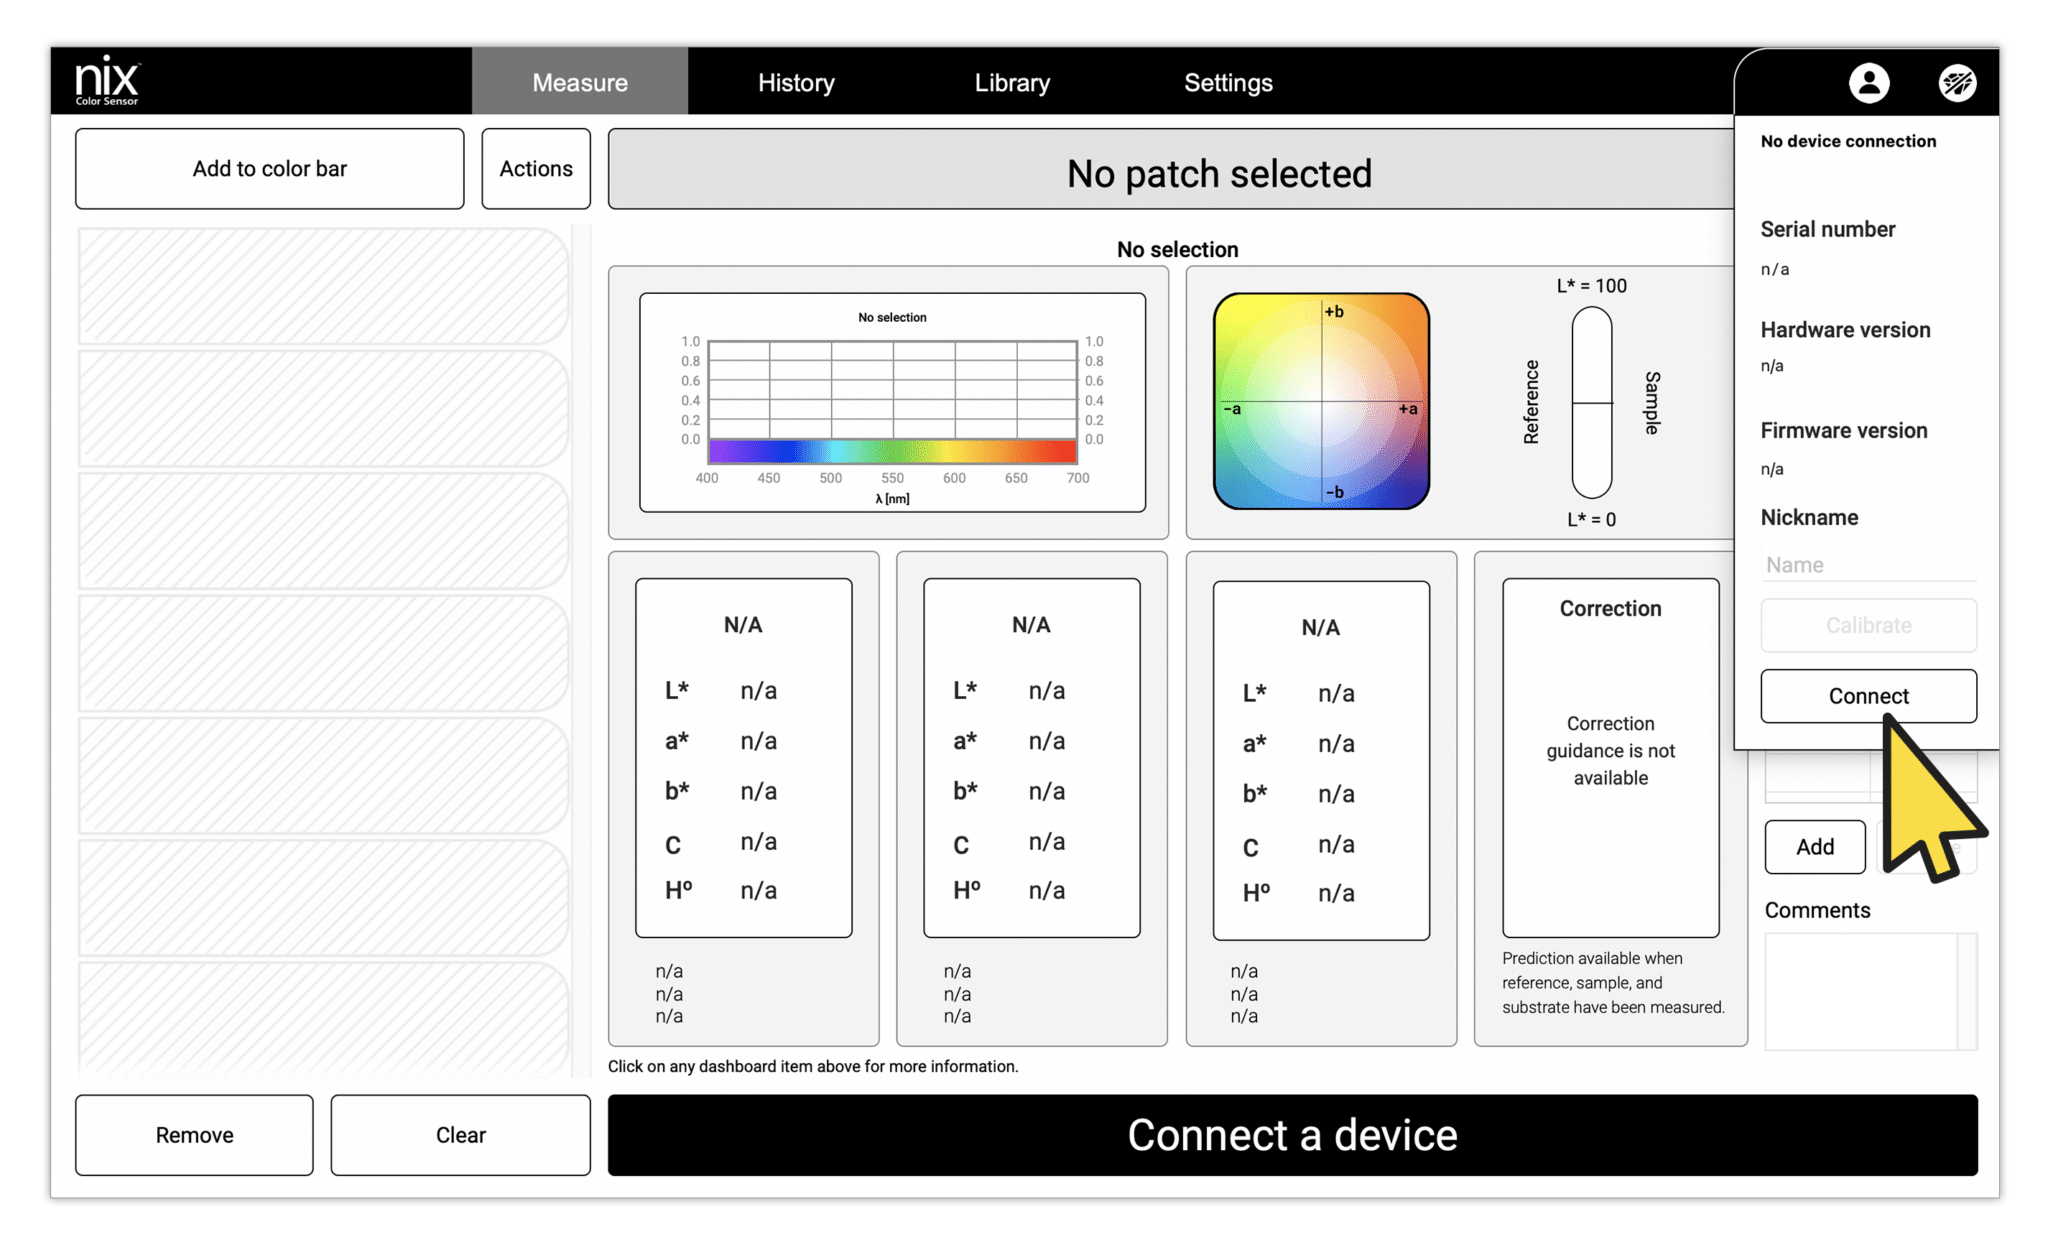
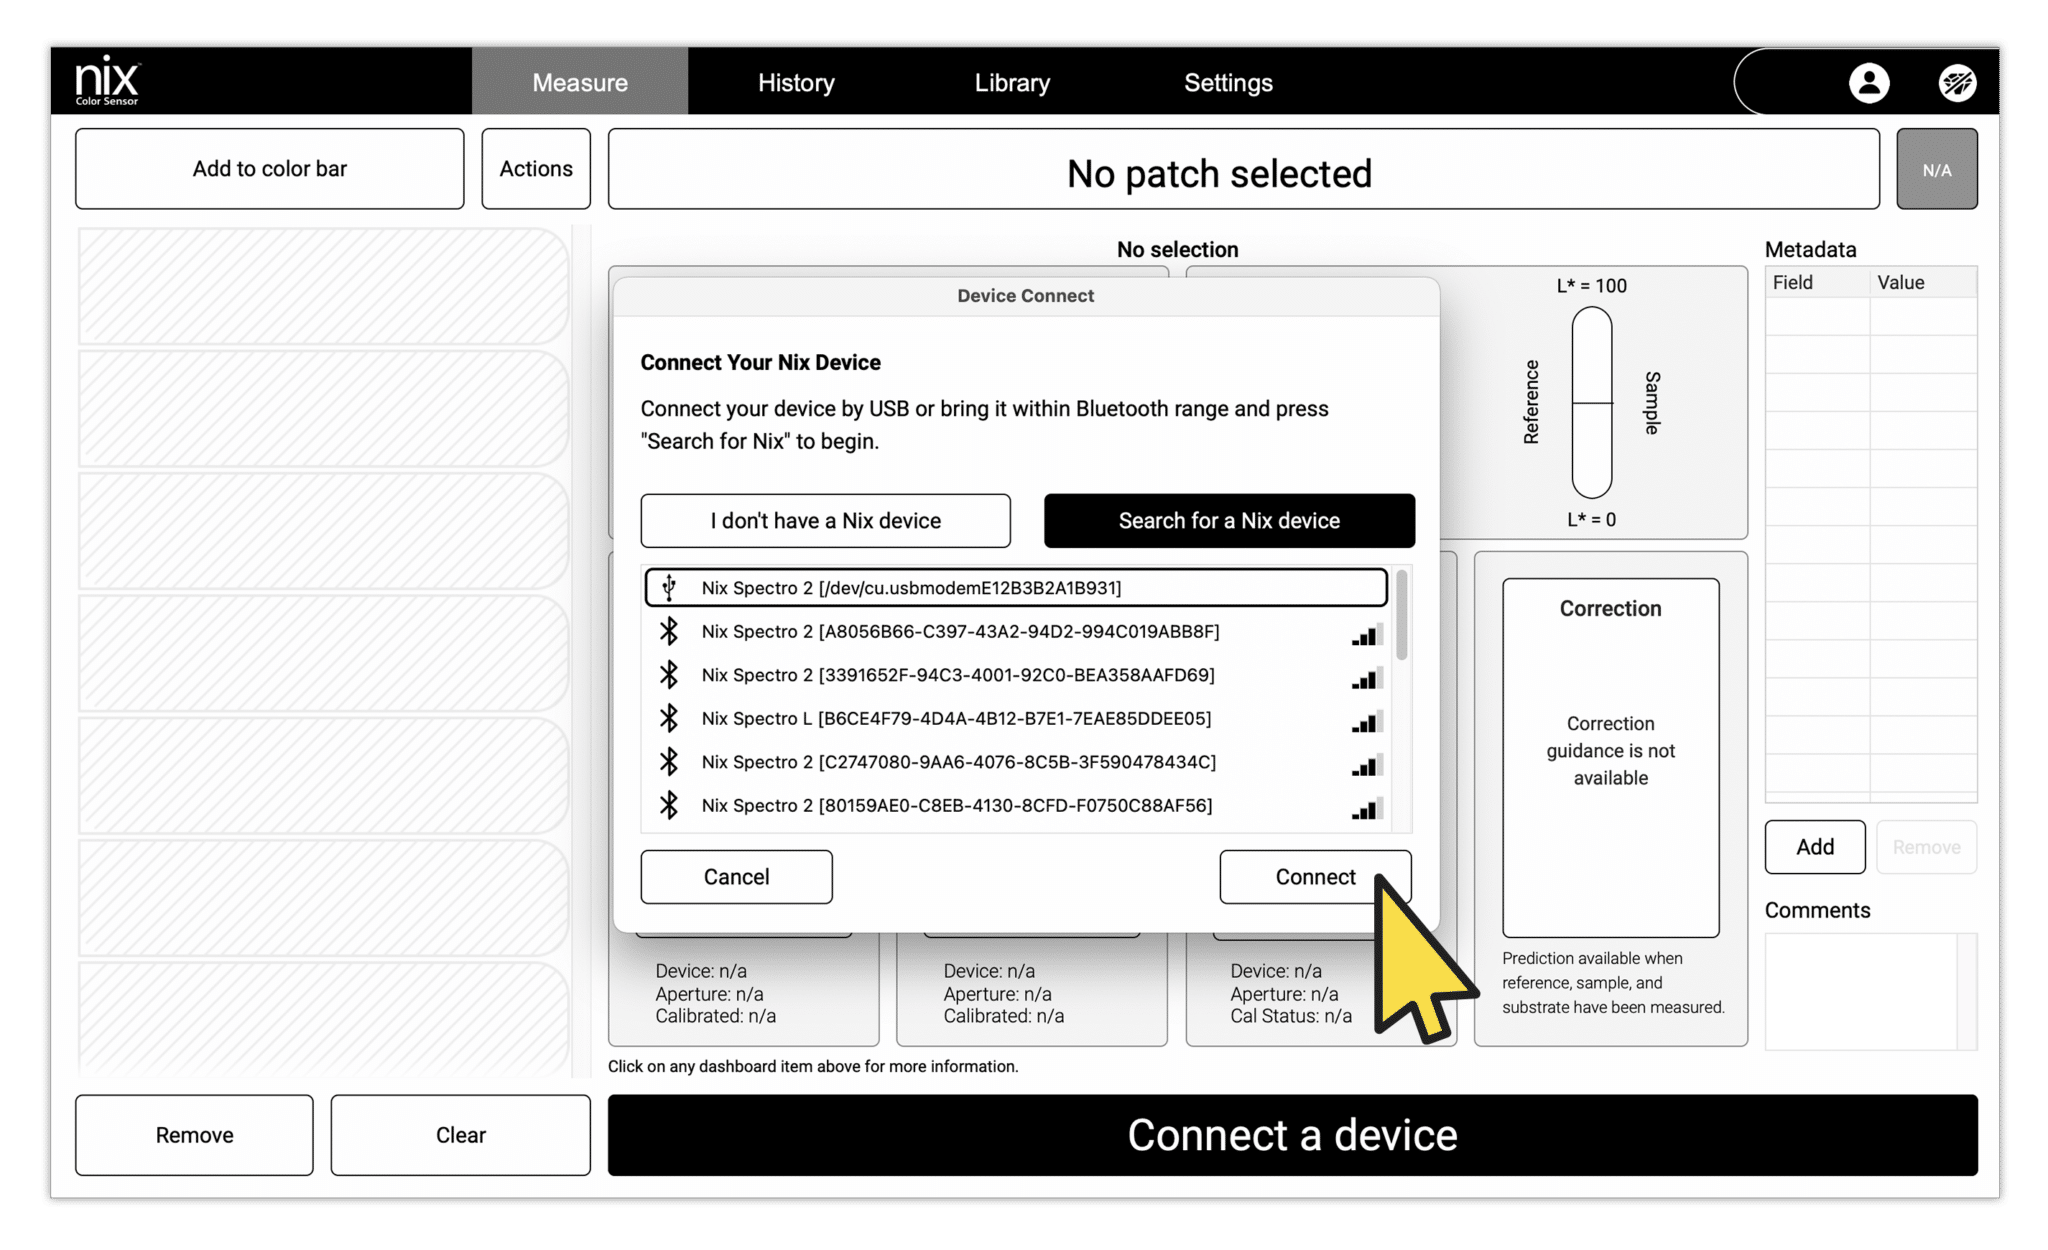
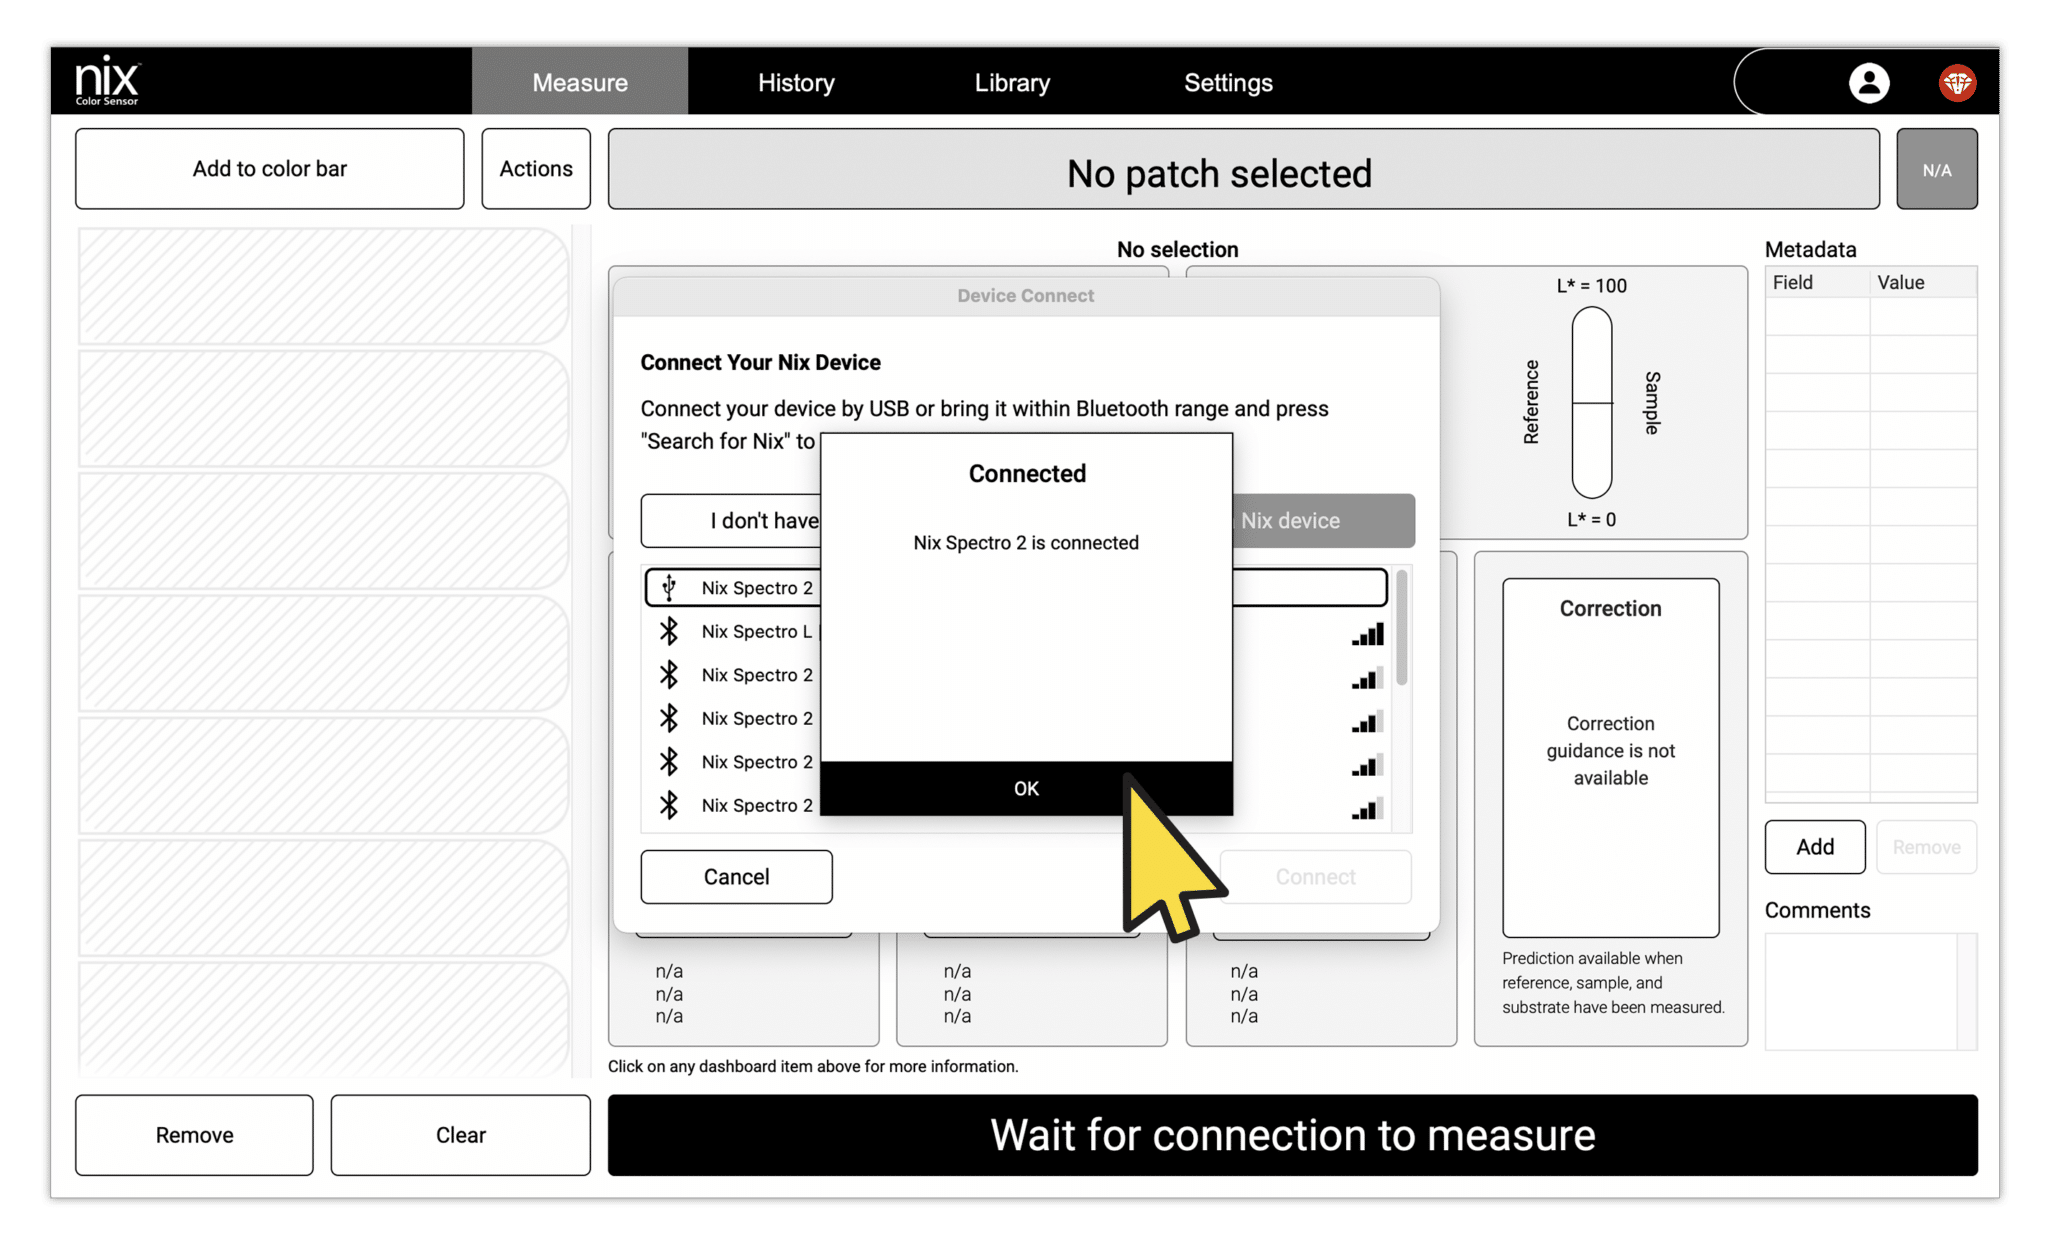
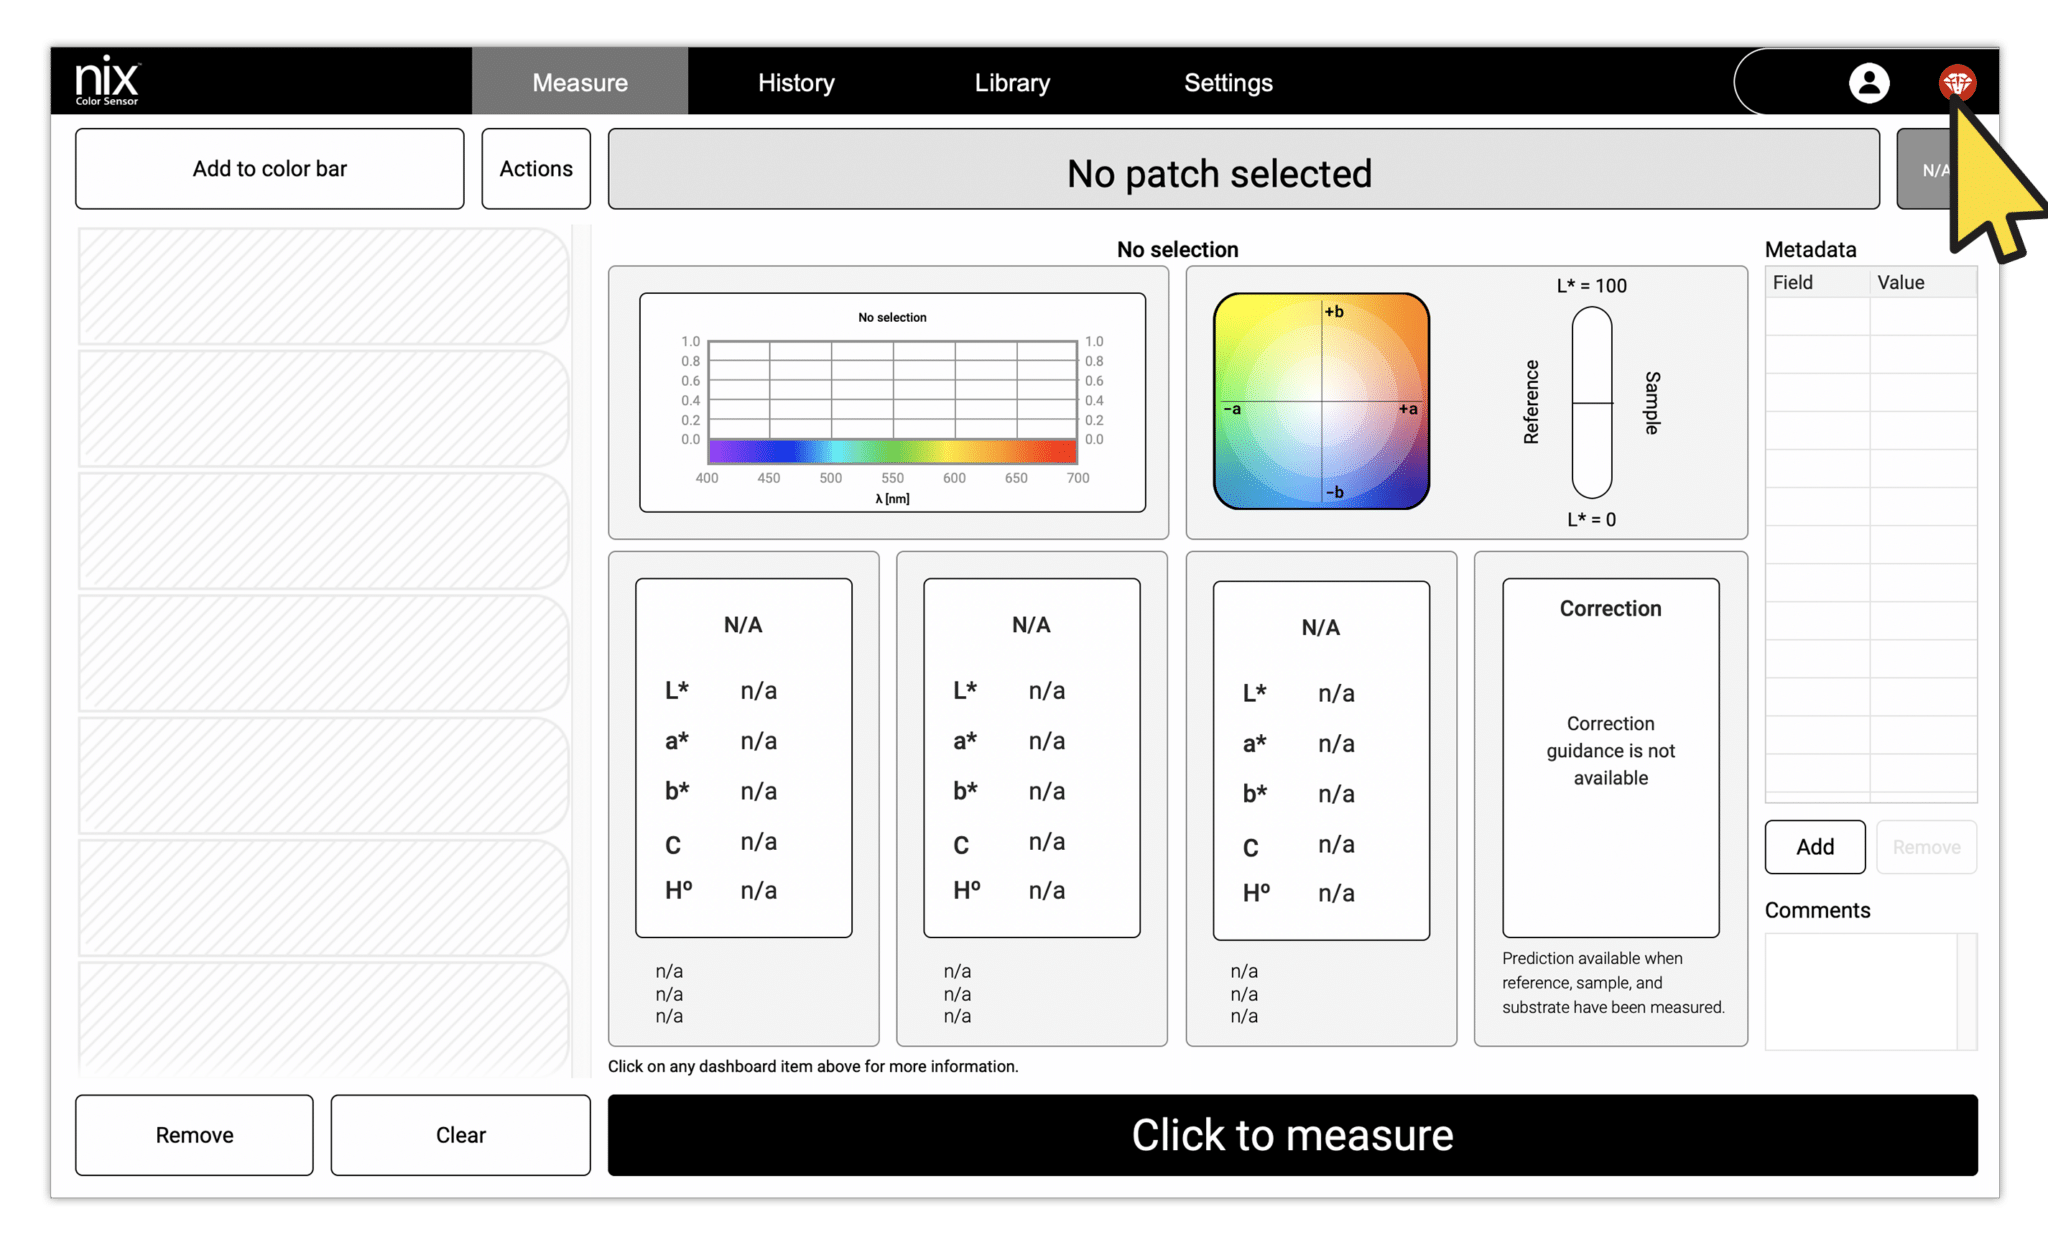
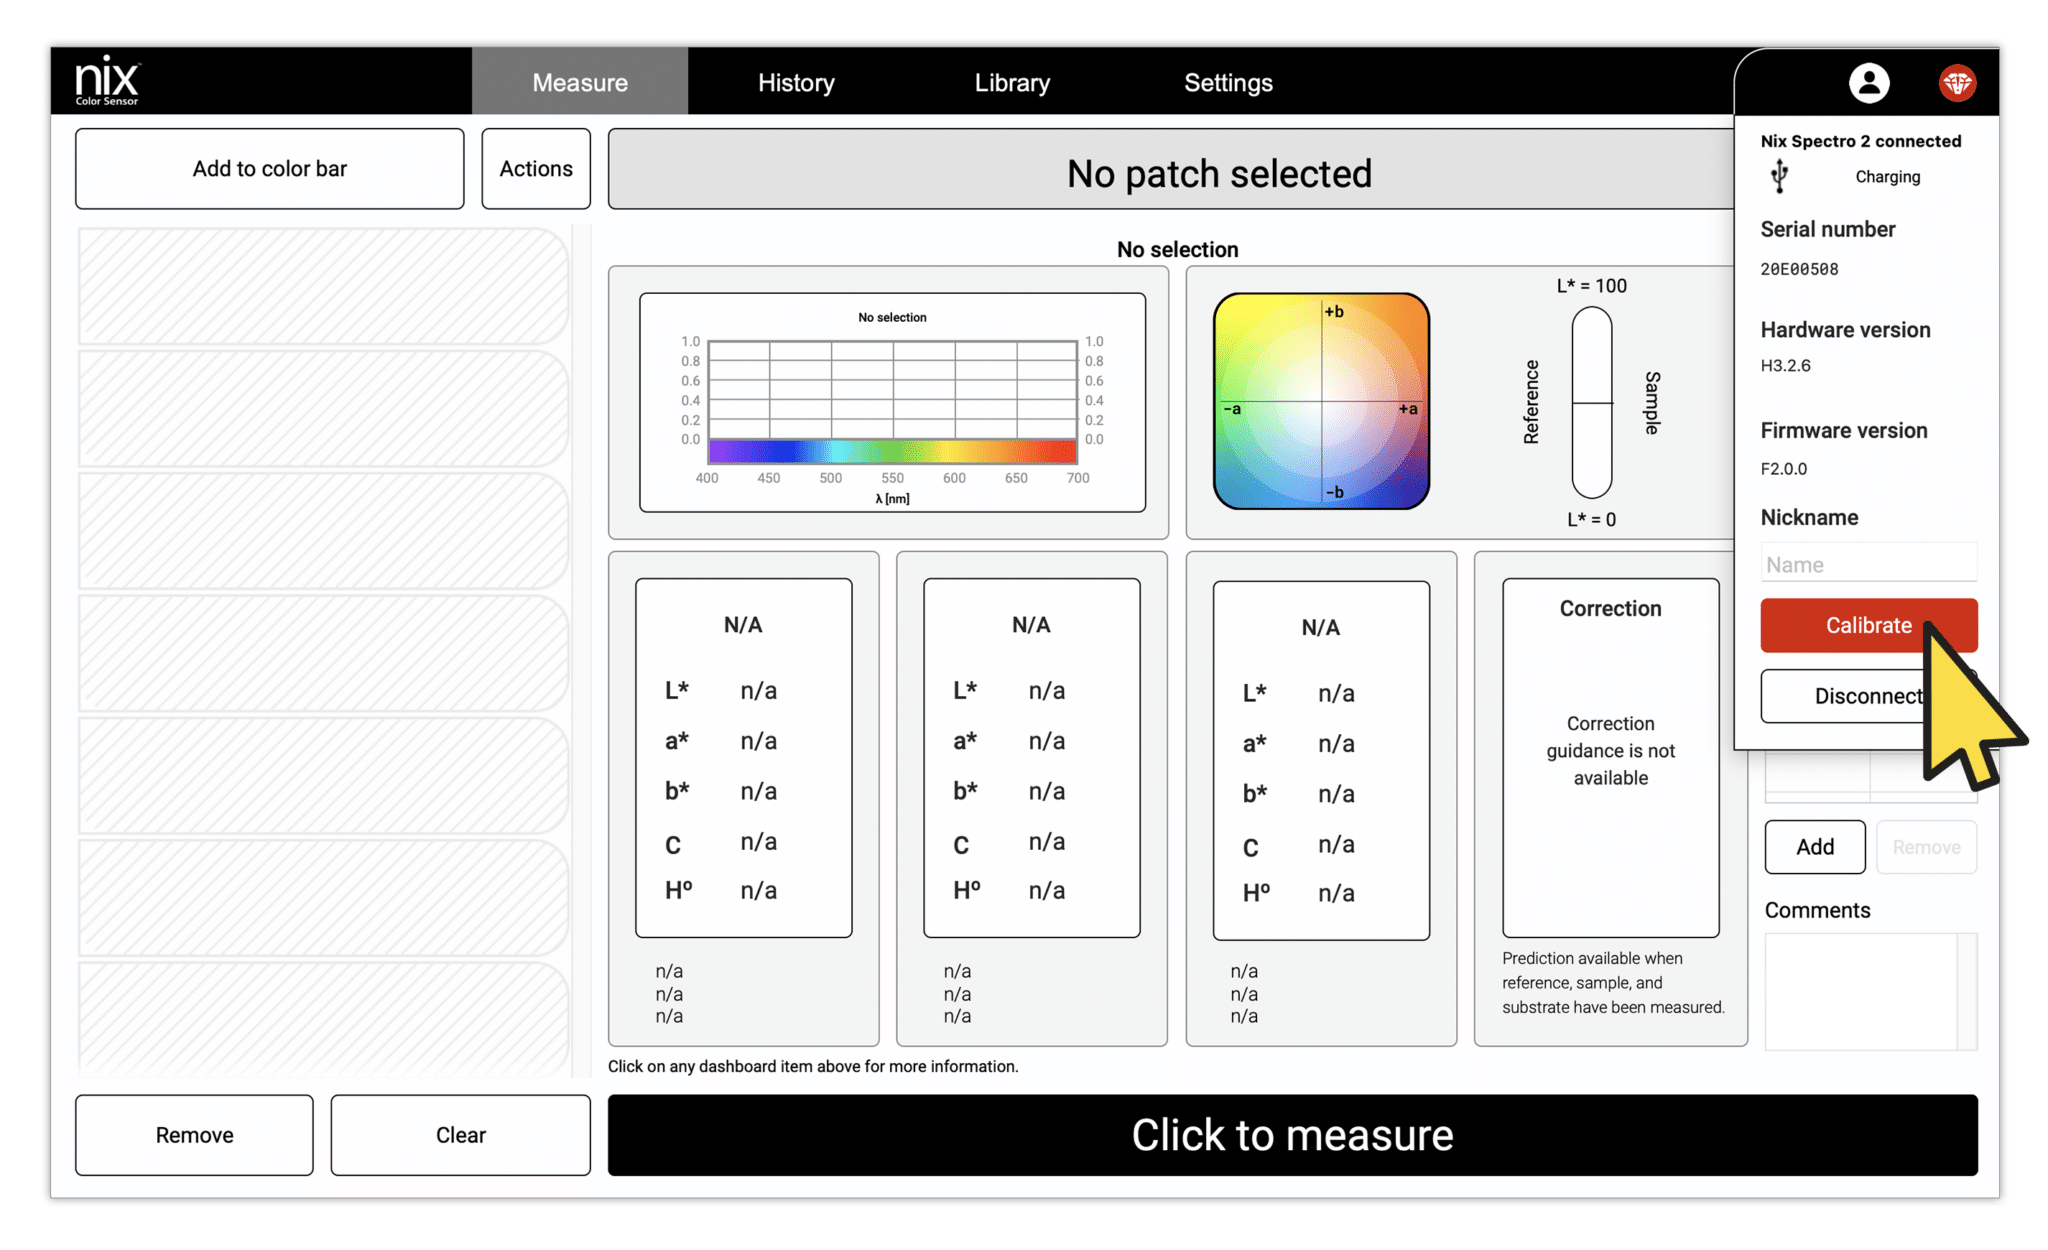
Connect to a device

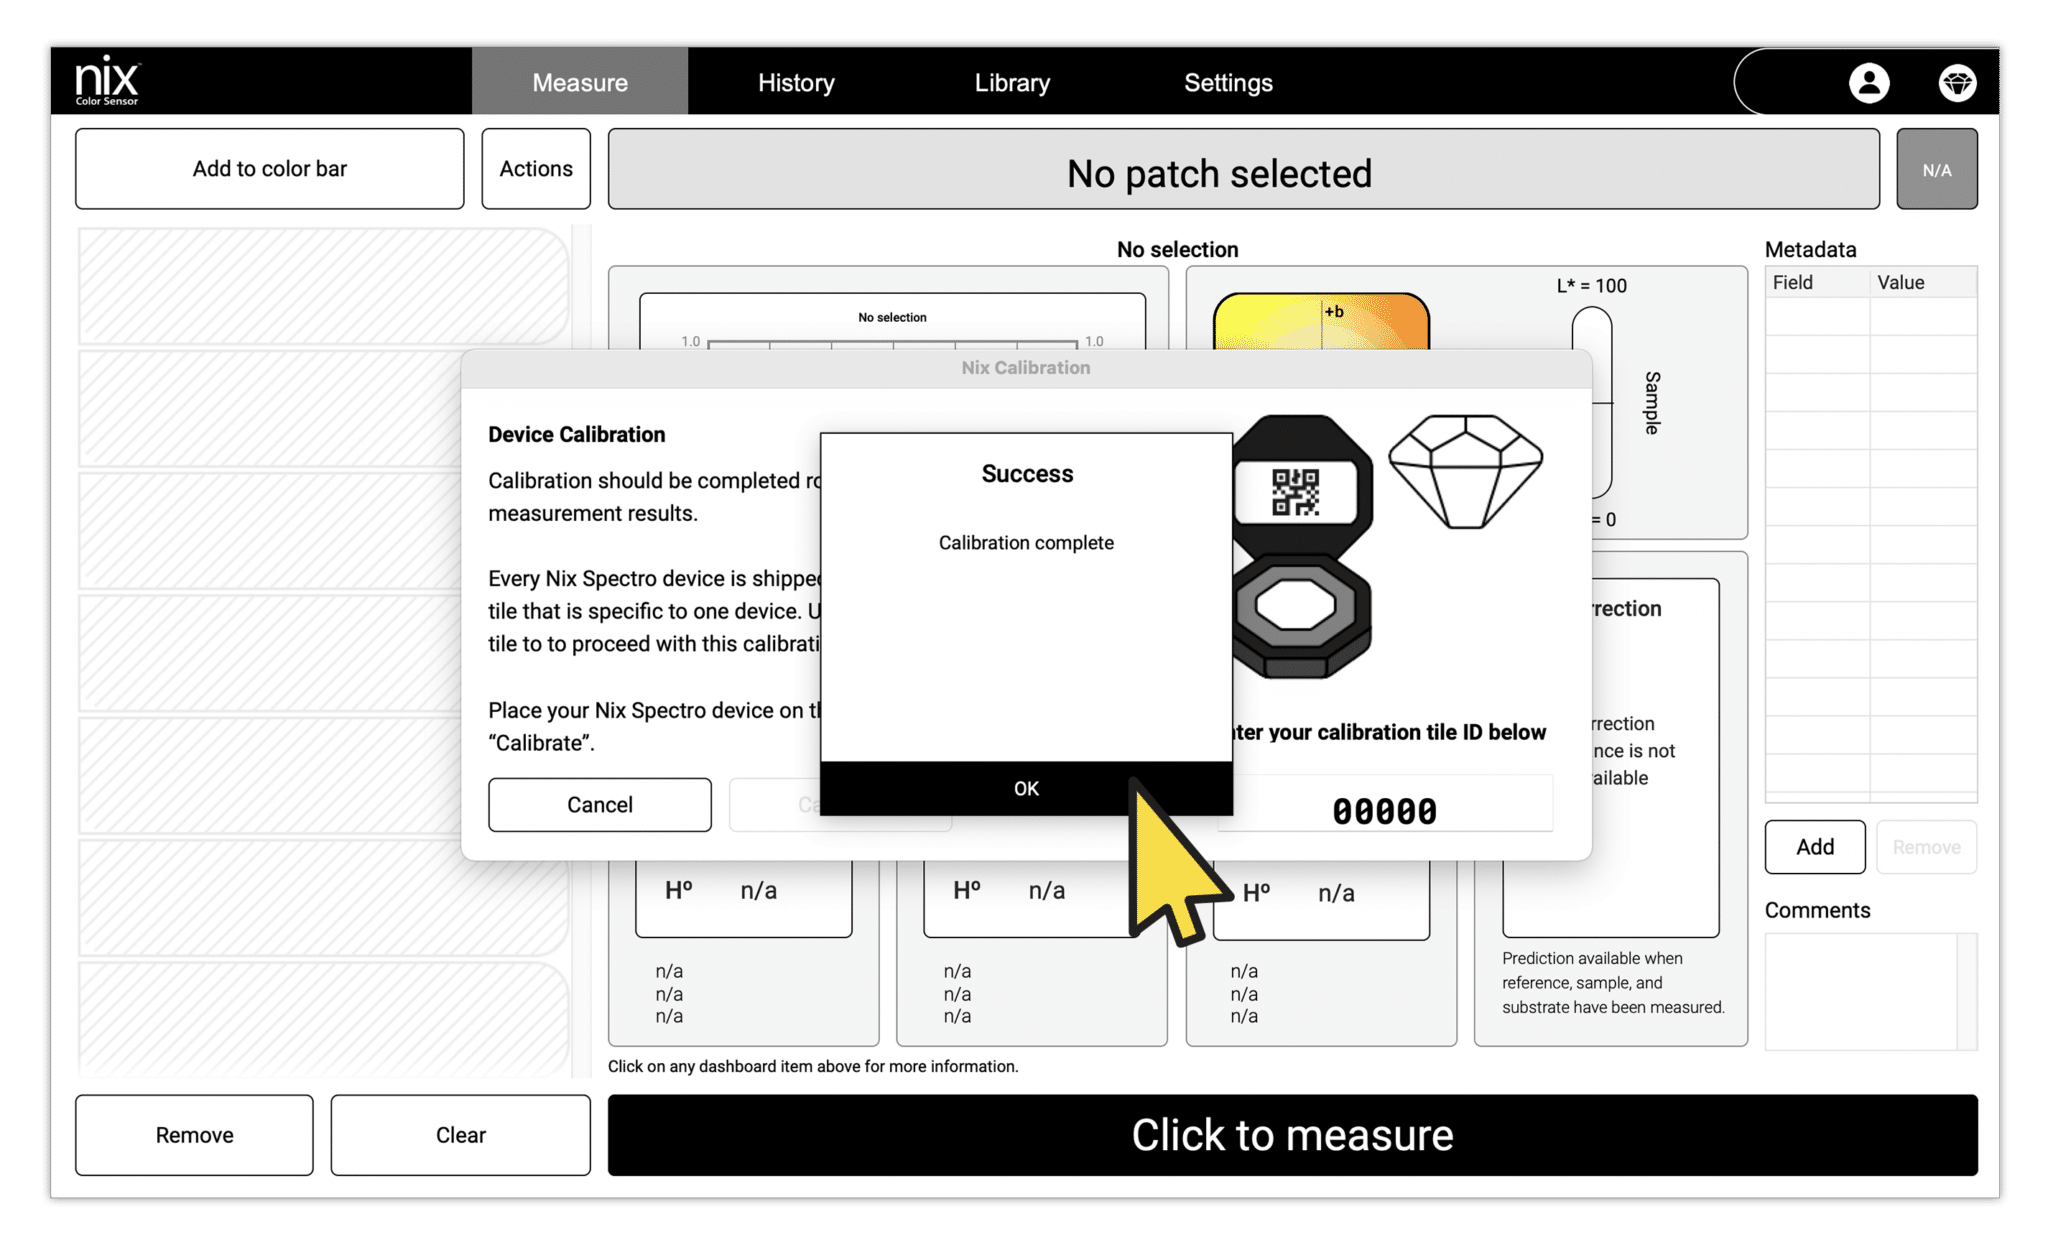
Calibrating your device

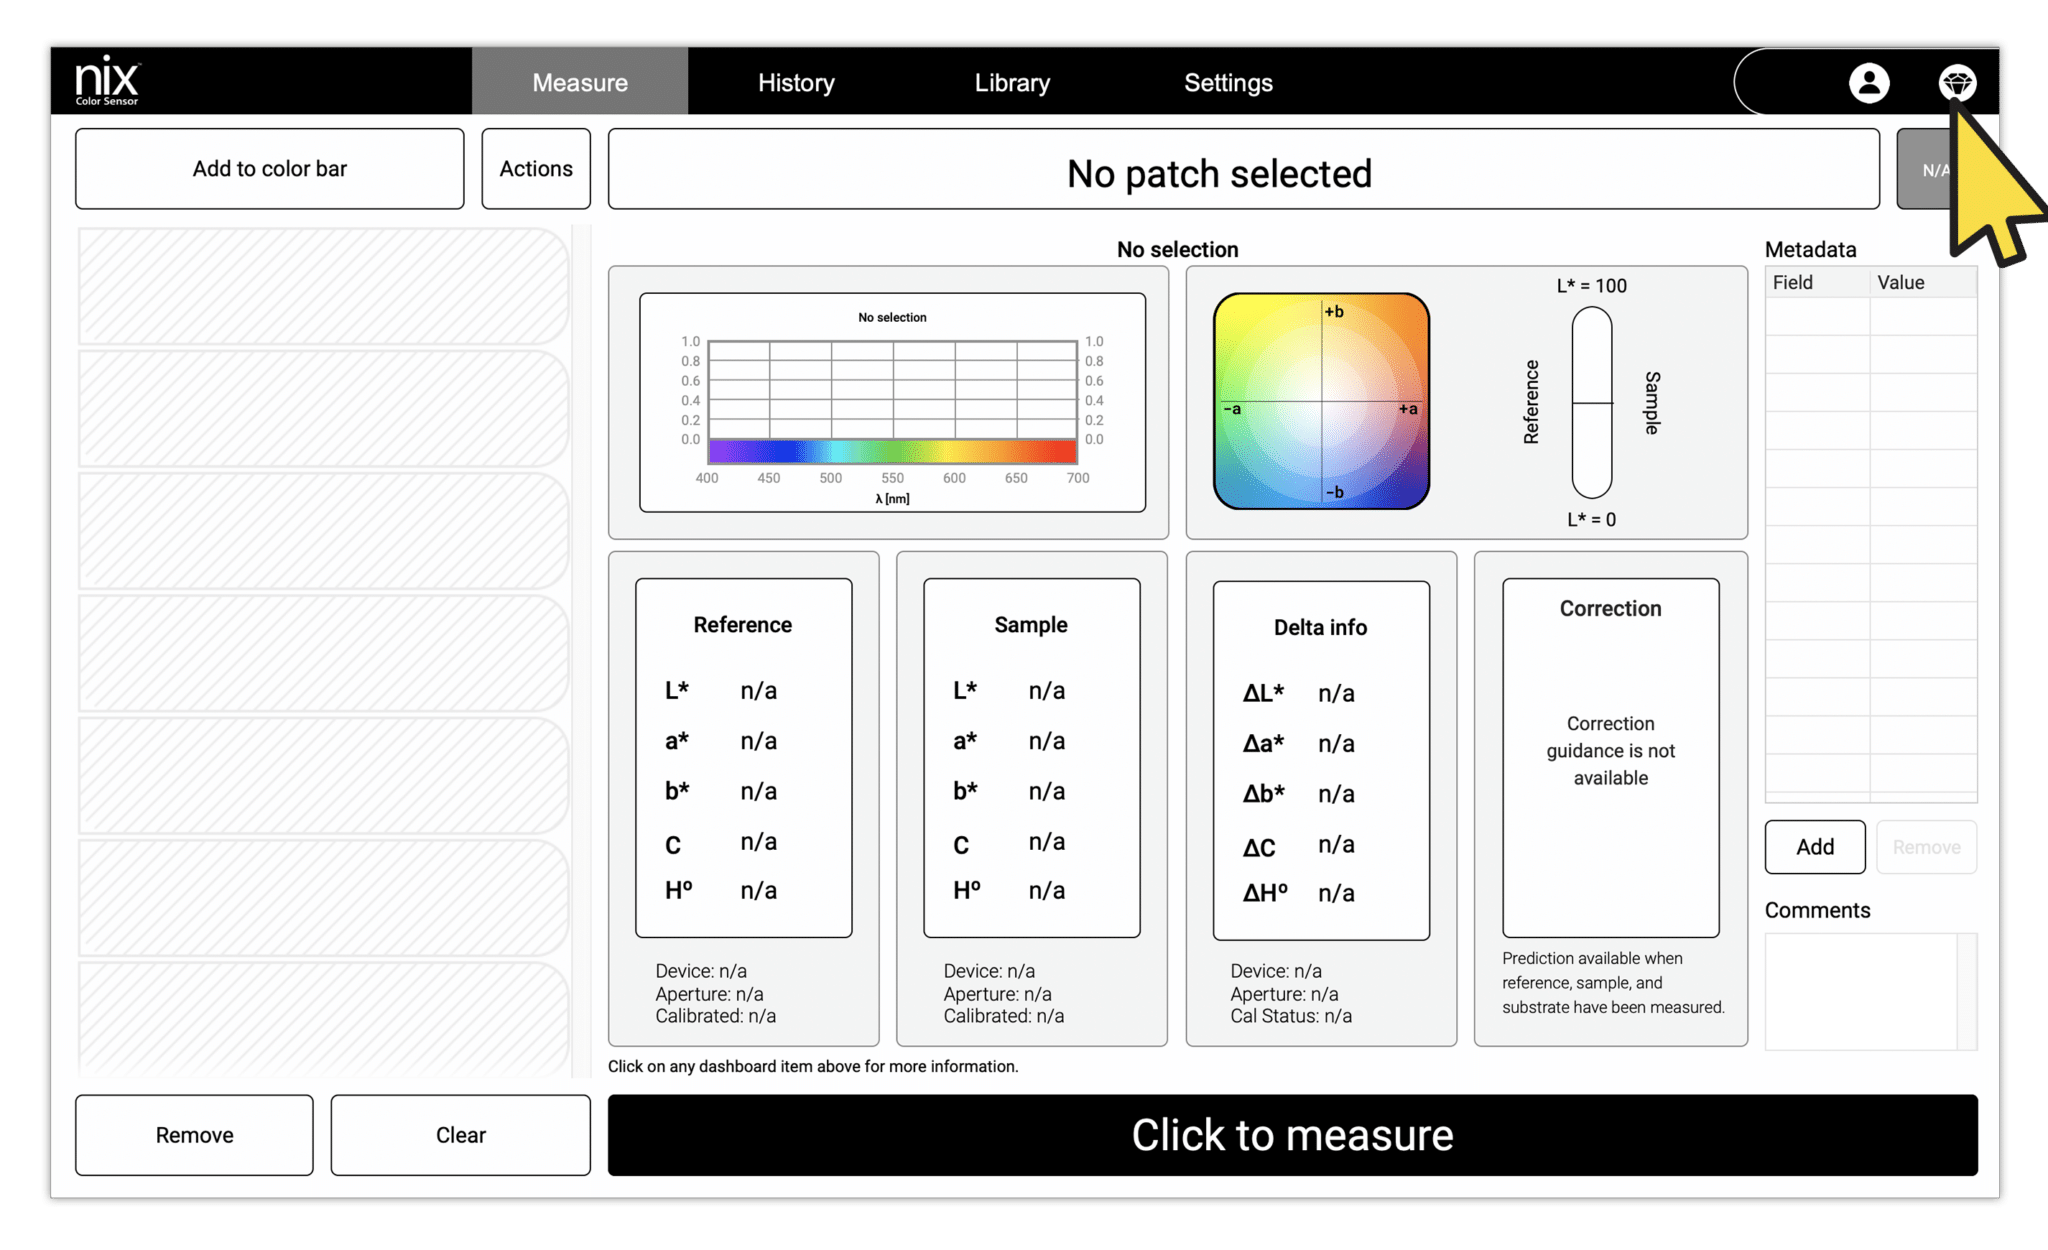
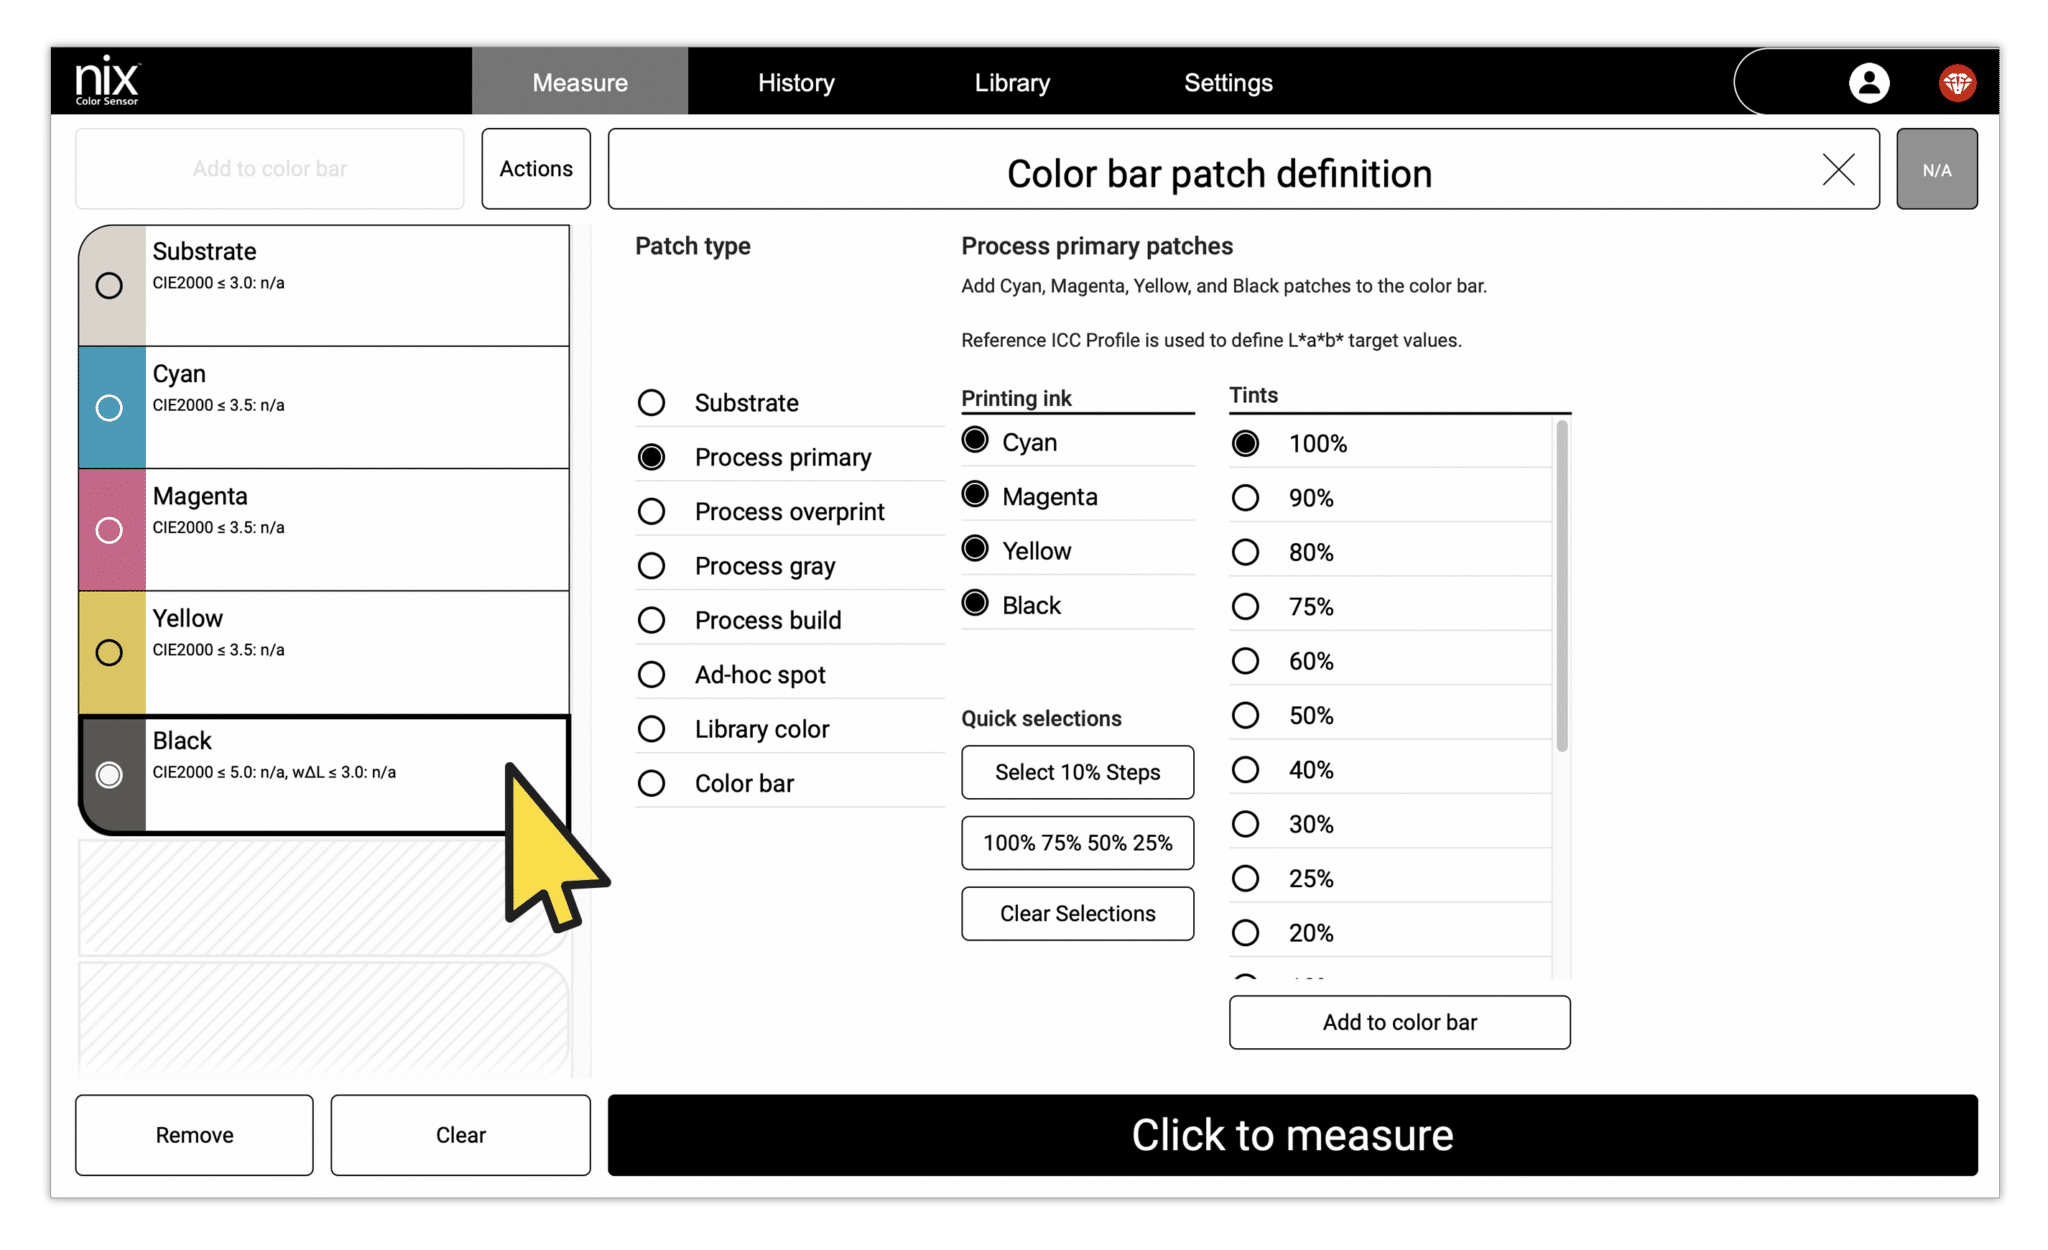
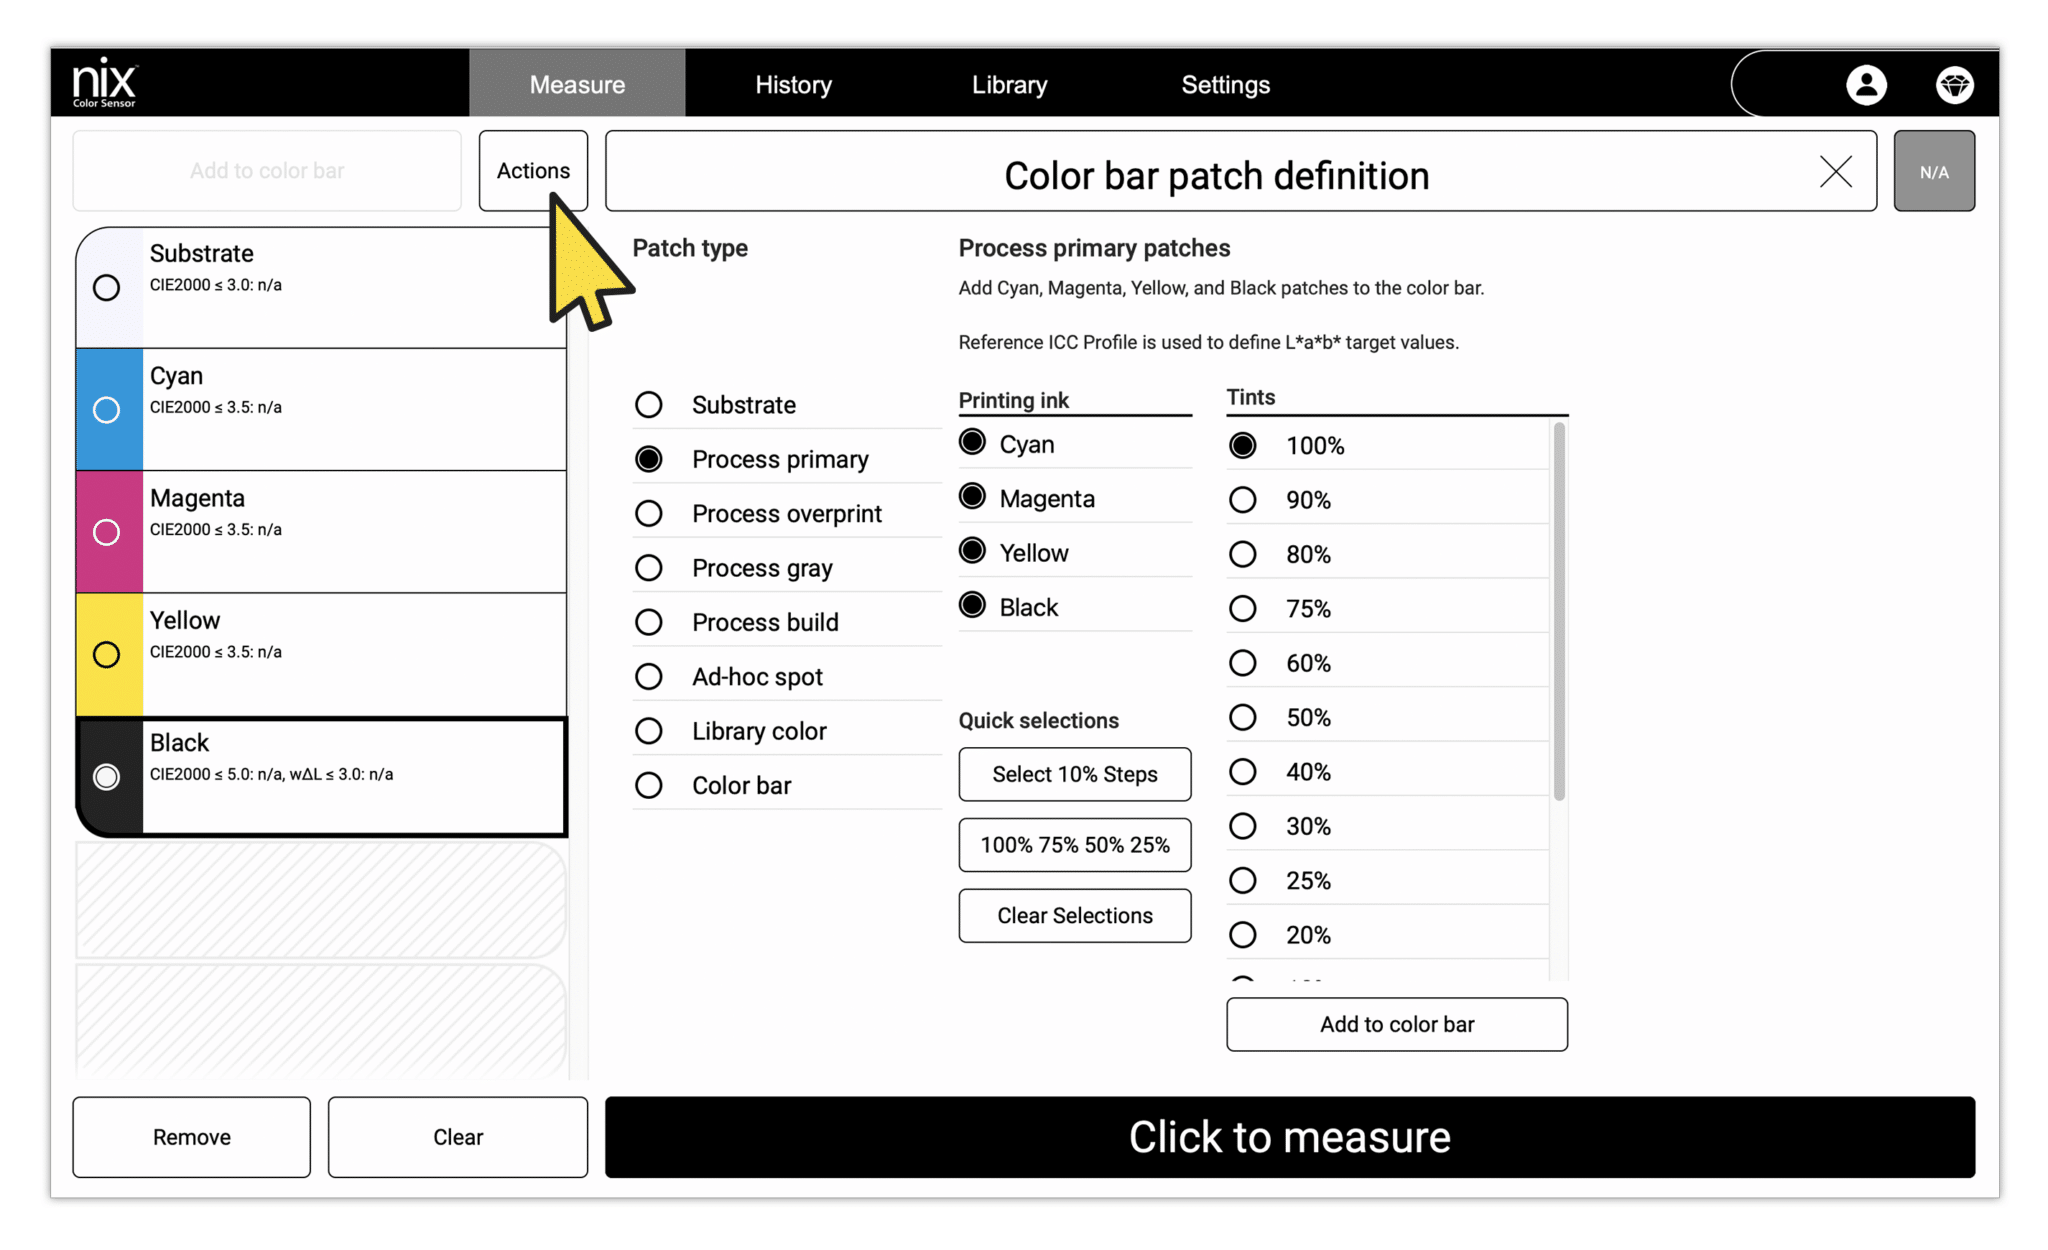
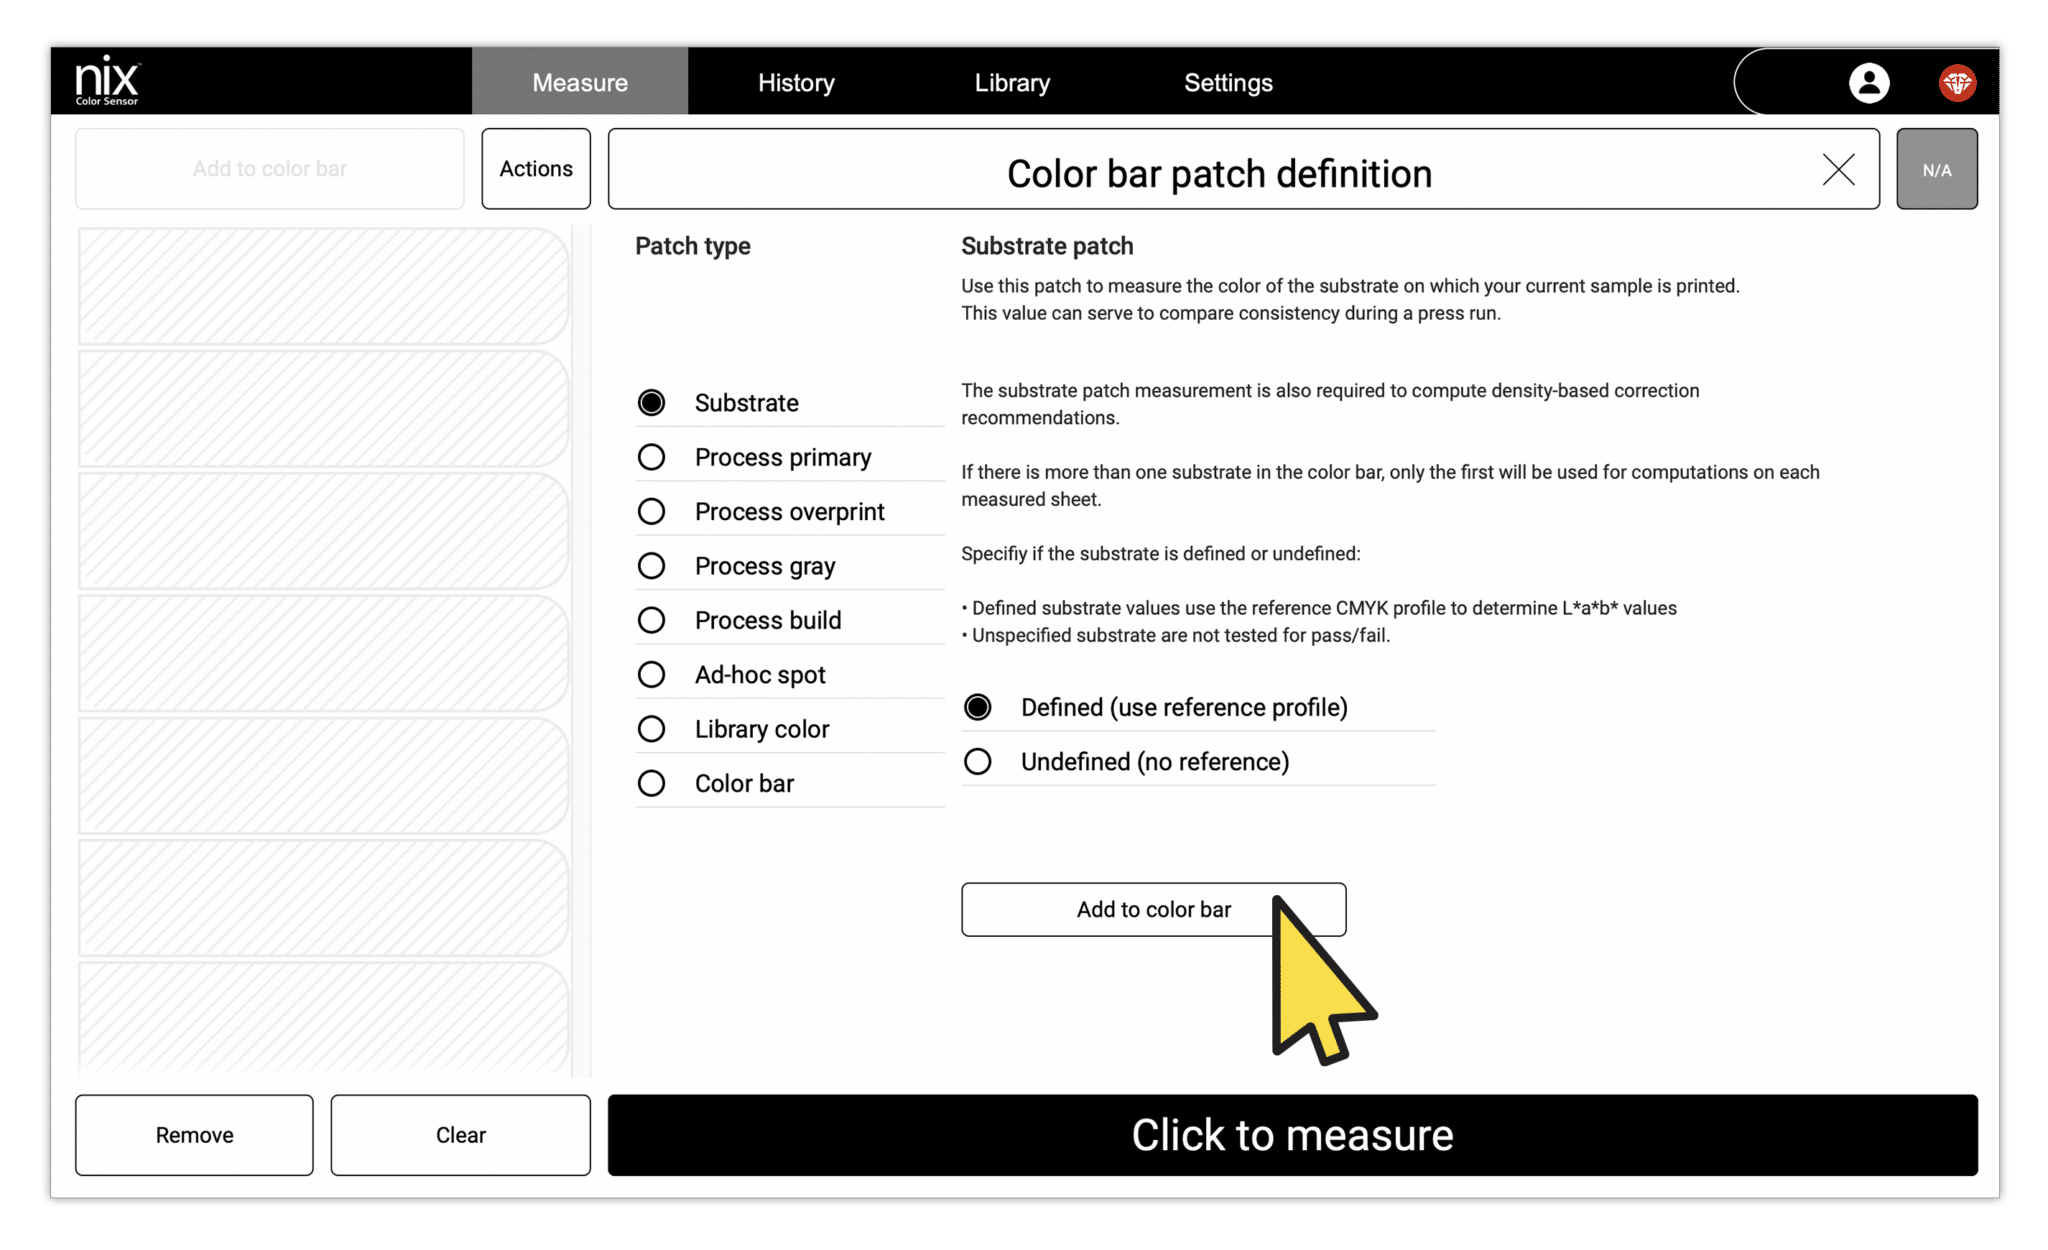
Performing color measurements
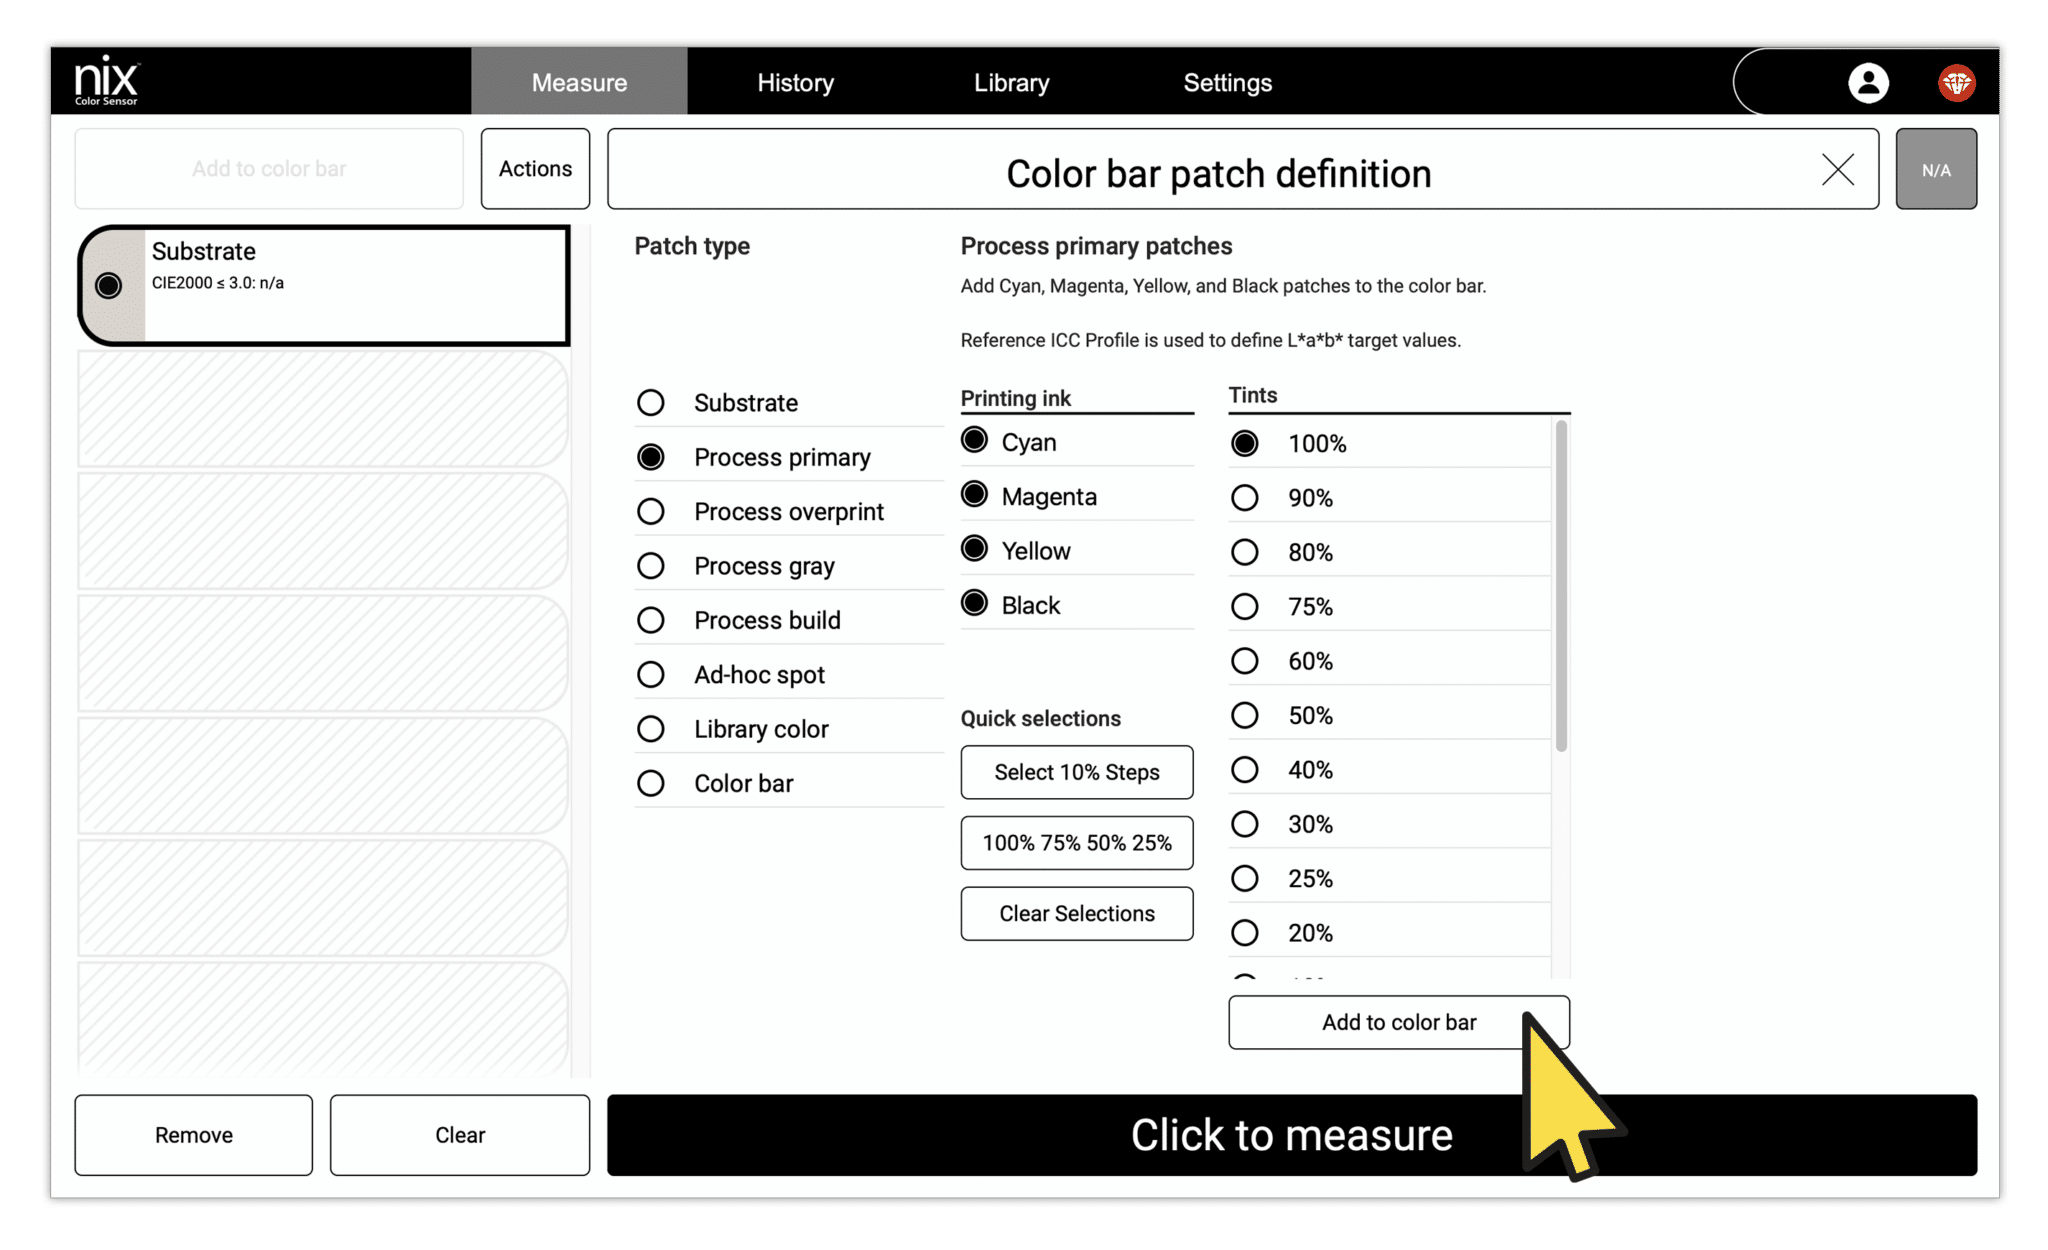
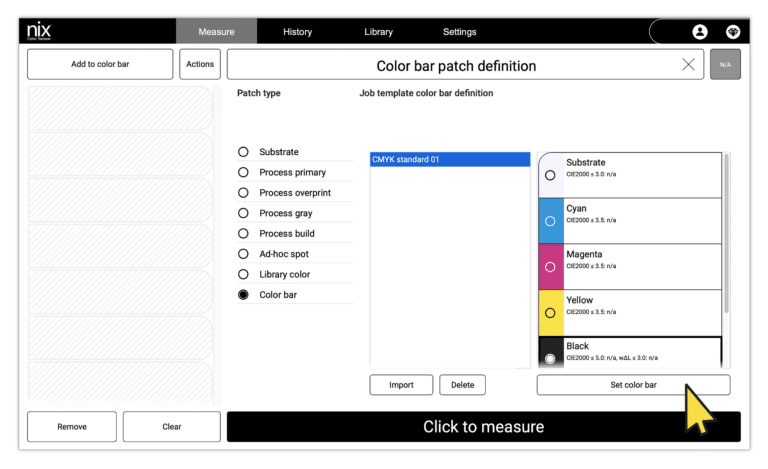
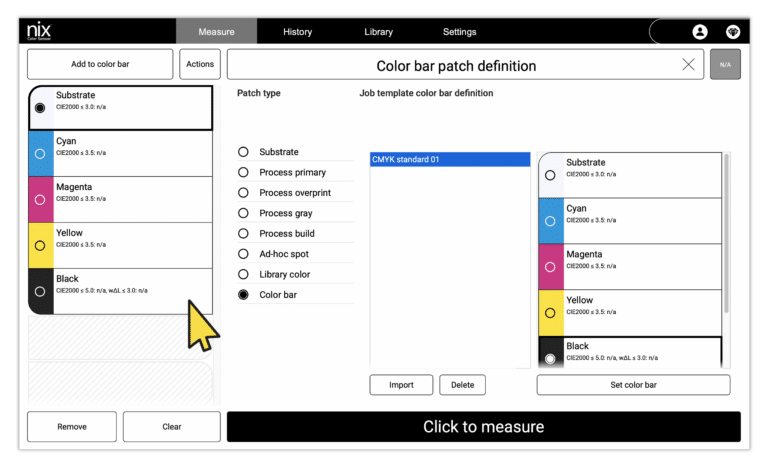
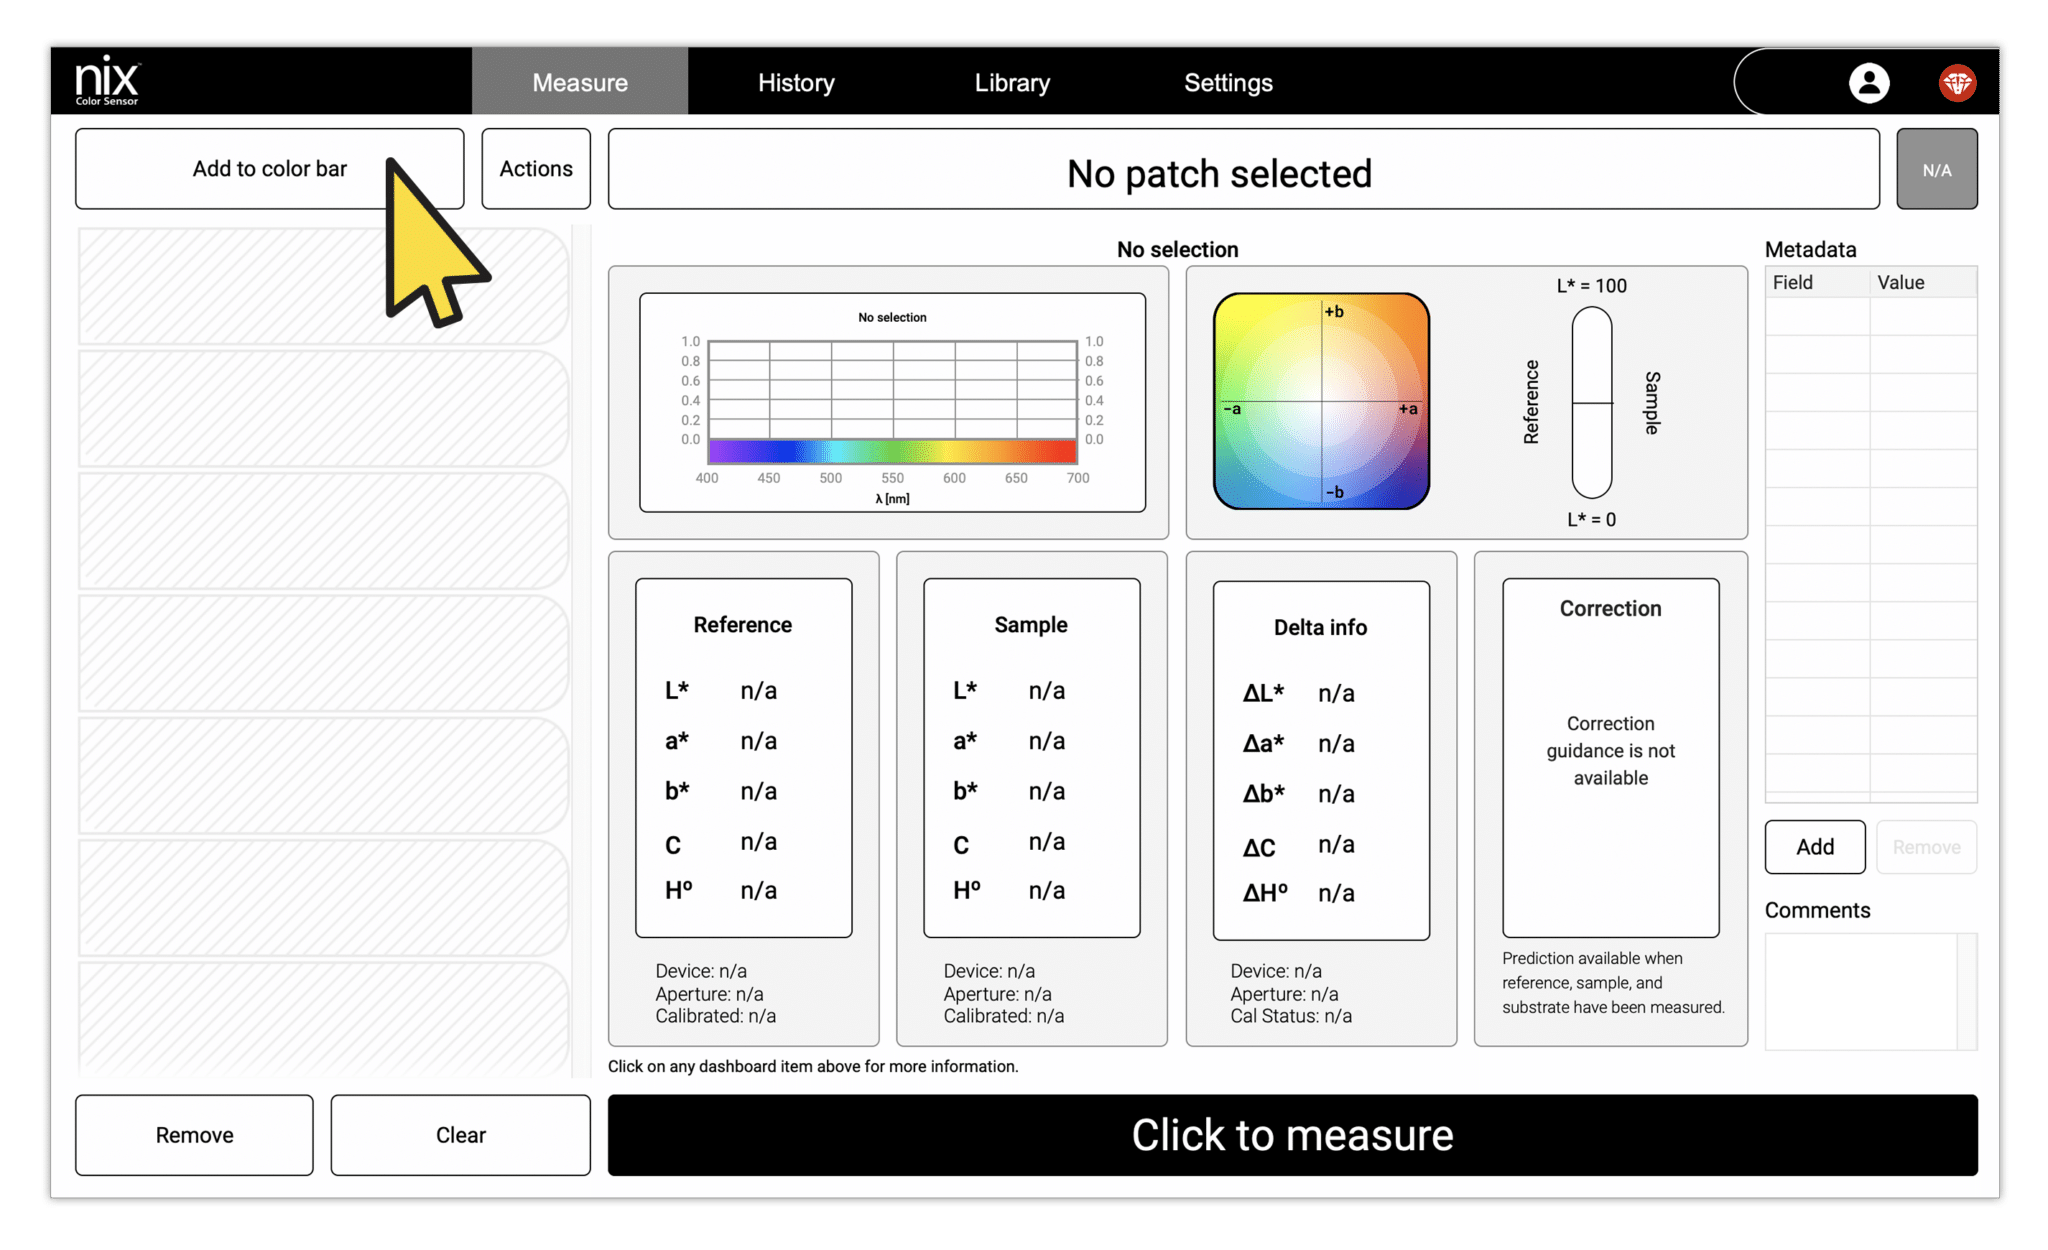
Adding to the color bar


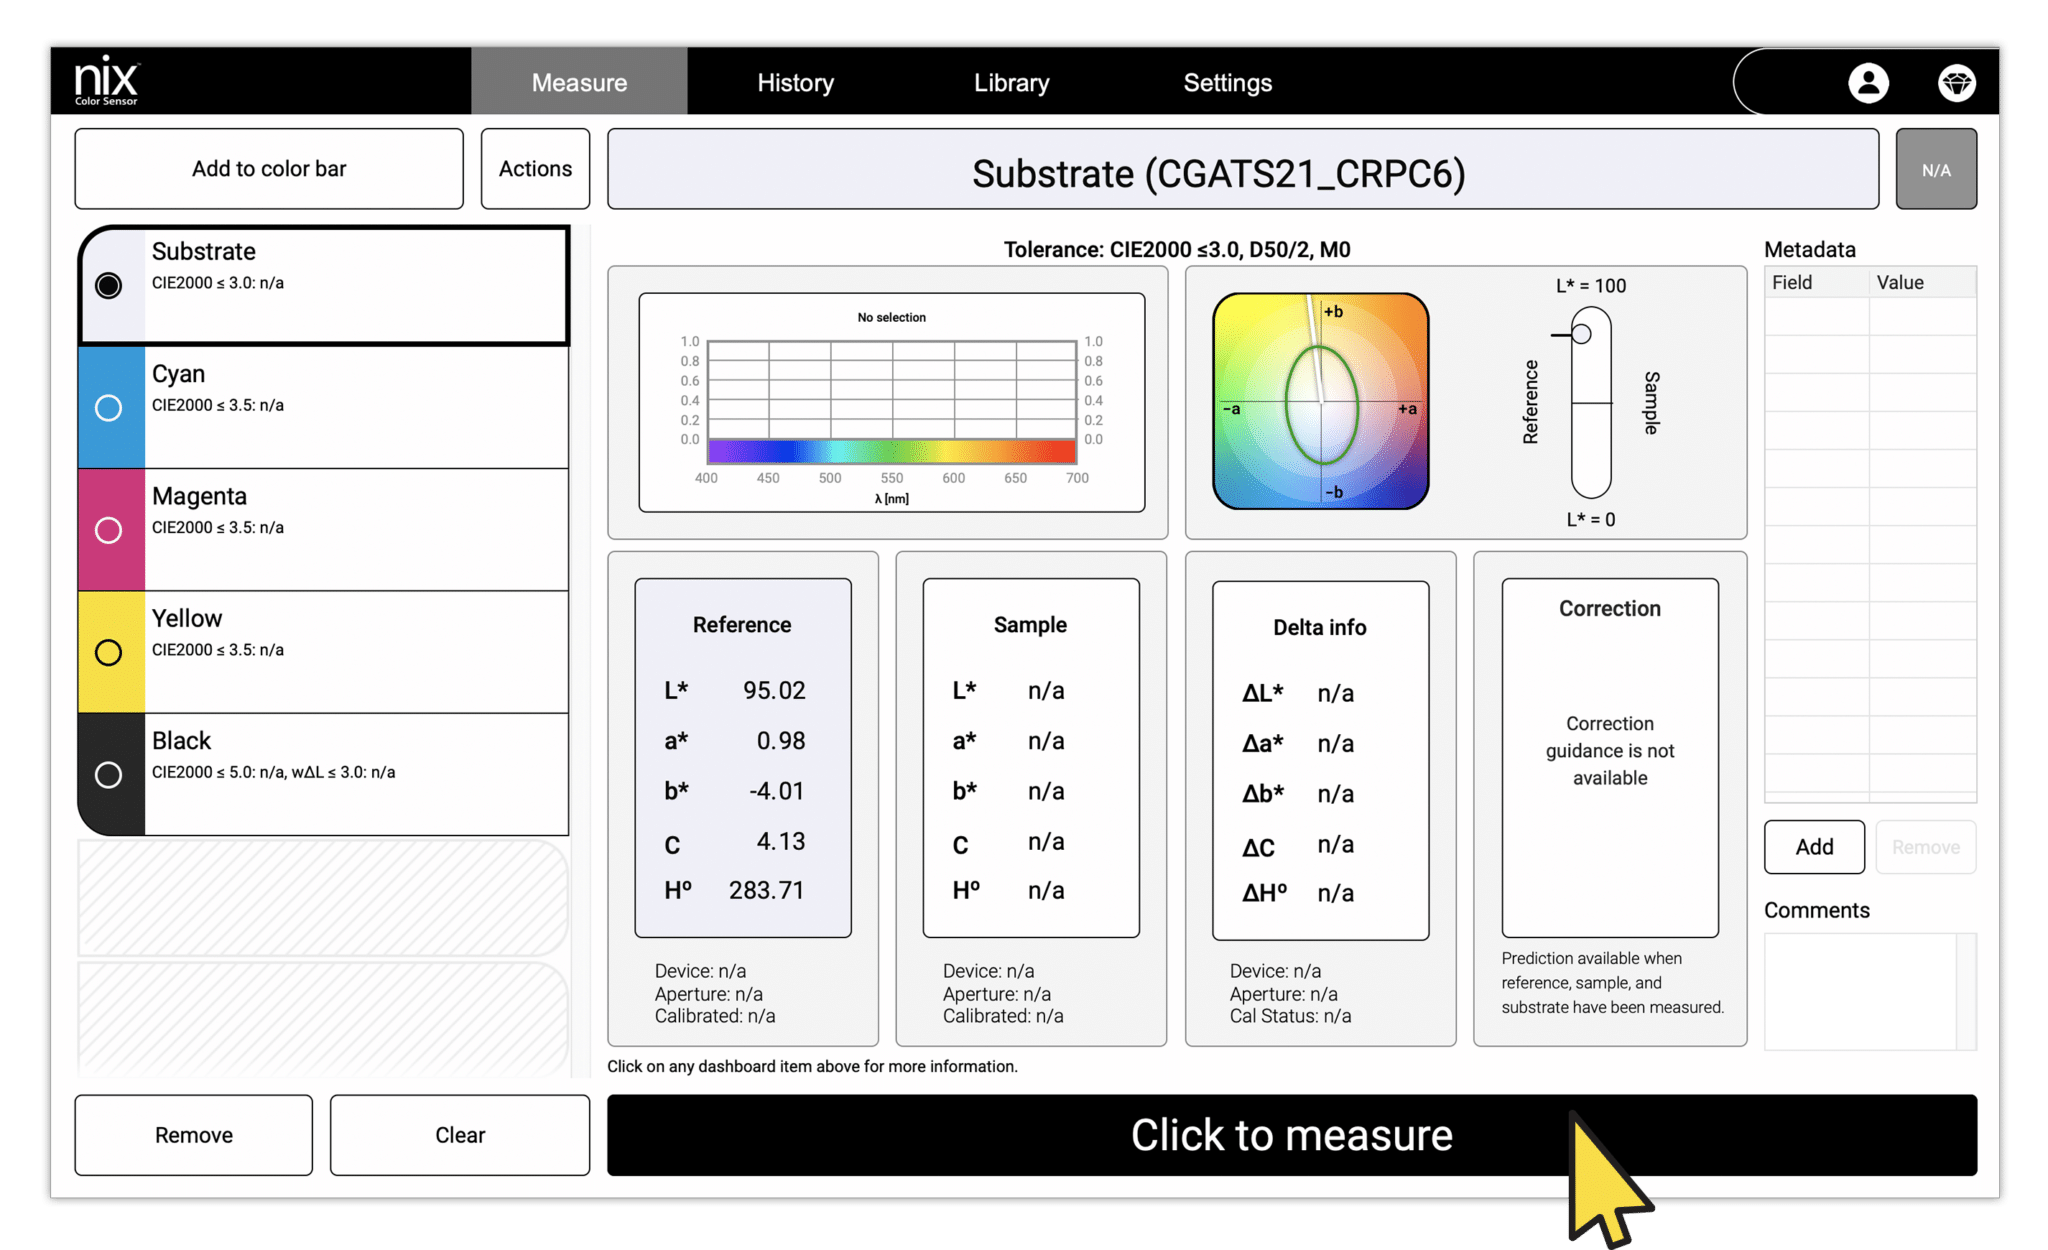
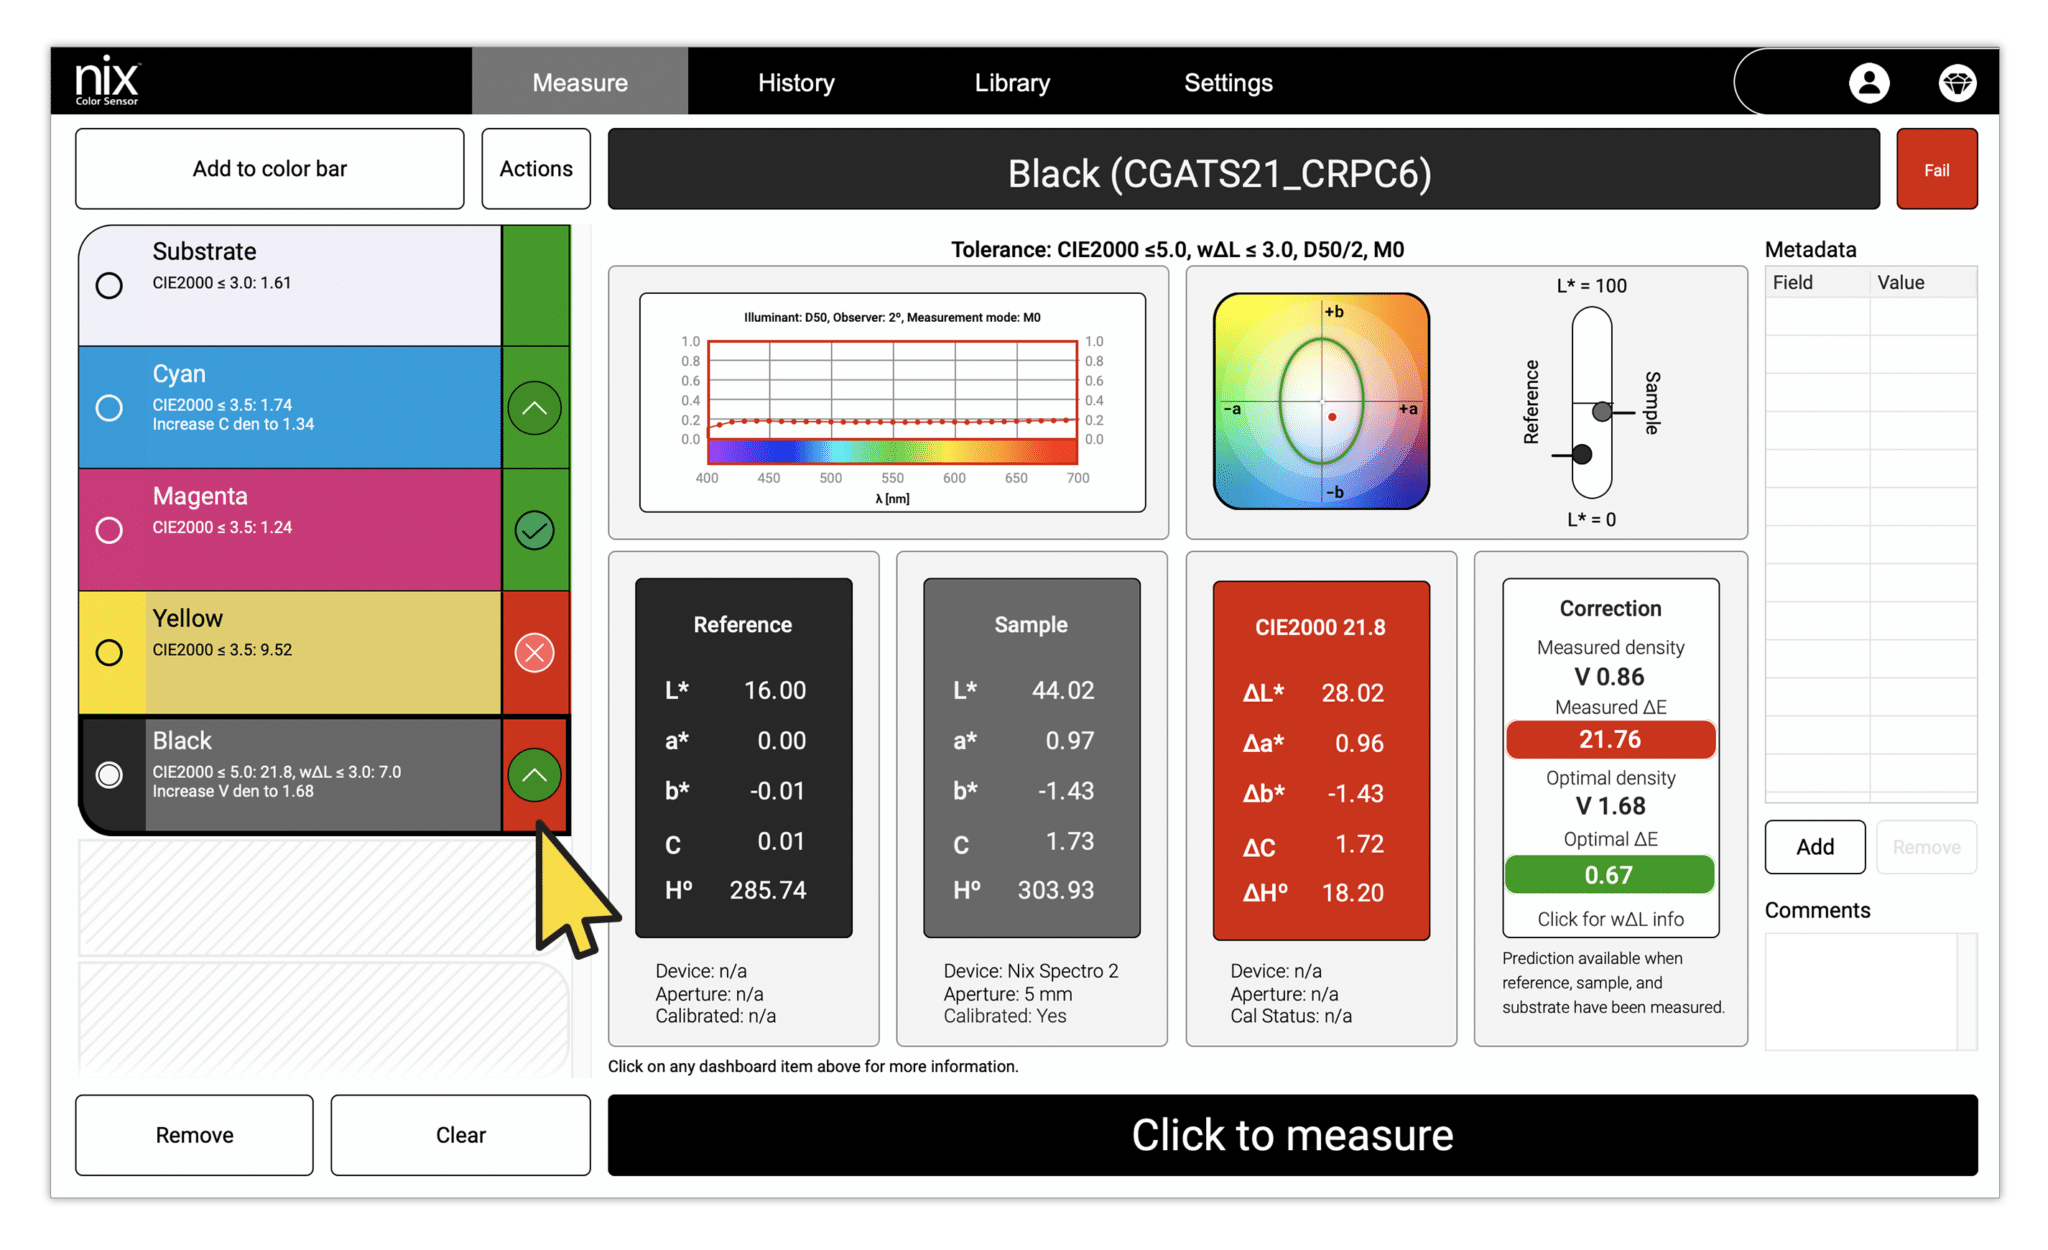
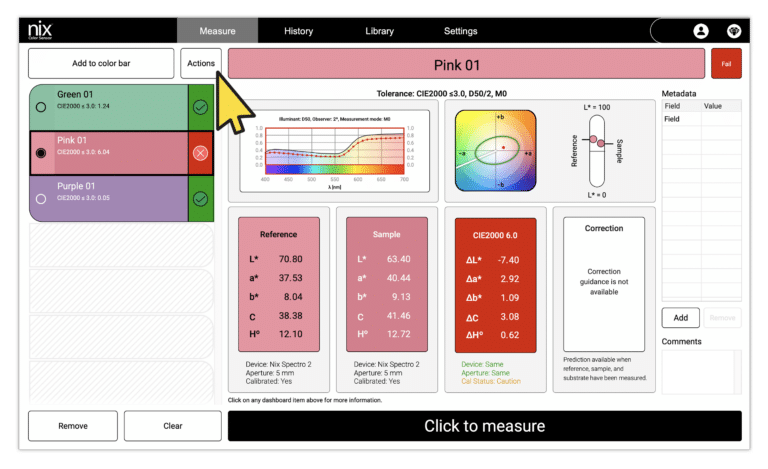
Measuring a color

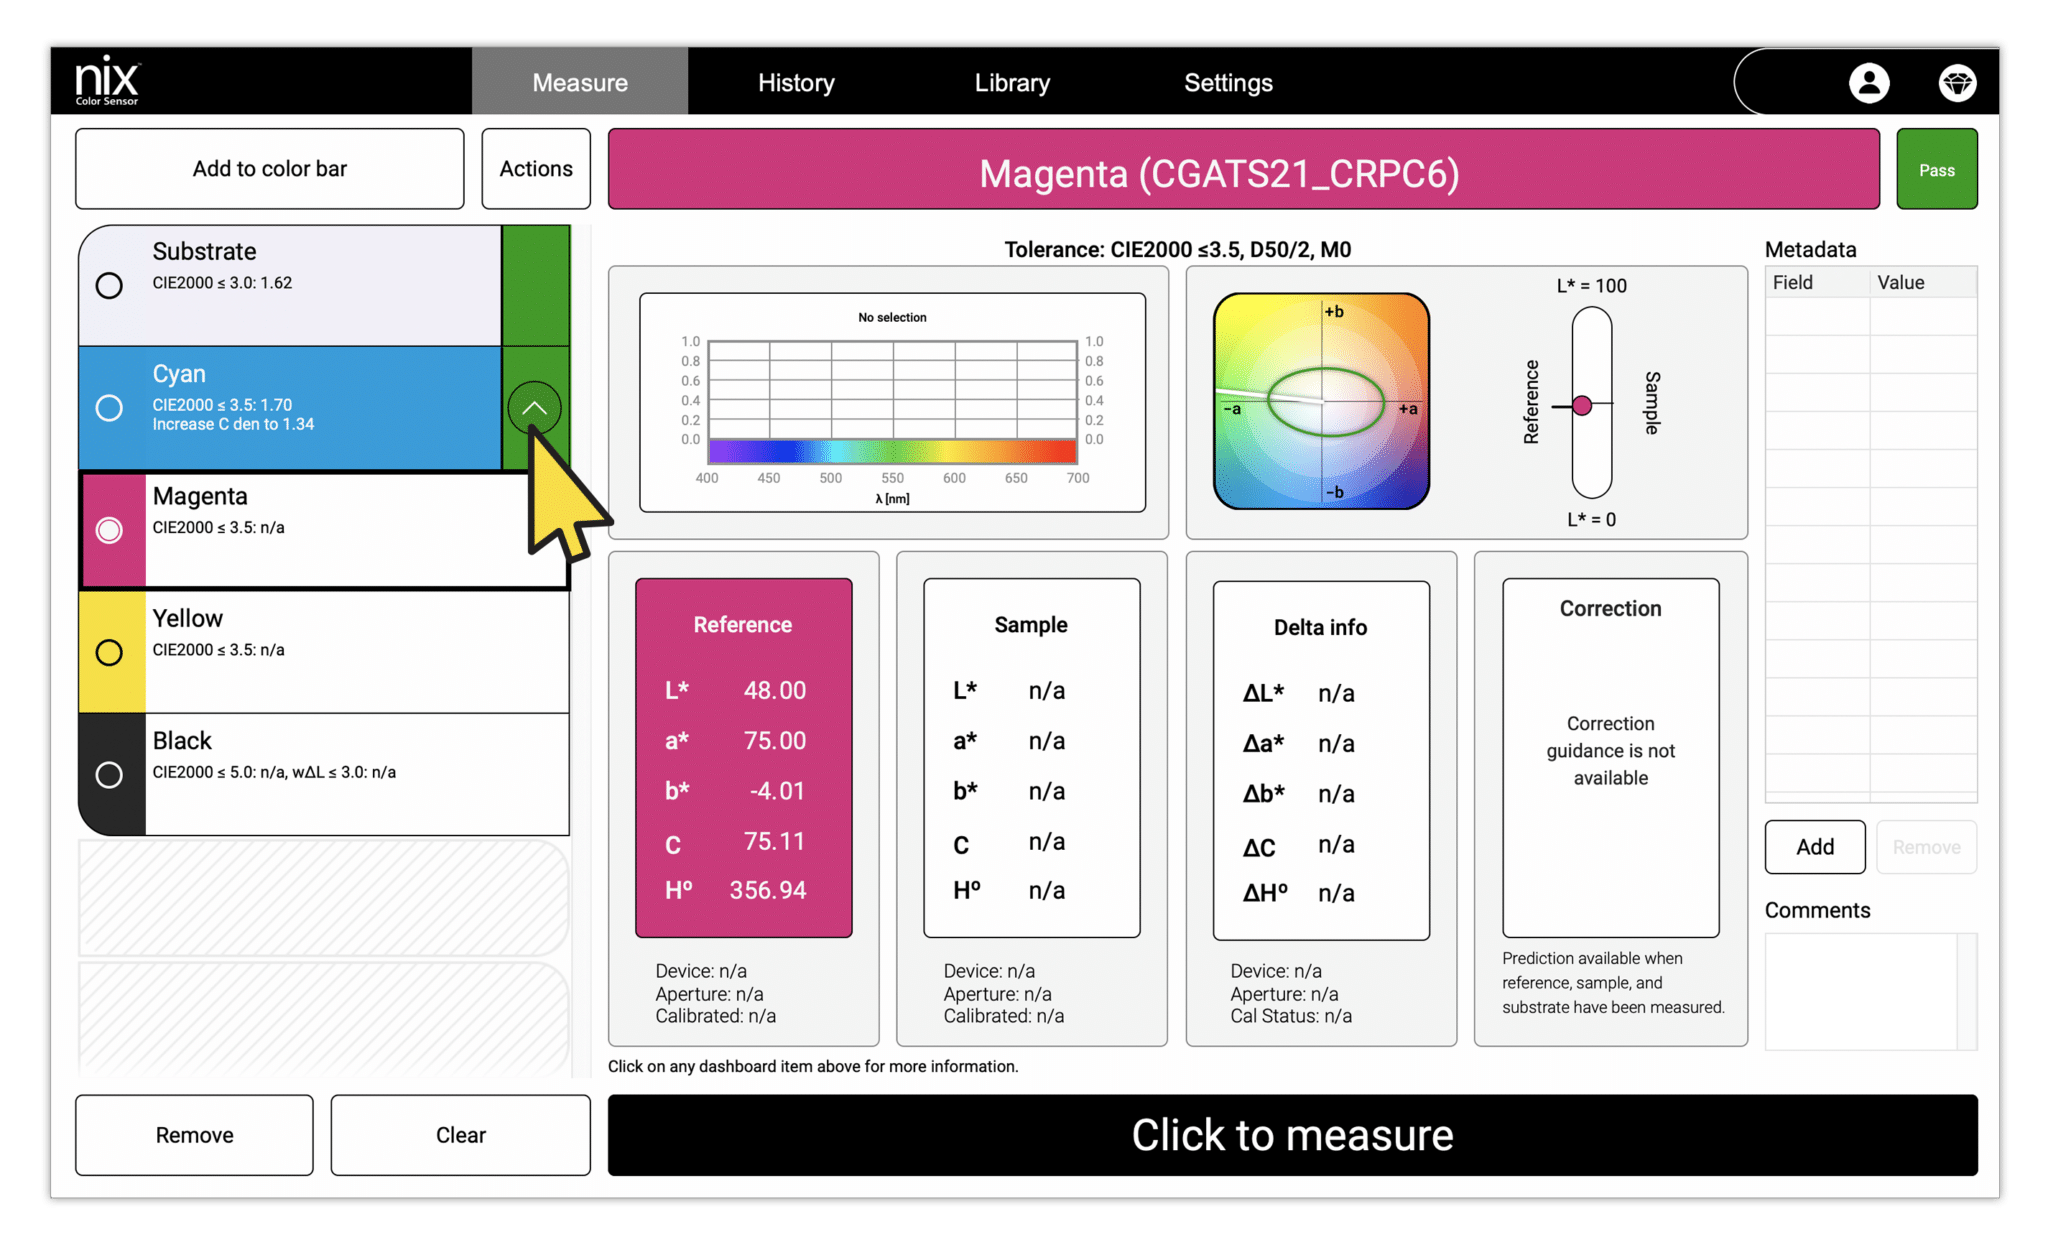
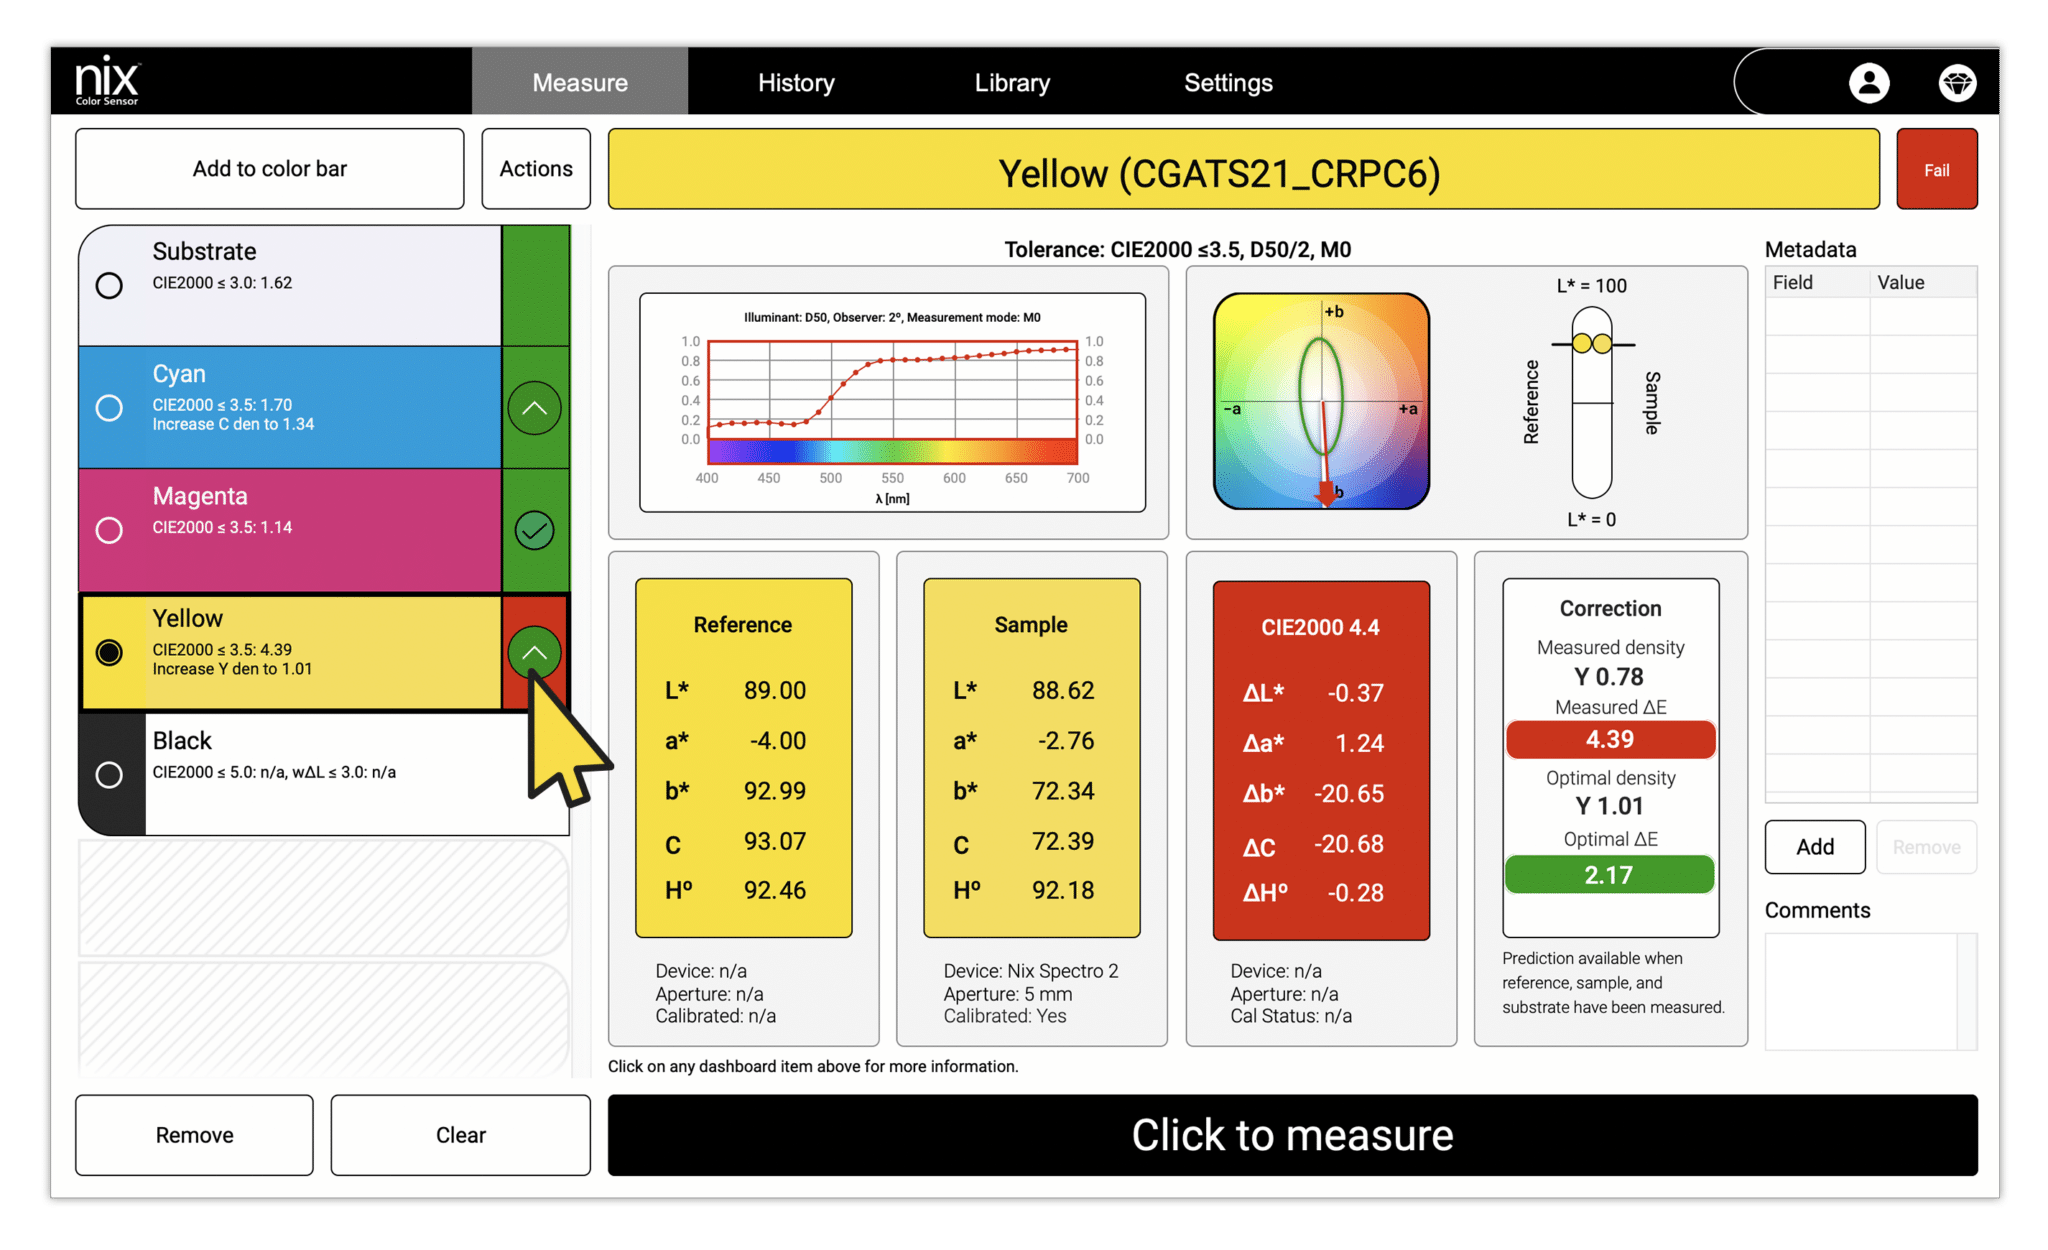

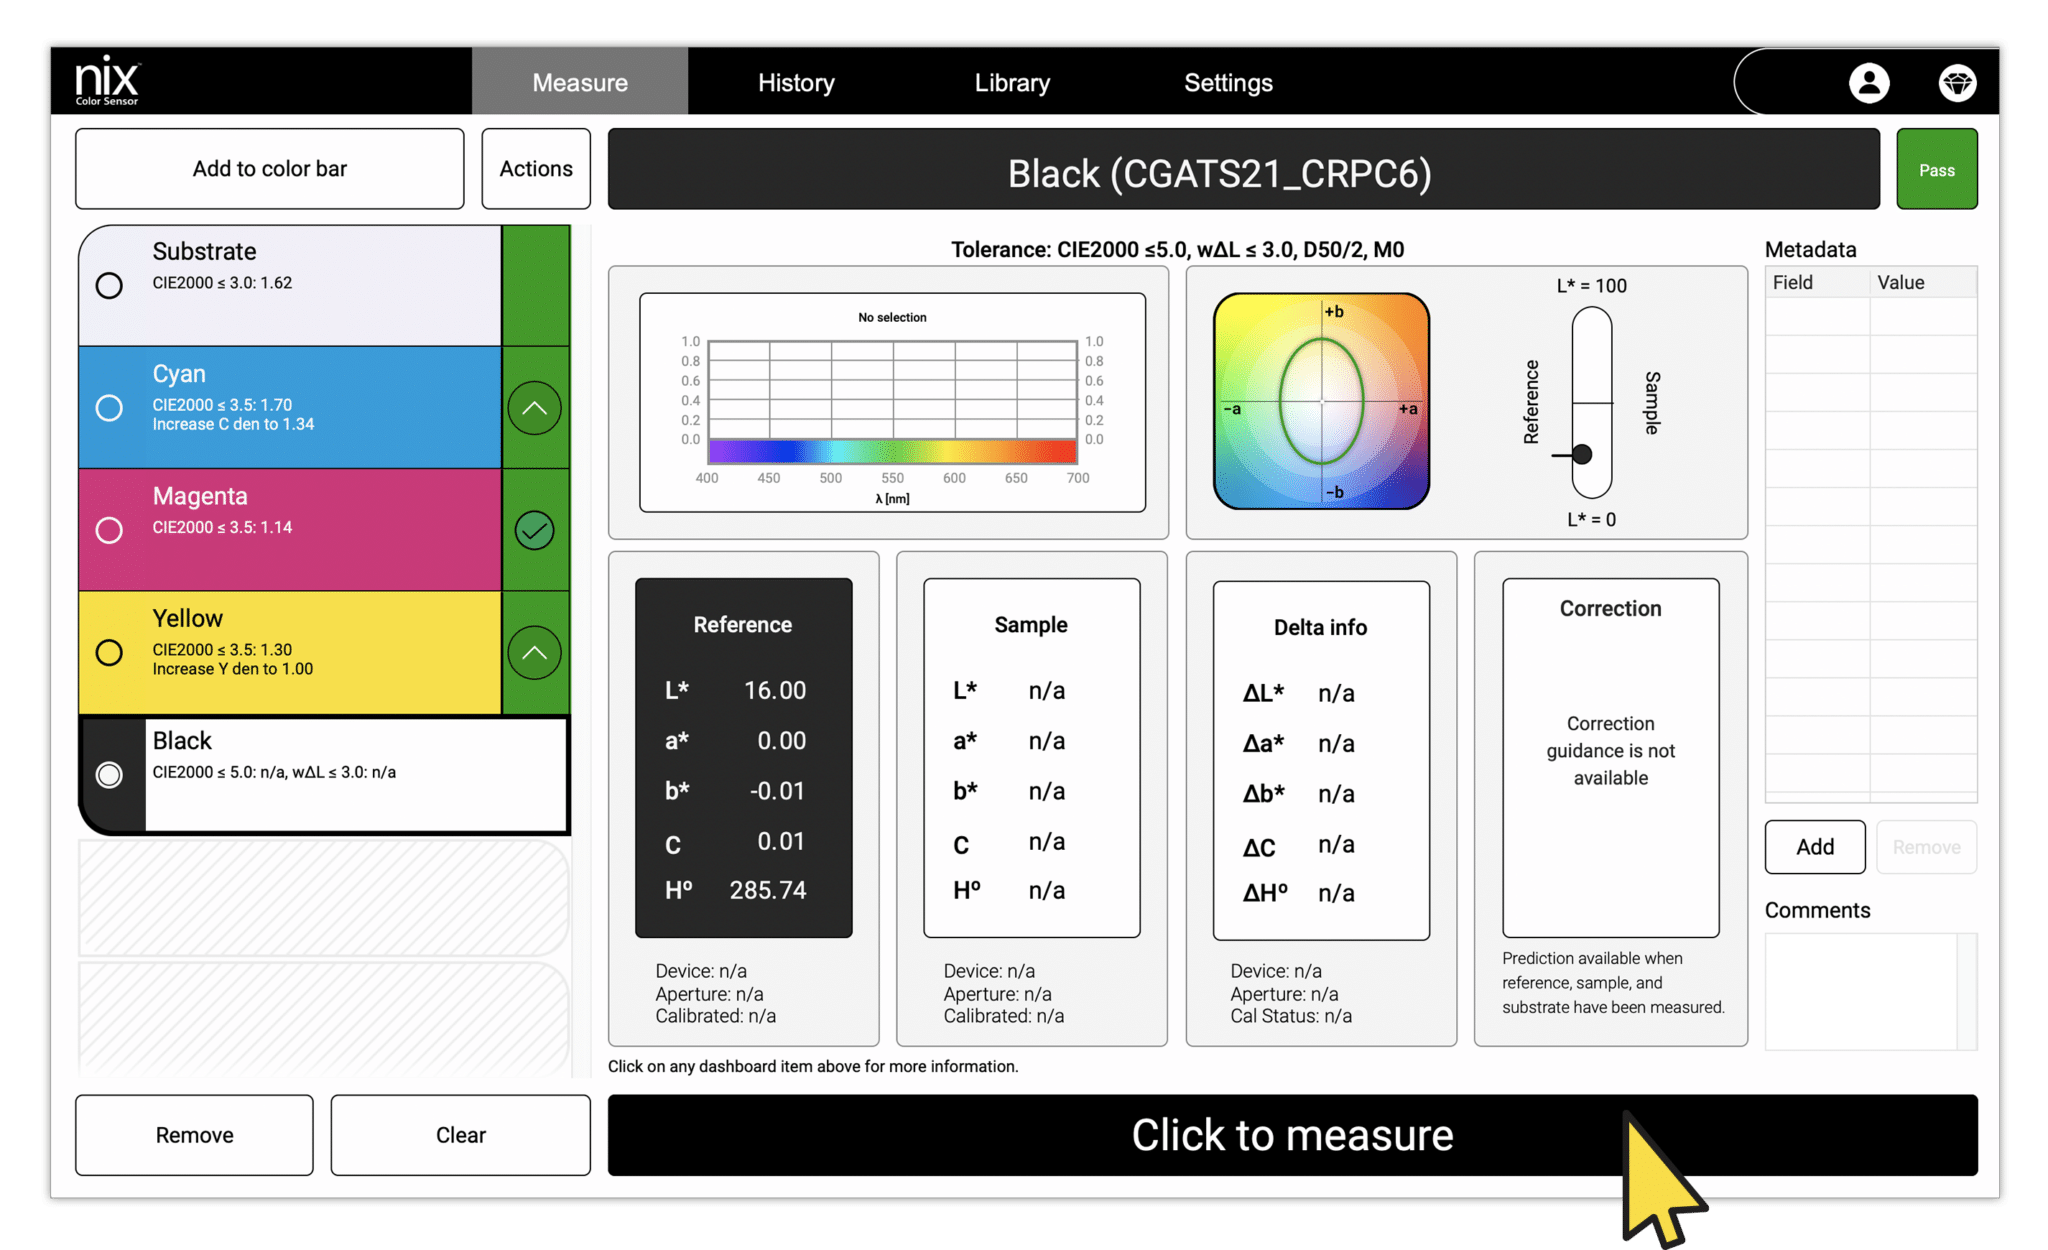
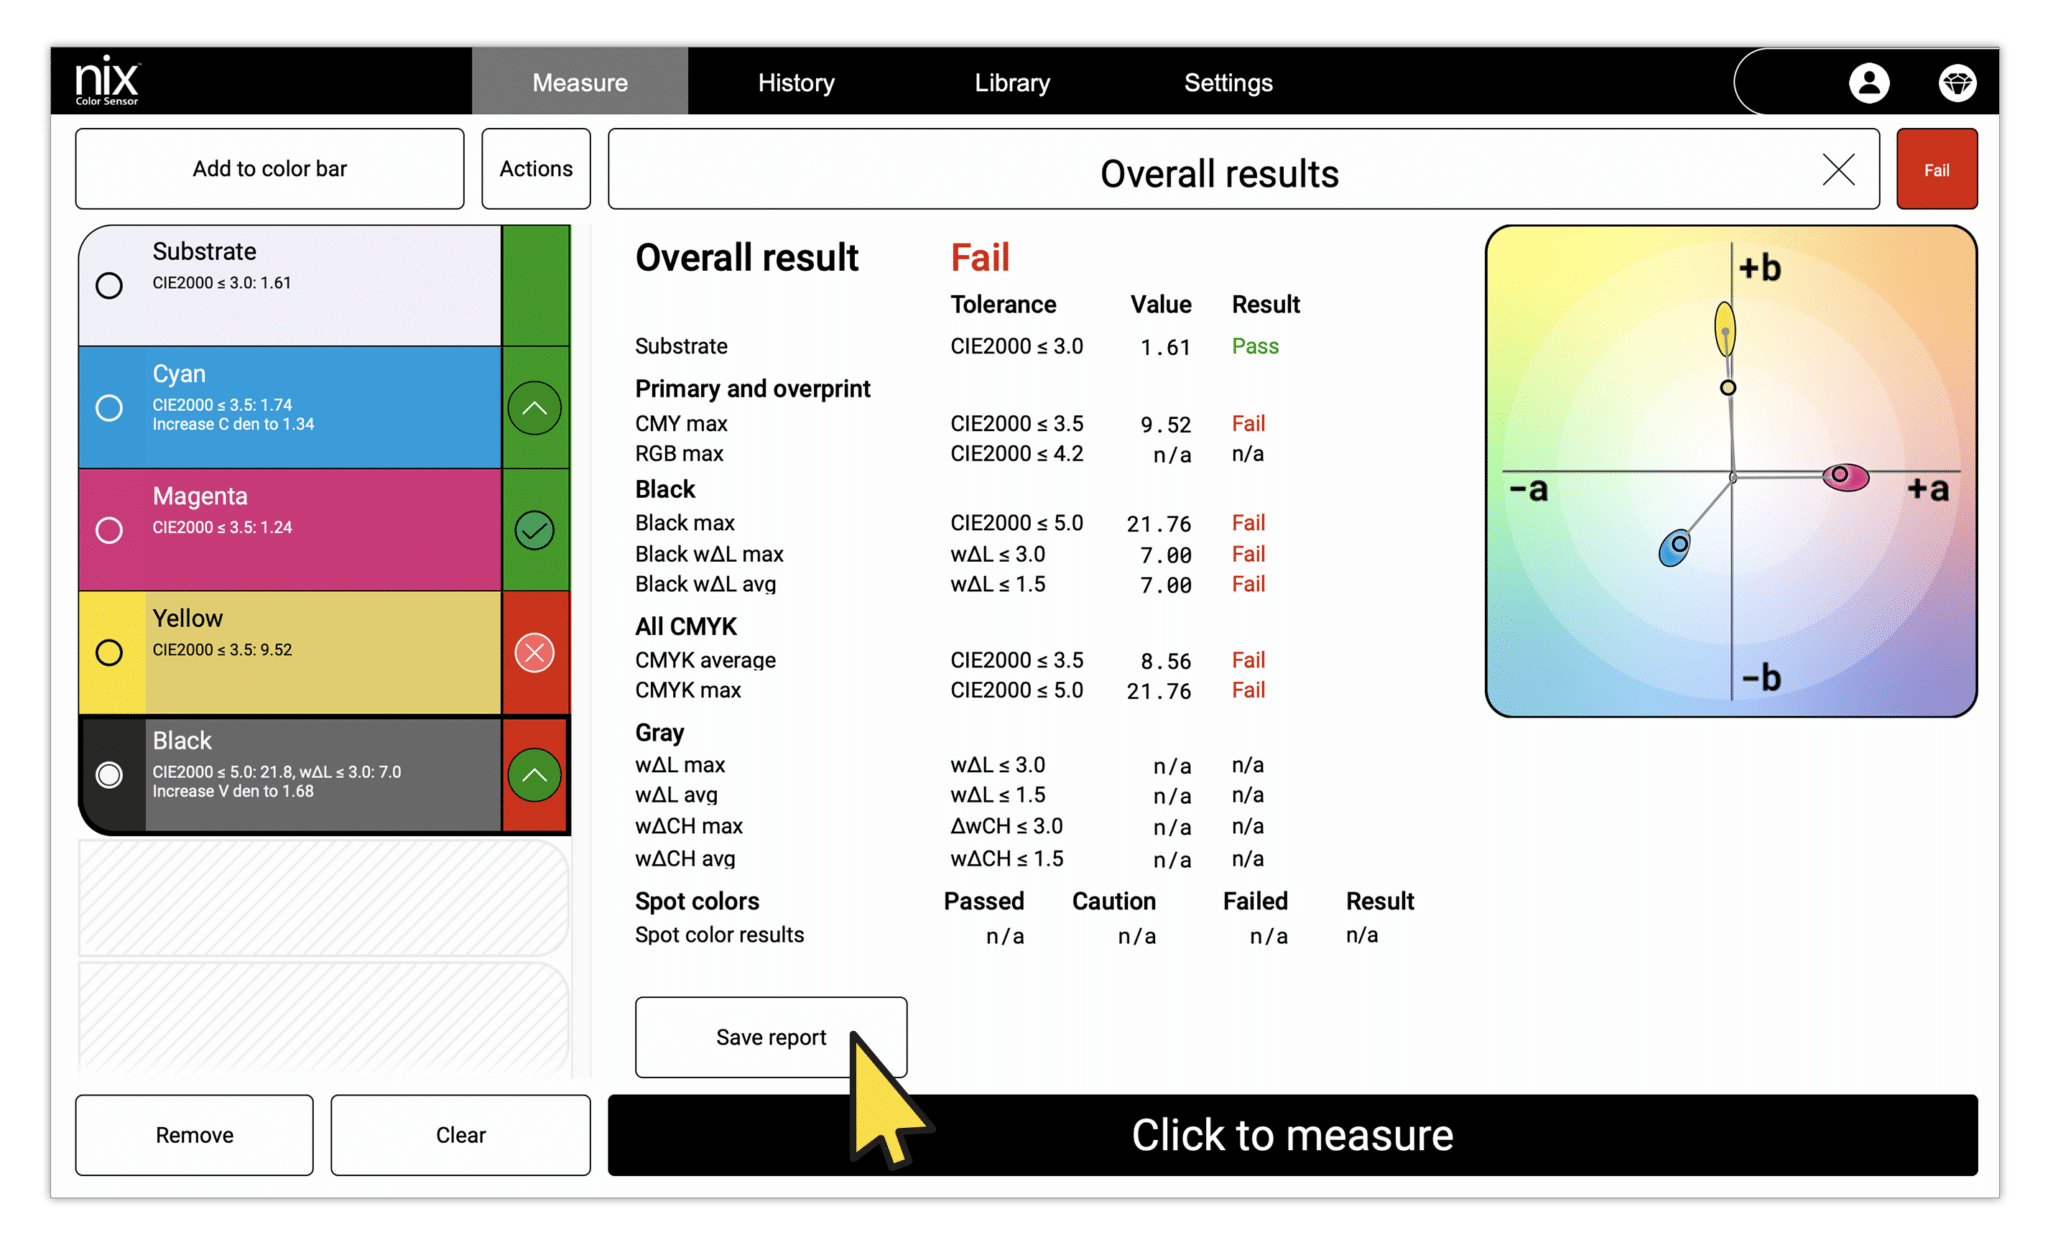
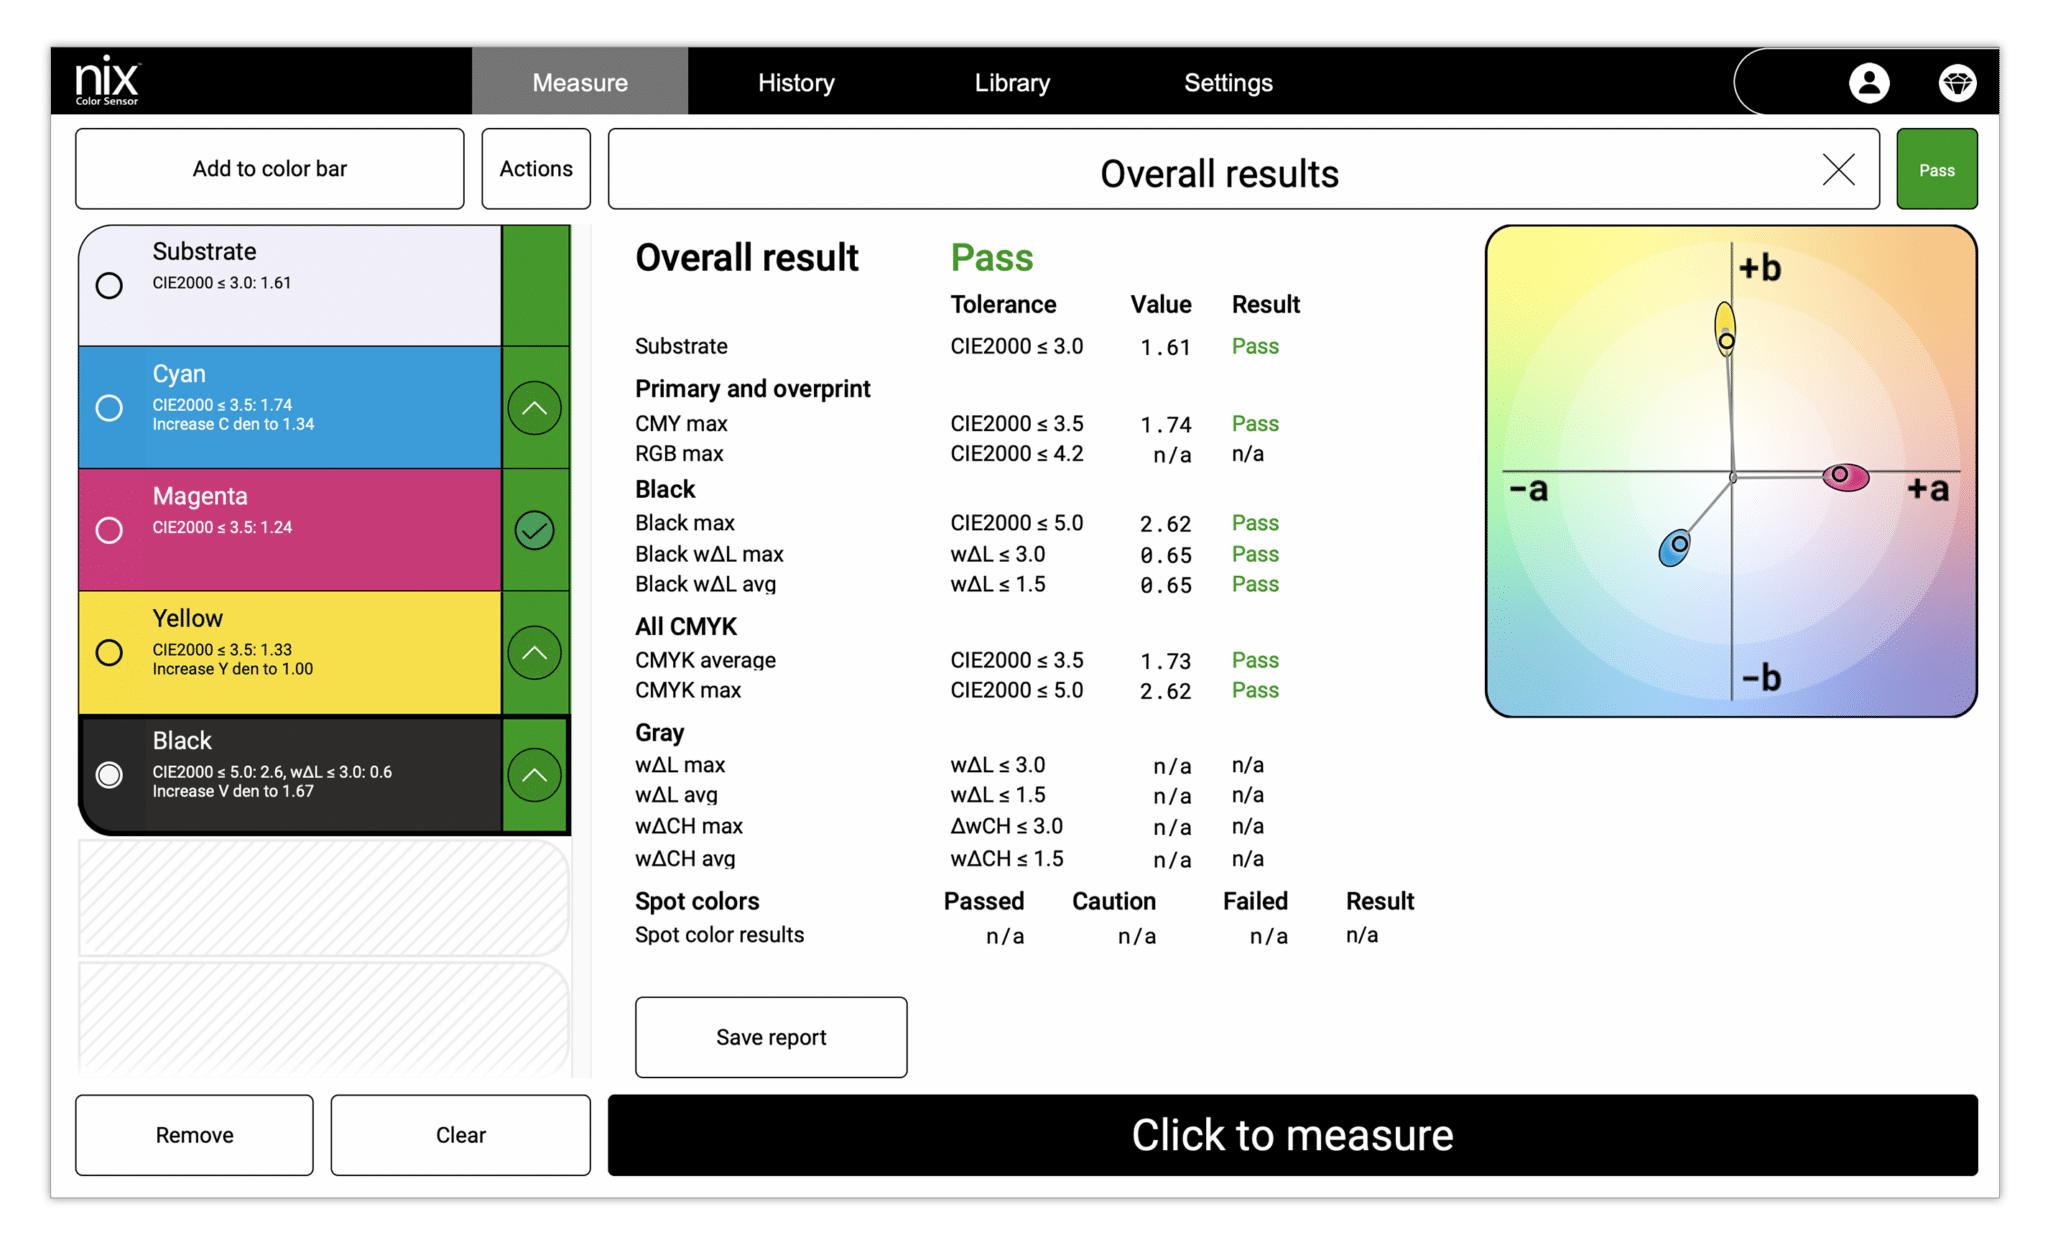
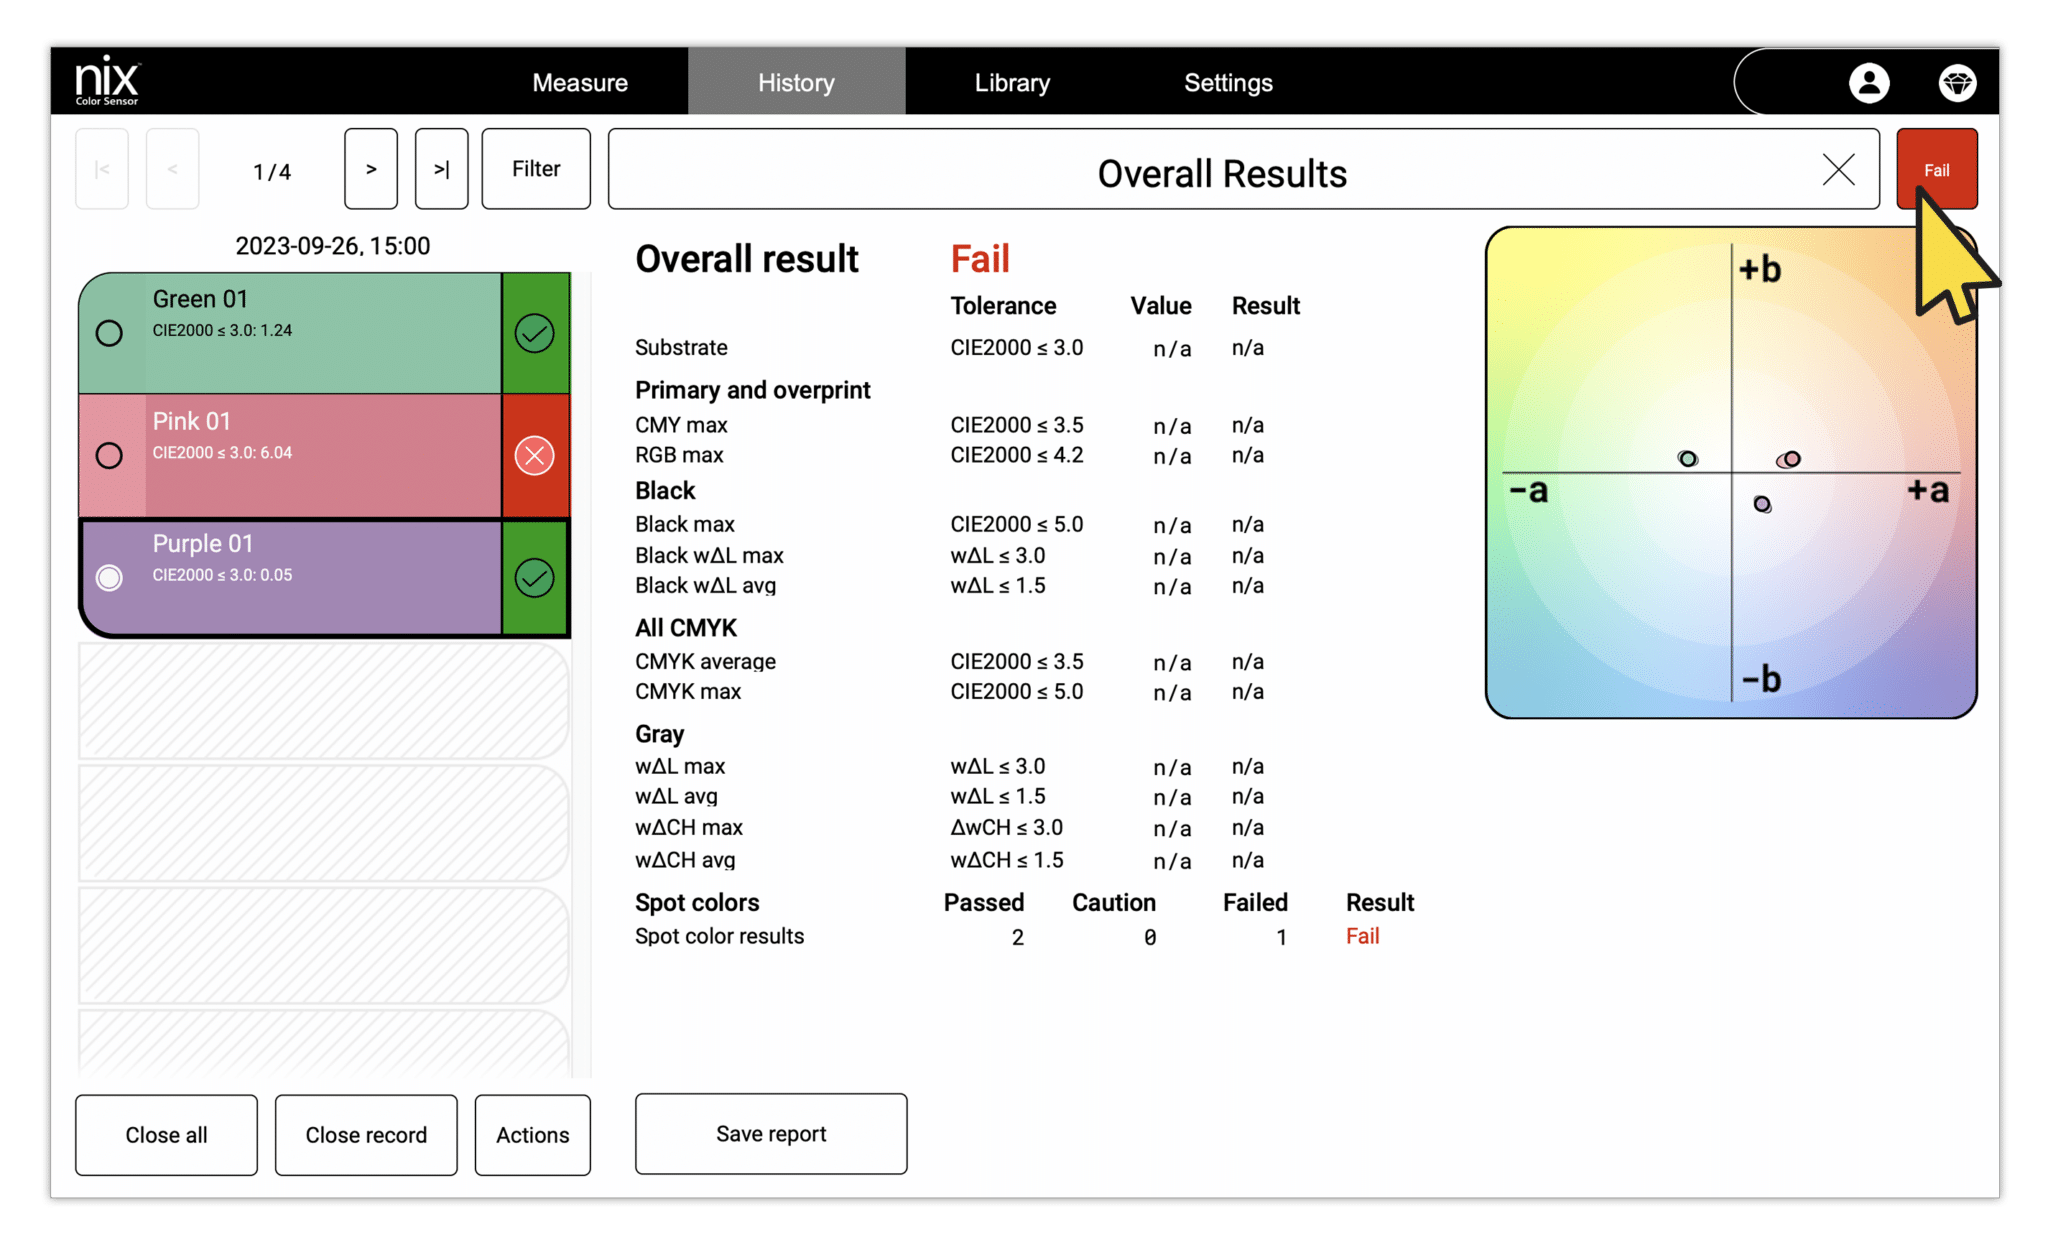
Understanding pass/fail measurements
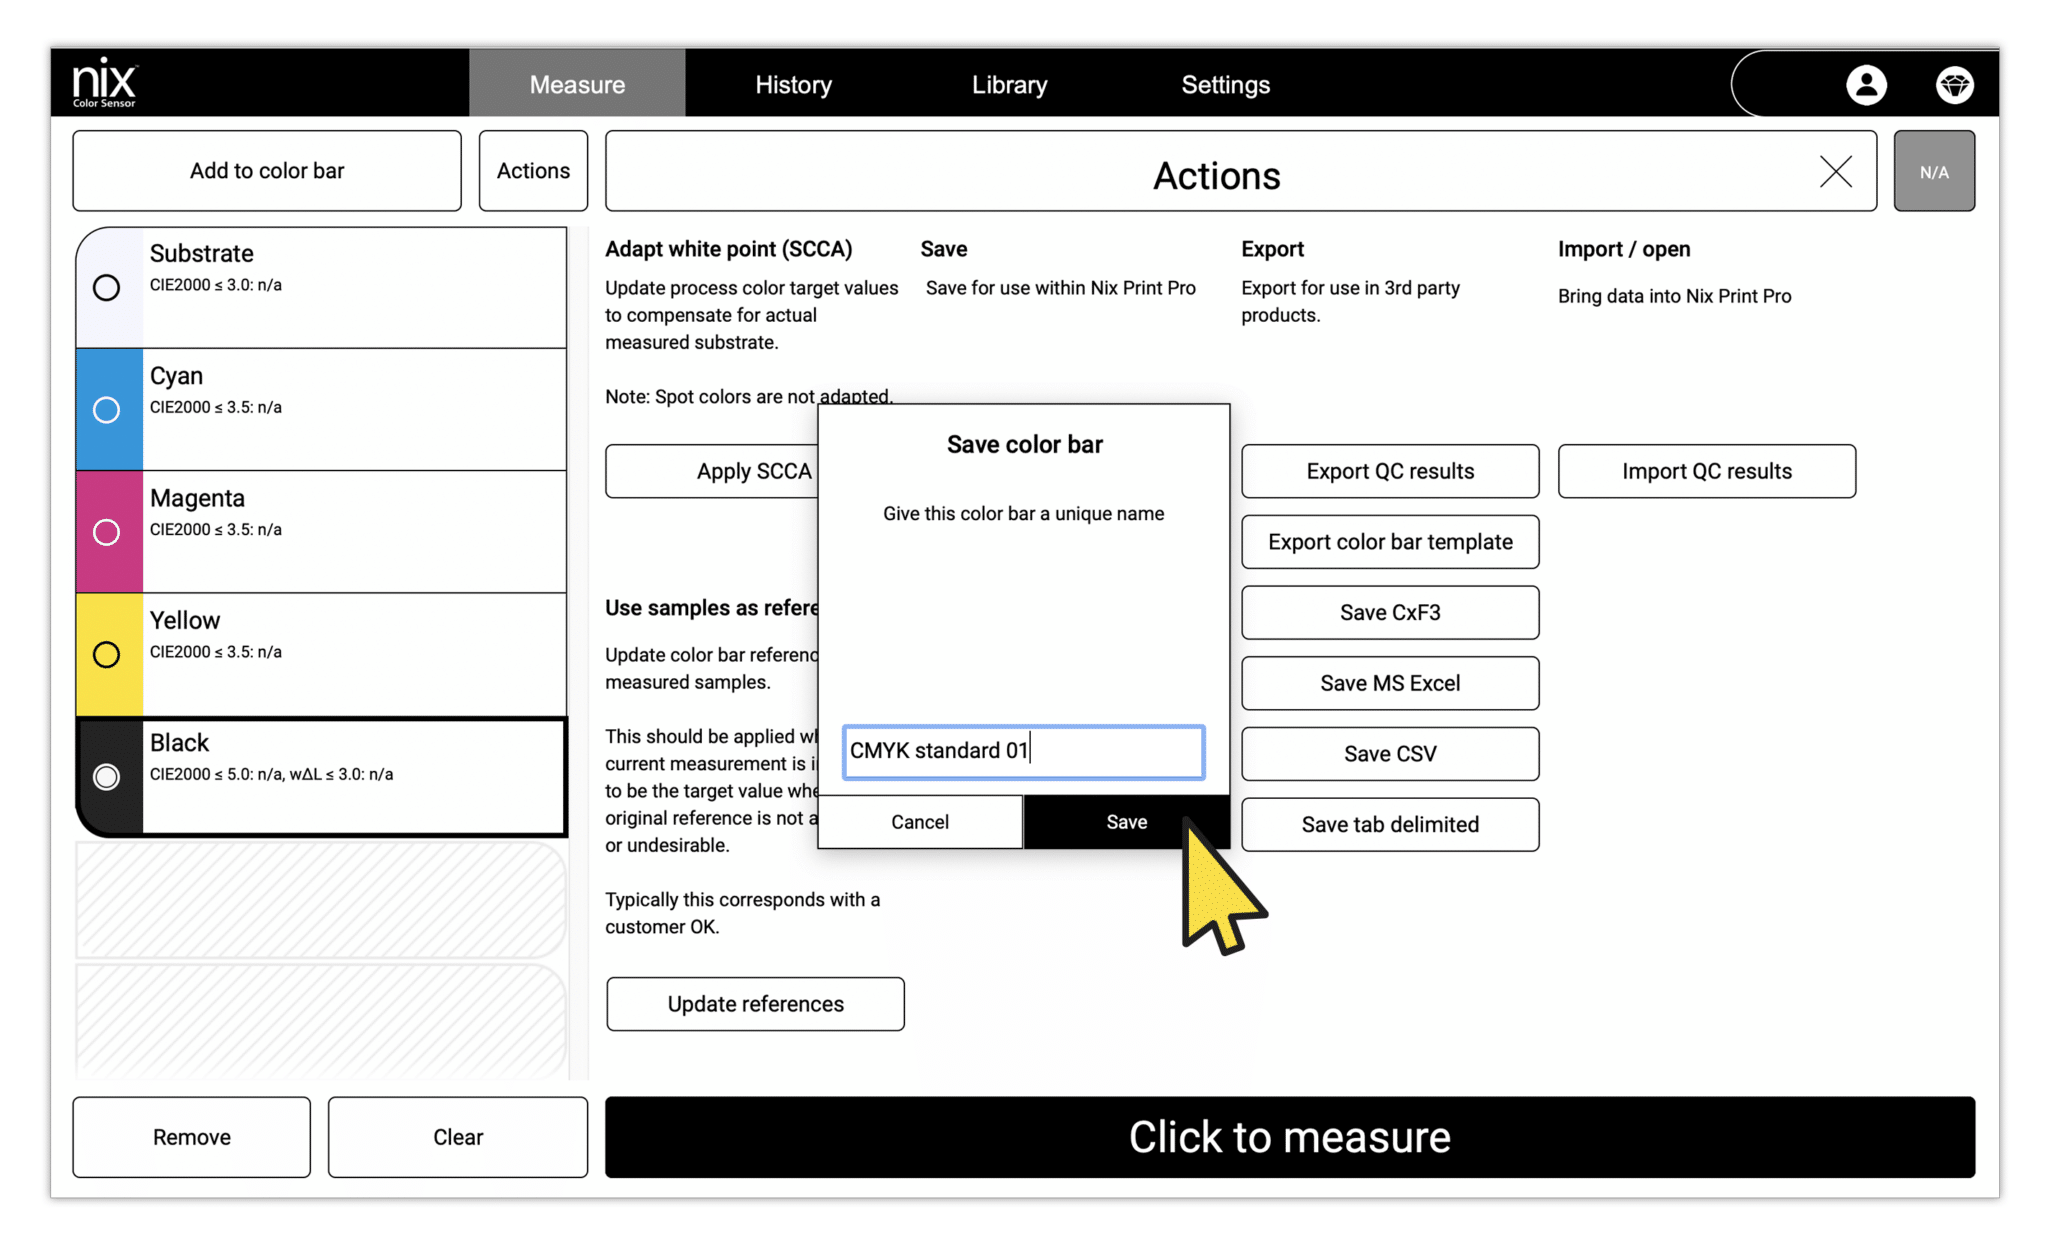
Working with color bar templates
Creating templates for the color bar
Using your color bar templates
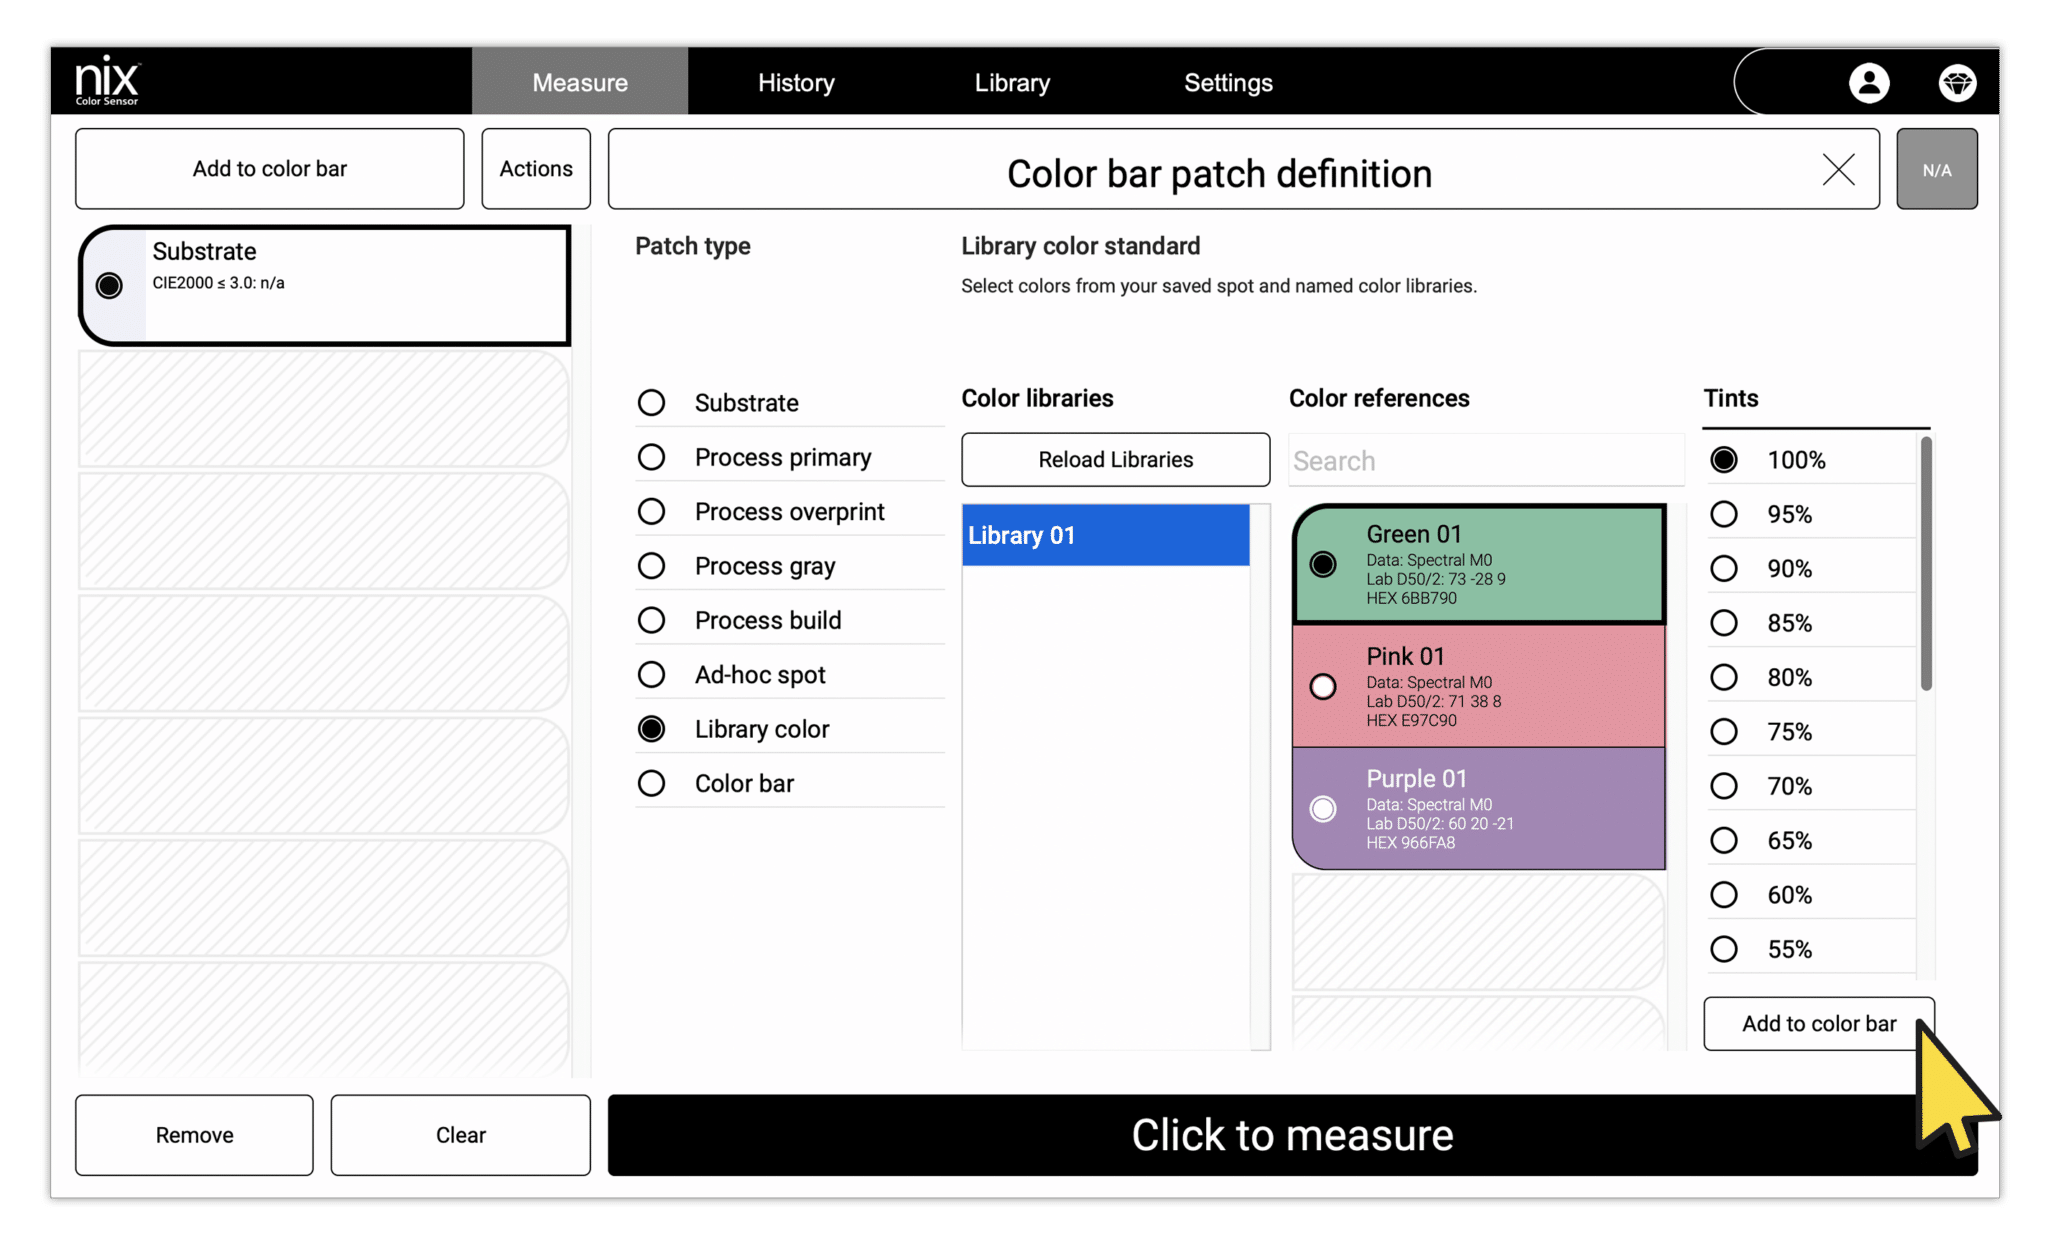
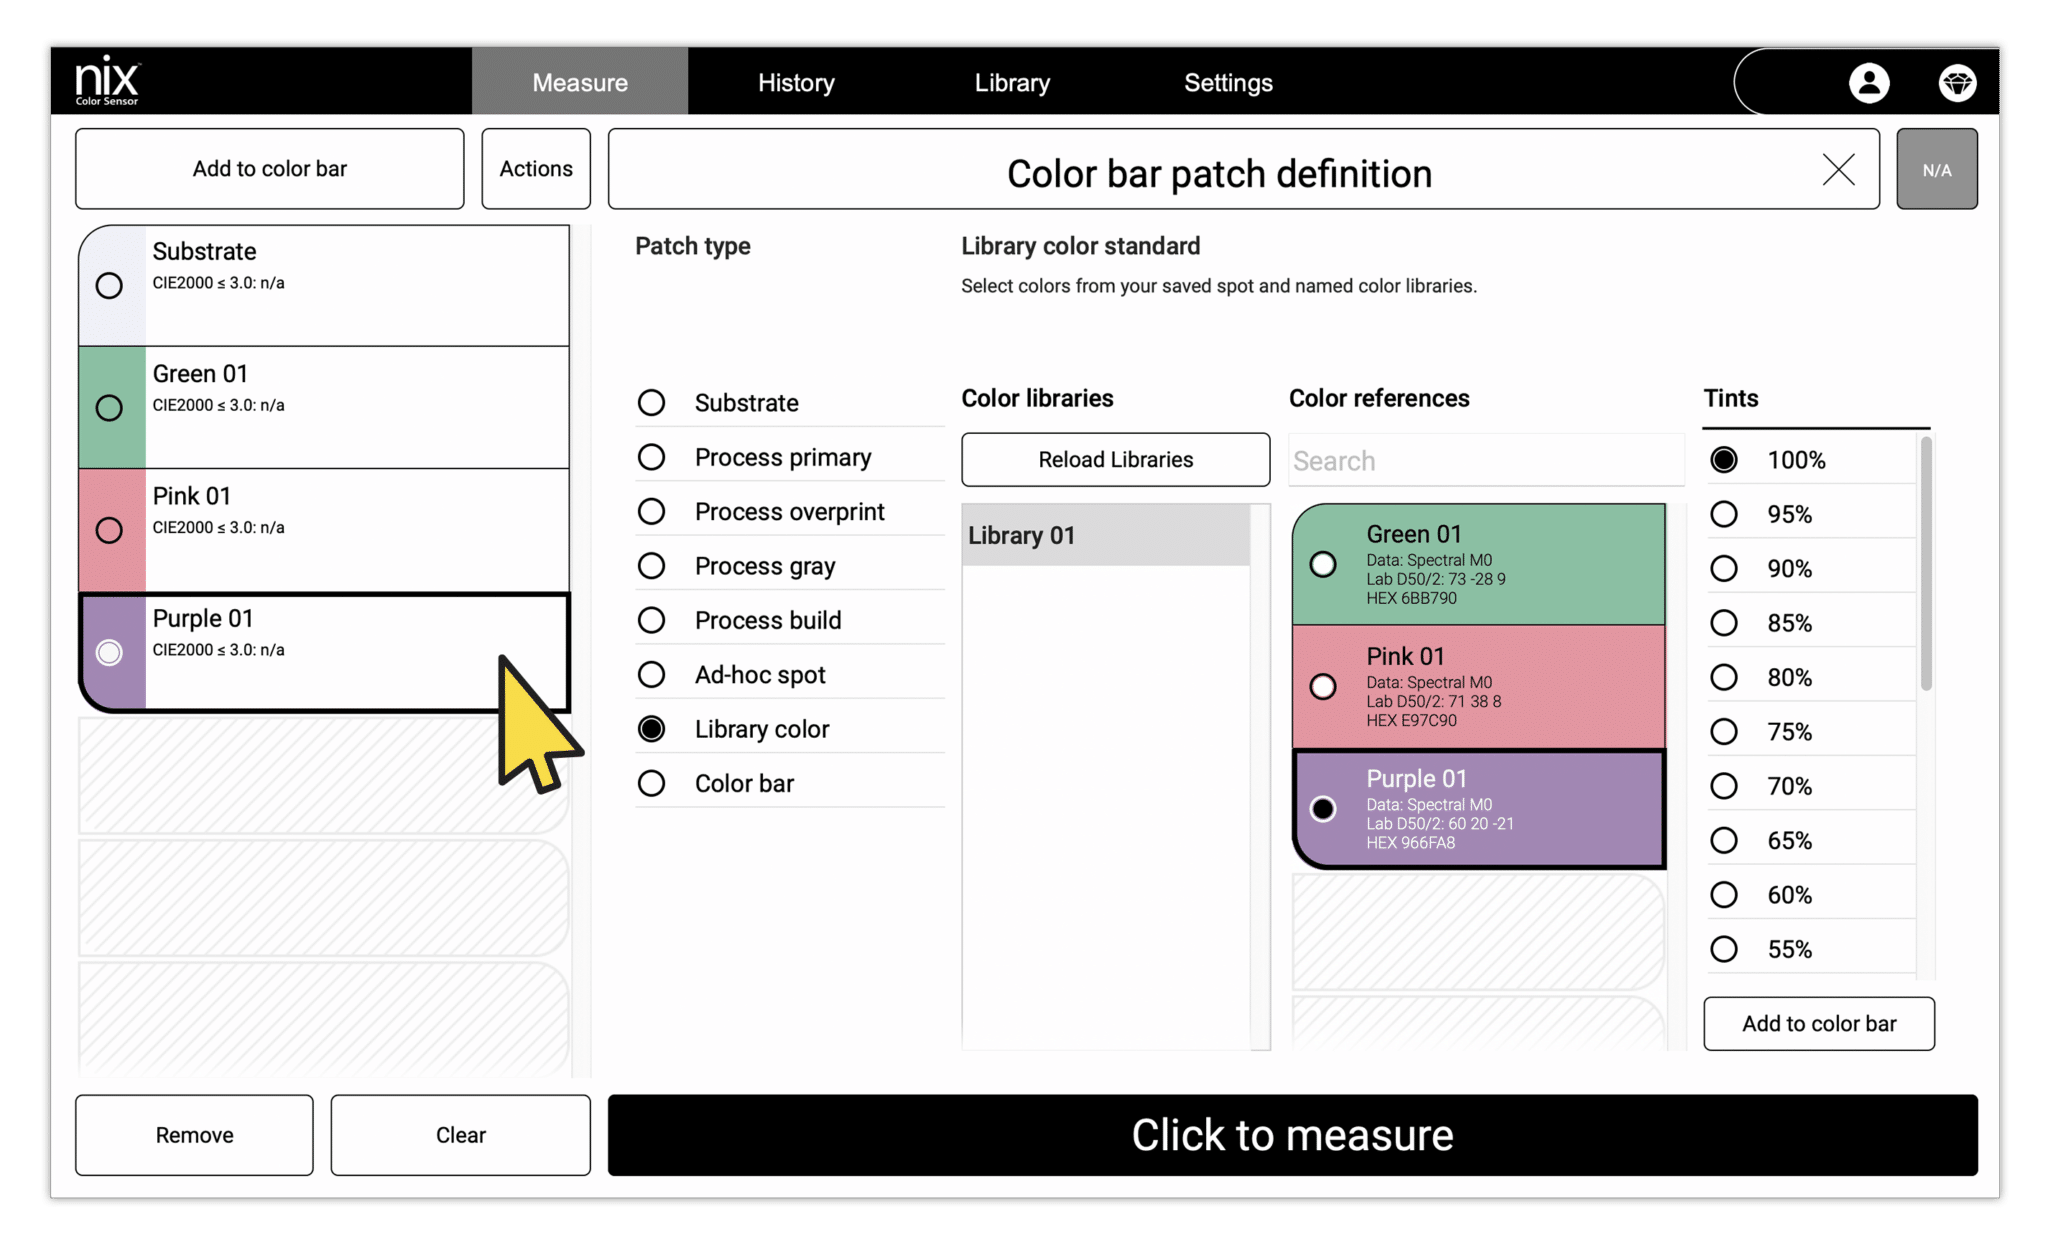
Using custom libraries
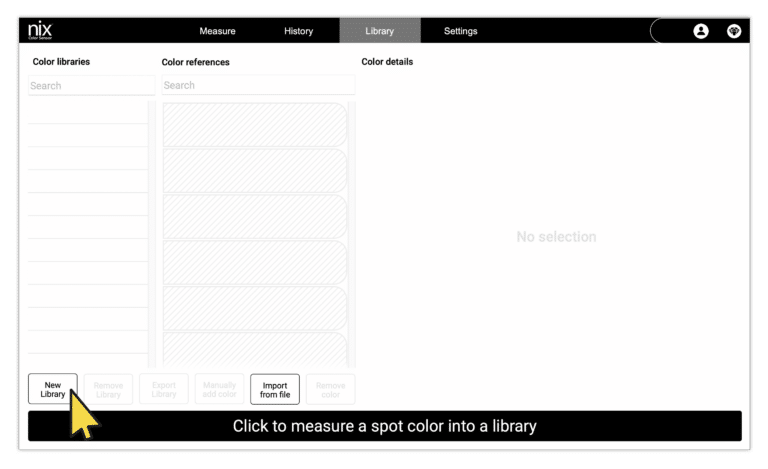
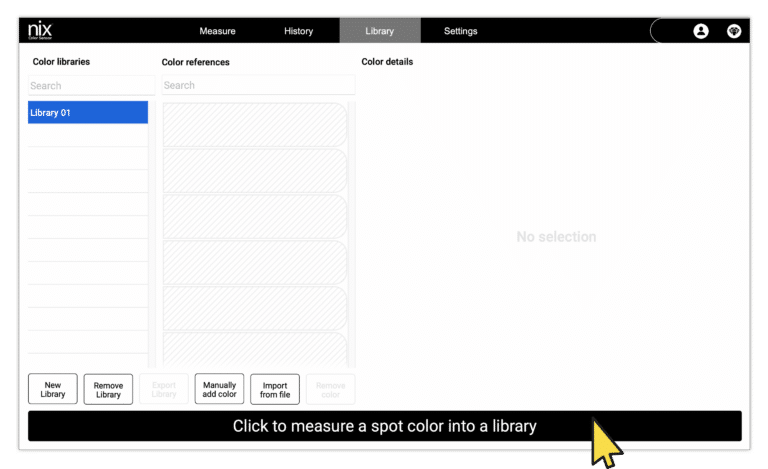
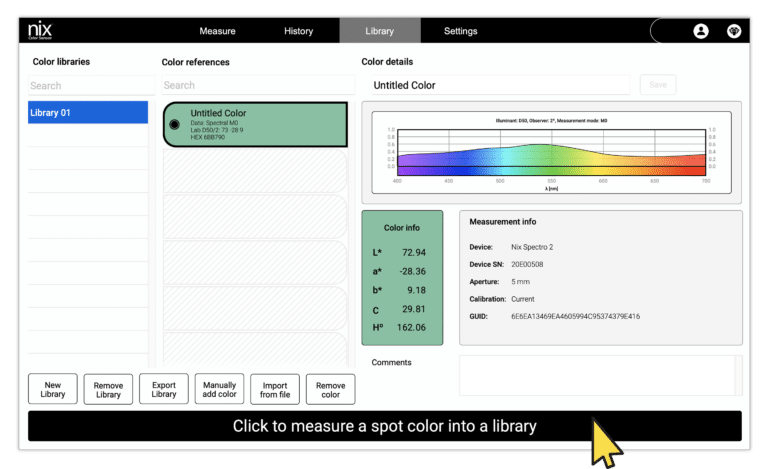
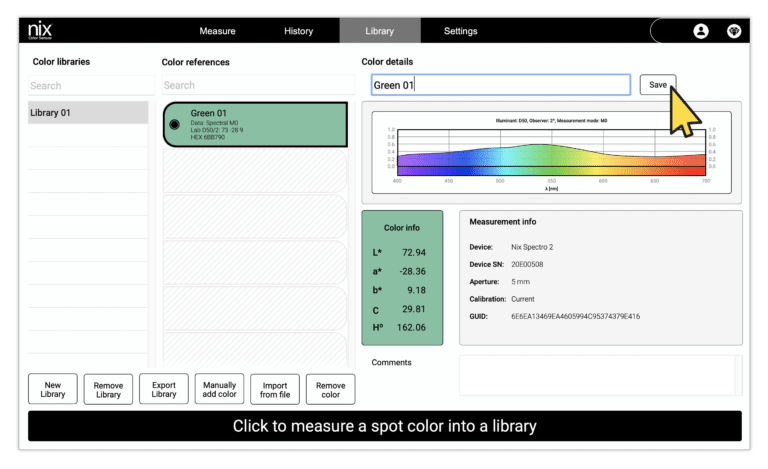
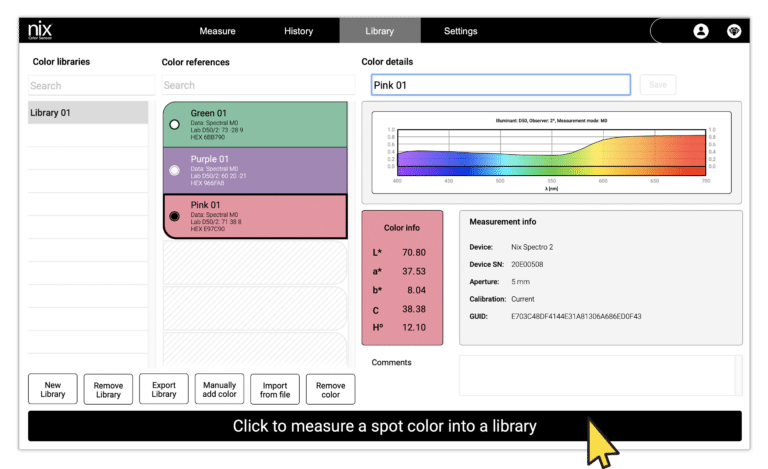
Creating and managing custom libraries
Adding custom library colors to the color bar
Saving jobs and accessing your history
Saving a job
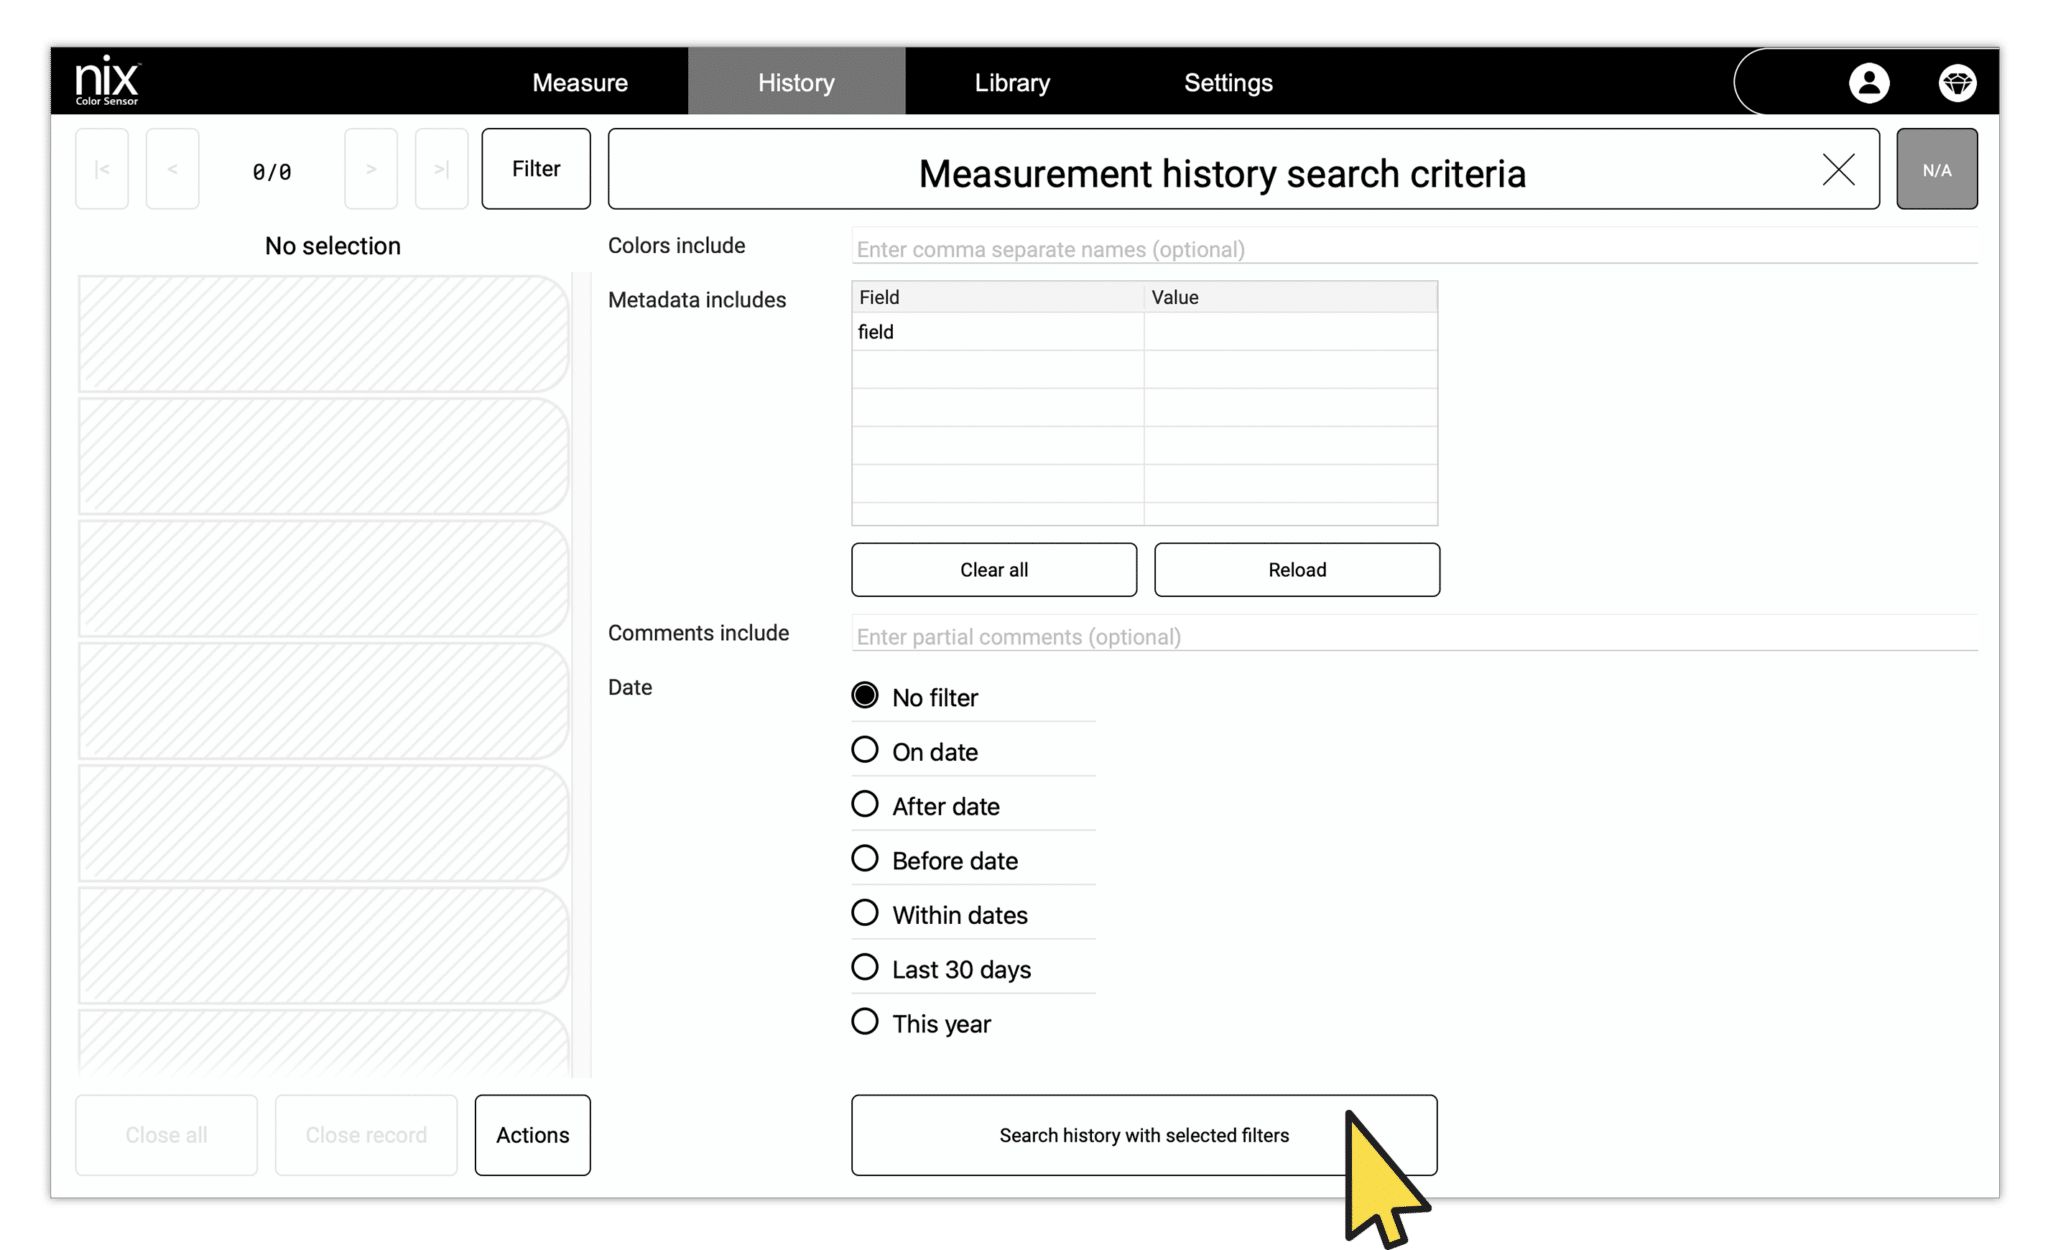
Viewing your history
Settings
Understanding settings
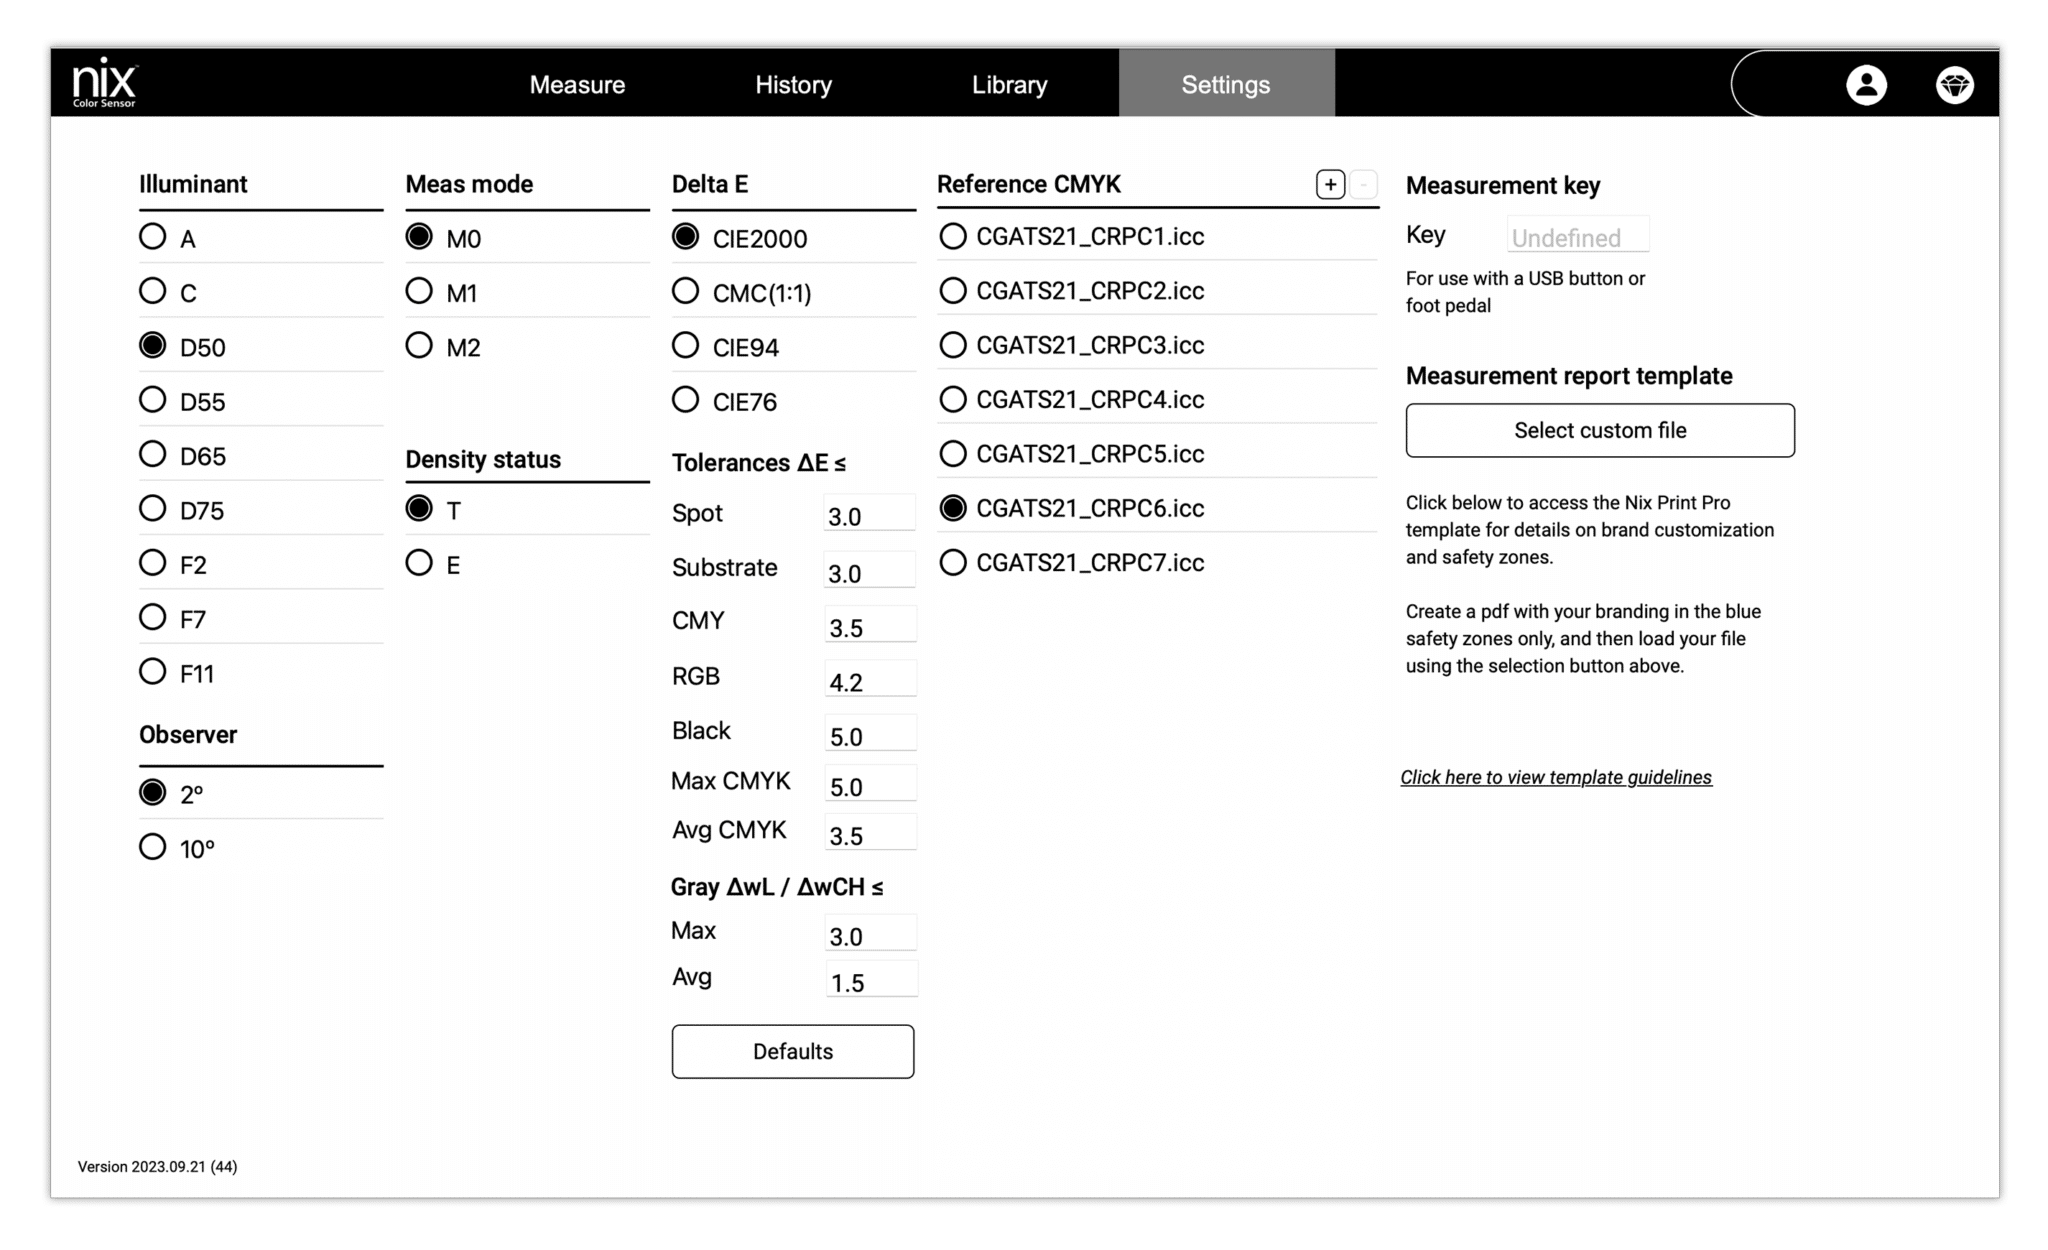
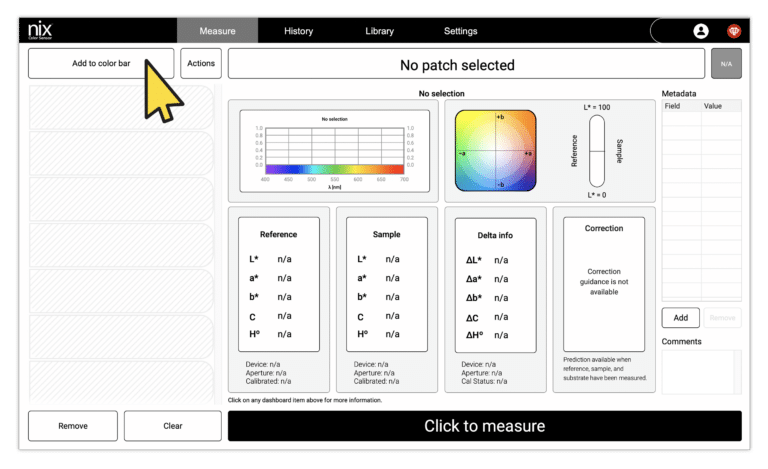
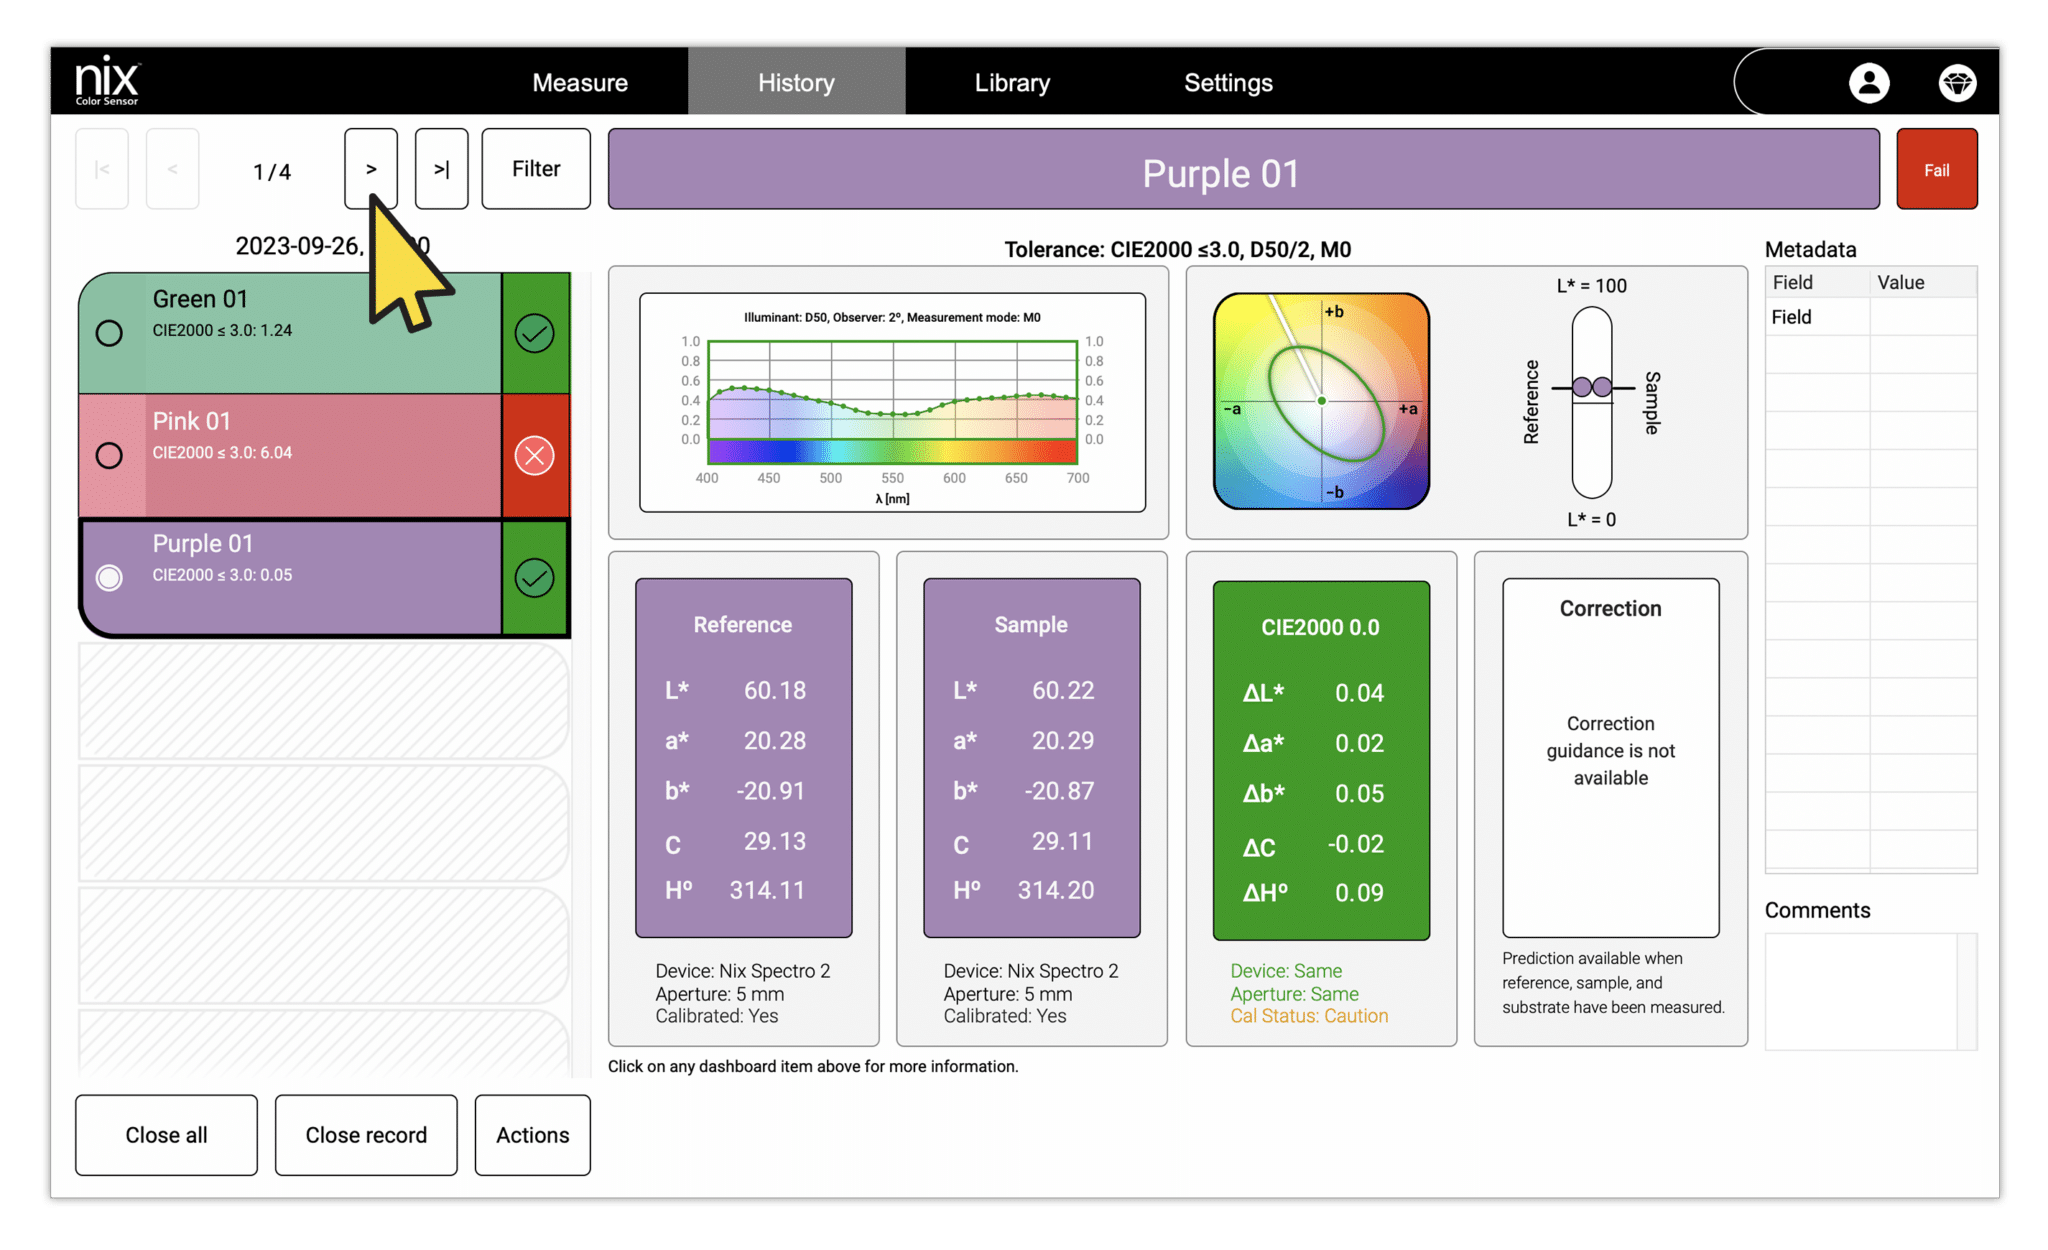
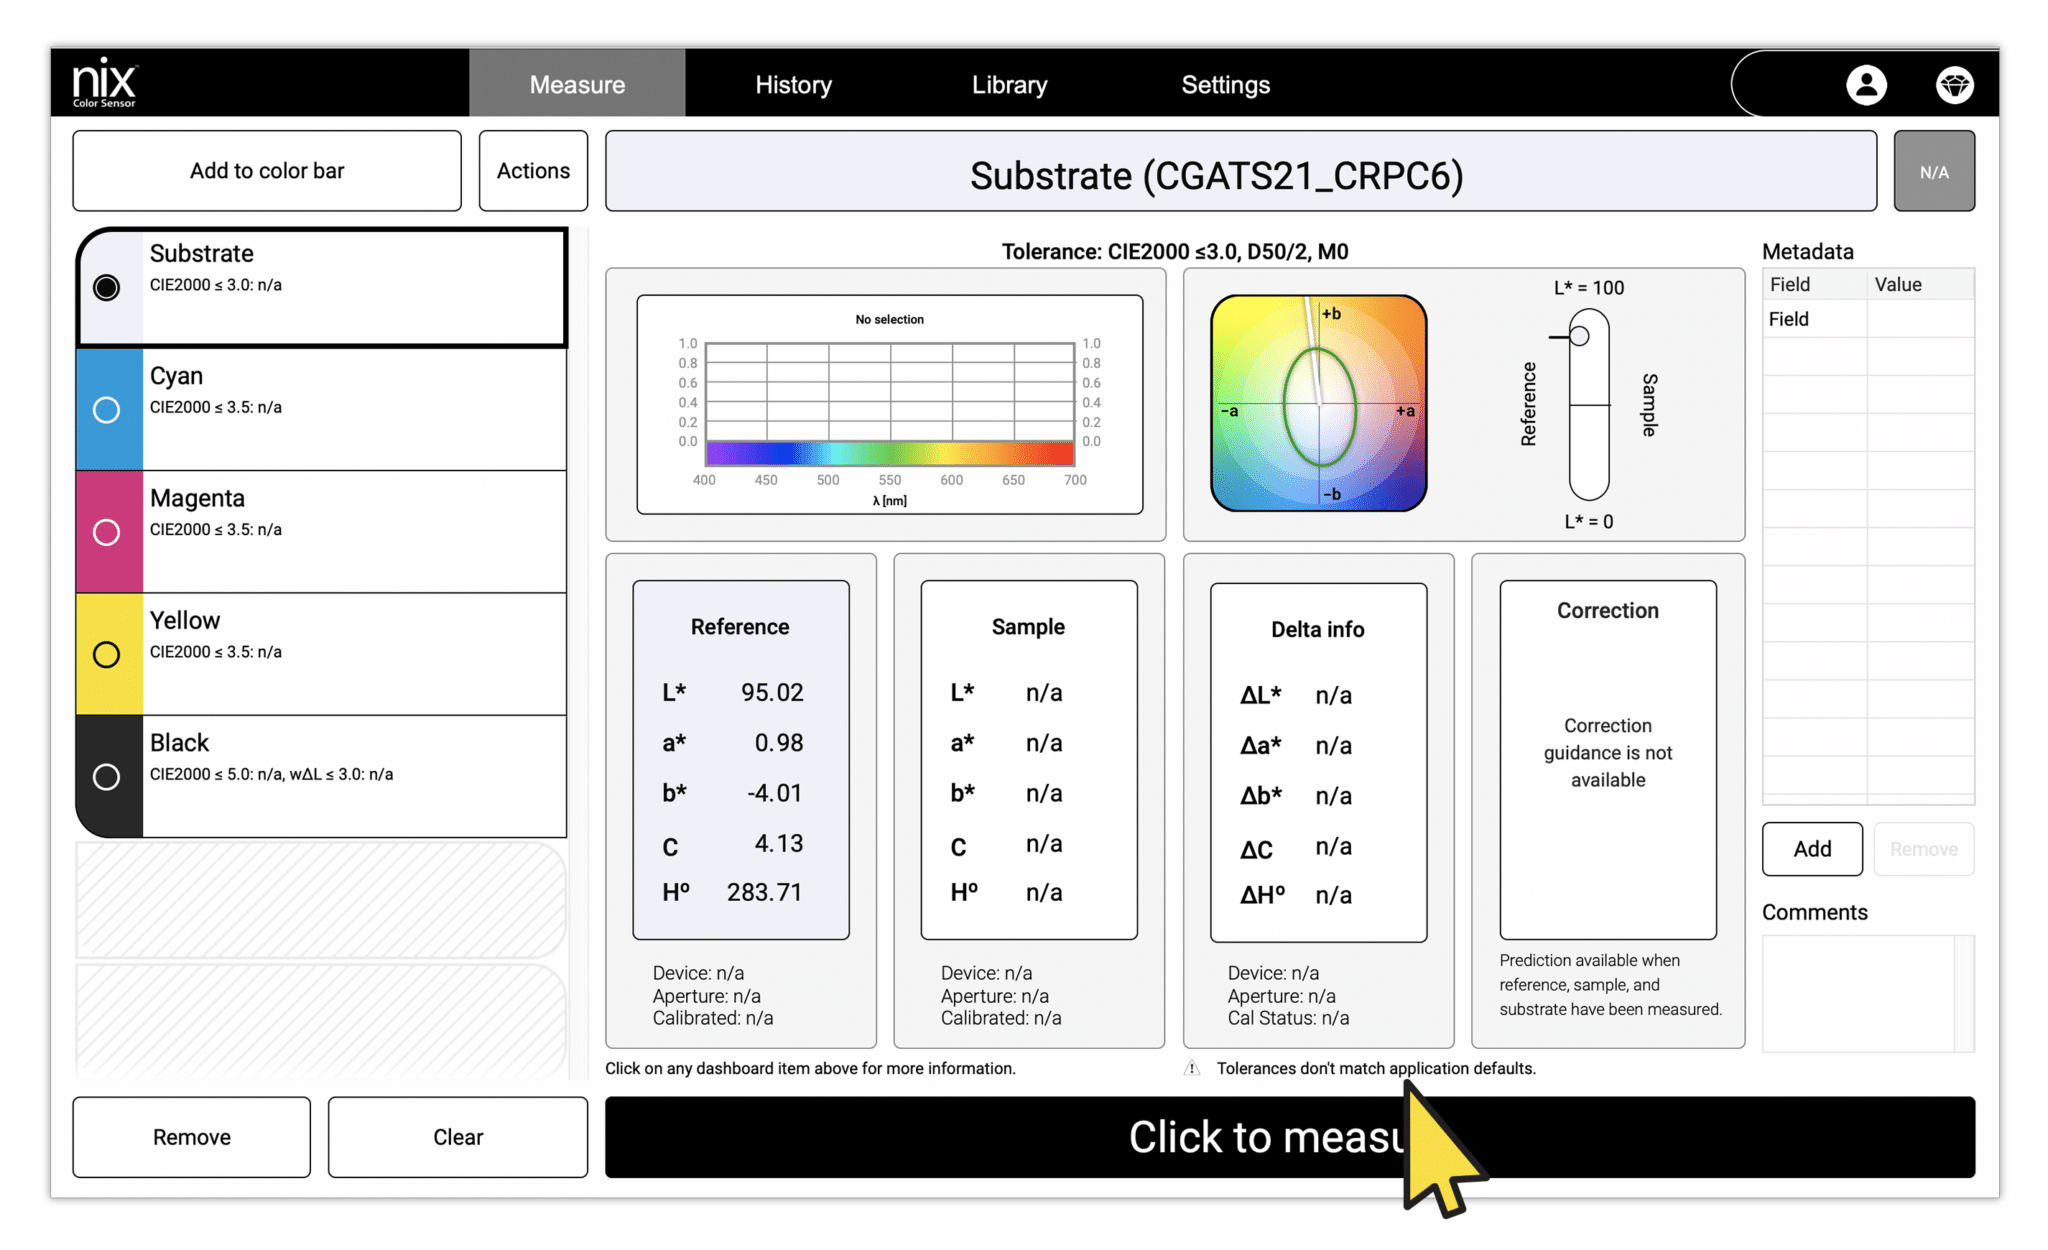
When starting a new job, all patches’ colorimetry and tolerances will match the default settings. However, if you were to open a color bar or a previously saved job the colorimetry and tolerances saved with that job would be retained. Notice the caution flag and message box on the image below.
Default illuminant and observer are D50 and 2° as these are the graphic arts standard. Measurement mode is defaulted to M0. The default density status is T for North America or E for Europe. Delta E defaults to CIE2000 as this is also the current industry standard.
When clicking the “Defaults” button, the “Tolerances ΔEs” fields will reset to their default values (see image below).
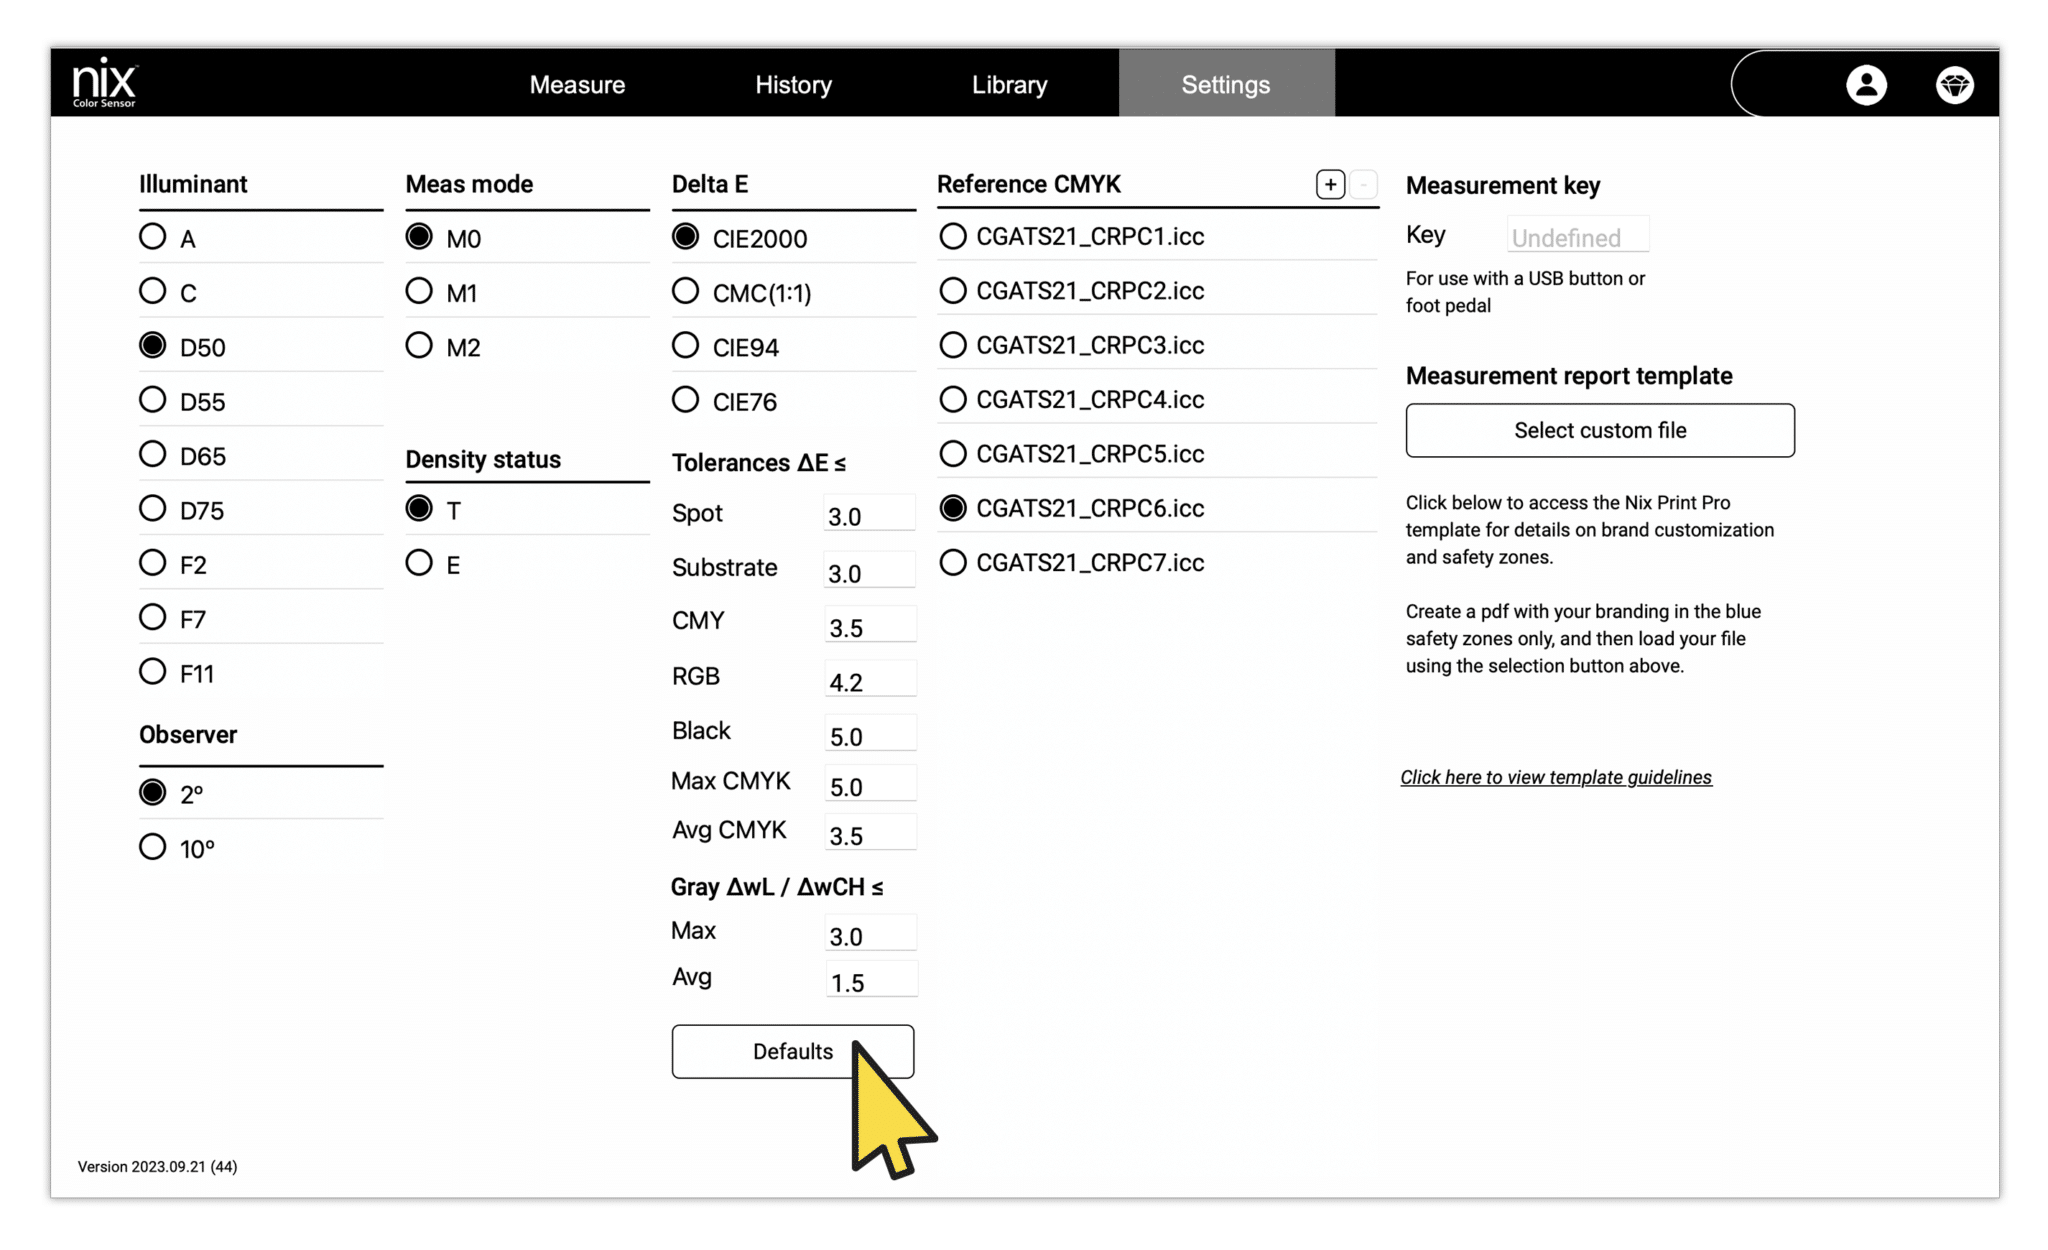
The reference CMYK Profile is used to compute the LAB target values for any process colors added to the color bar. The software comes preinstalled with industry-standard CGATS ICC profiles to choose from. These represent the current CRPCs. You can also add your own custom ICC profile for the exact production conditions you require.
If your company plans on pairing a USB or Bluetooth button or pedal to assist the Nix Print Pro software, you’re able to set this up under the “Measurement Key” section. Simply define which character you’re going to use, then whenever you press your button or pedal it will key that character into our software and trigger a color measurement to take place.
Through the “Measurement Report Template” section, you’re able to customize the appearance of the reports to fit the branding of your company. Browse your computer for your desired files and you’re done! We’ve even provided a template sizing guideline to help you when designing your report. North American and European sizes are accepted.