Learn how to fill small holes in your wall on your own! You will need:
Sanding Block
Filling Knife and Putty Knife
Spackle
Water
Screw driver
Stain-blocking primer
Disclaimer Note: If you have more than 2-3 damaged areas to repair on your wall we reccomend painting the wall in it’s entirety instead of patching
CAUTION TIPS:
Before you begin your repair, it’s important to know the utility placement in your home. Typically, electric wires are attached to wall studs. Locate the wall studs before you begin cutting, drilling or nailing drywall.
You may want to wear protective clothing, work gloves, goggles and a dust mask when working with drywall.
Small hole repairs
**Sufficient to fill a 2m2 hole at 2mm deep and patch a 15cm2 hole**
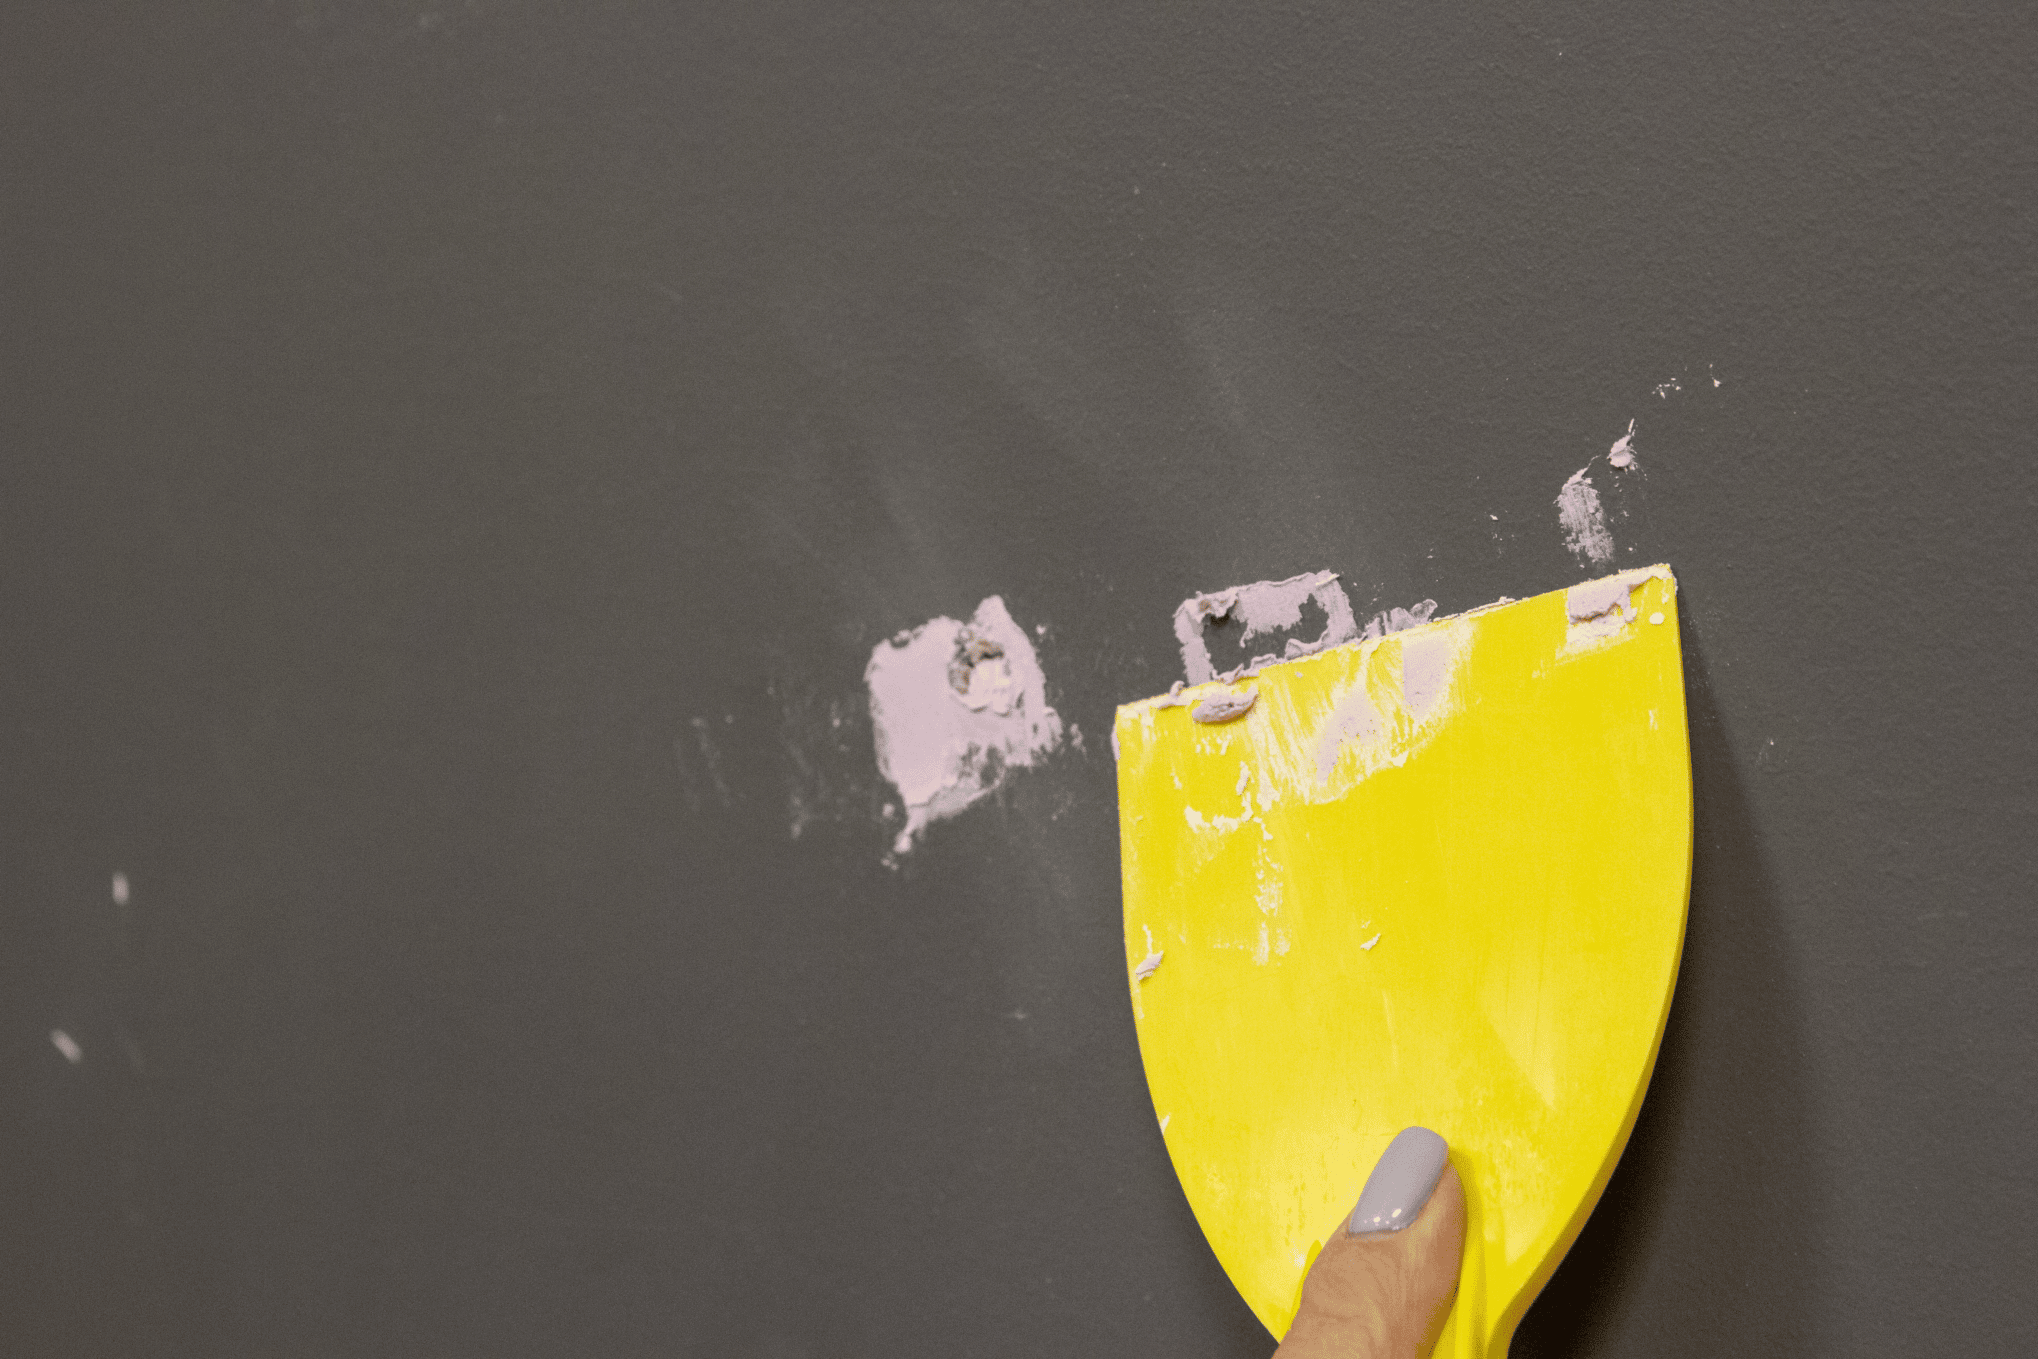
If needed:Unscrew the dry-wall screw from the wall and clean wall.
[layerslider id=”31″]
Mix filler with a small amount of clean water and stir to a smooth, creamy consistency. Dip 2 inches of the edge of the filling knife into the spackling paste and apply a thin layer on the wall in one horizontal stroke. Press firmly to ensure that the mud fills the screw hole.
PRO TIP: The coats shrink as they dry.
[layerslider id=”32″]
Without adding any additional spackling paste, make a second stroke perpendicular to your first stroke using a putty knife to flatten out the mud.
PRO TIP: Make just one run. Multiple runs may have a counterproductive effect, wiping mud out of the screw hole.
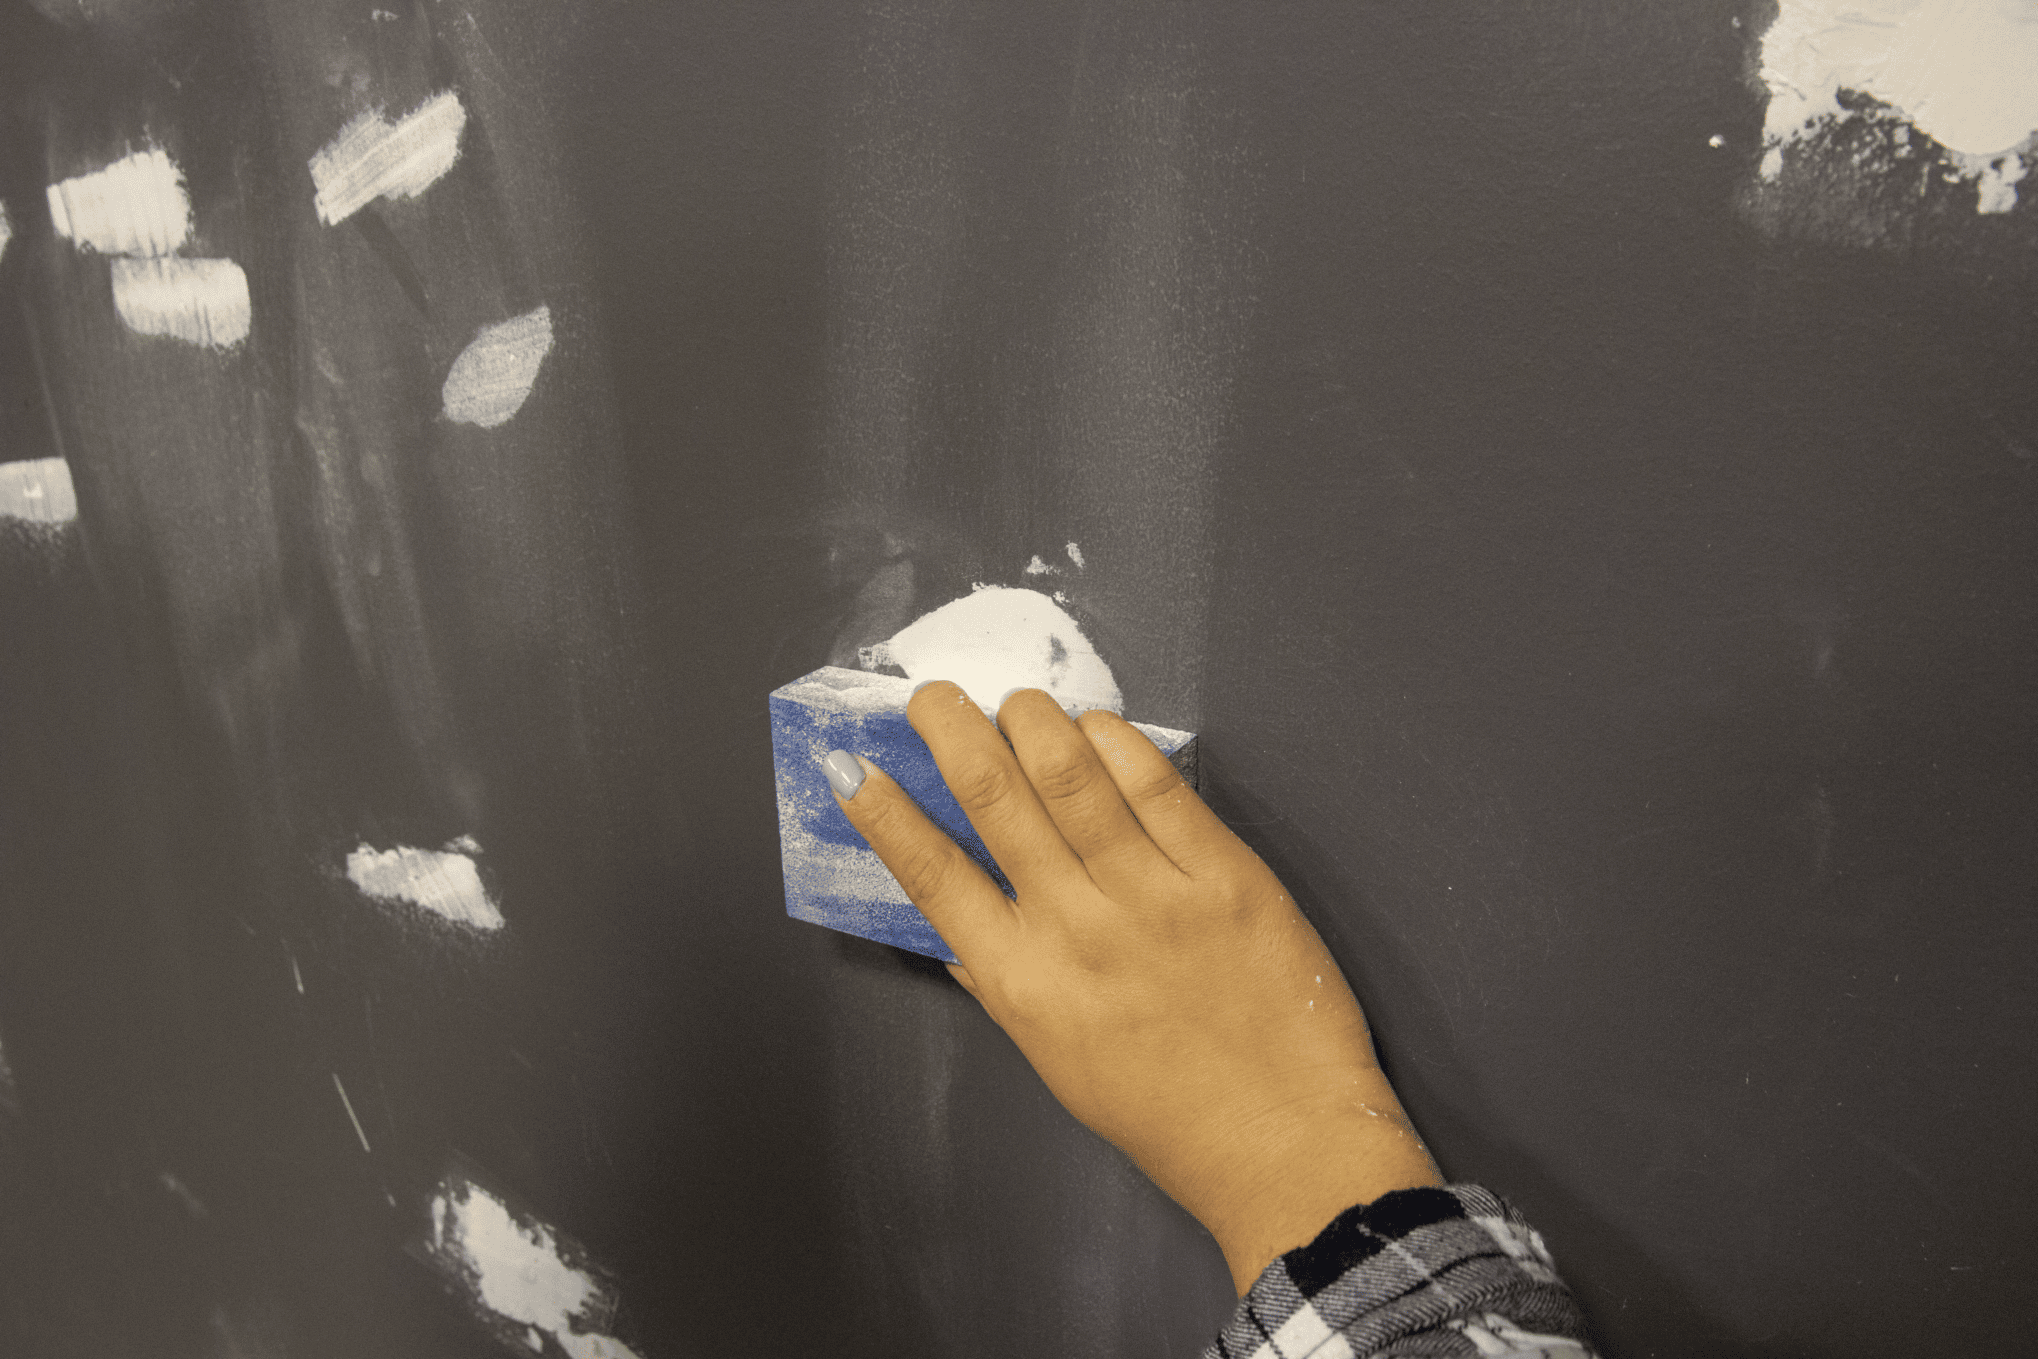
Once dry, sand surface in a circular motion (you may need to repeat steps 2-4, 2-3 times to ensure the hole is filled).
PRO TIP: Avoid overfilling to minimize sanding.
[layerslider id=”33″]
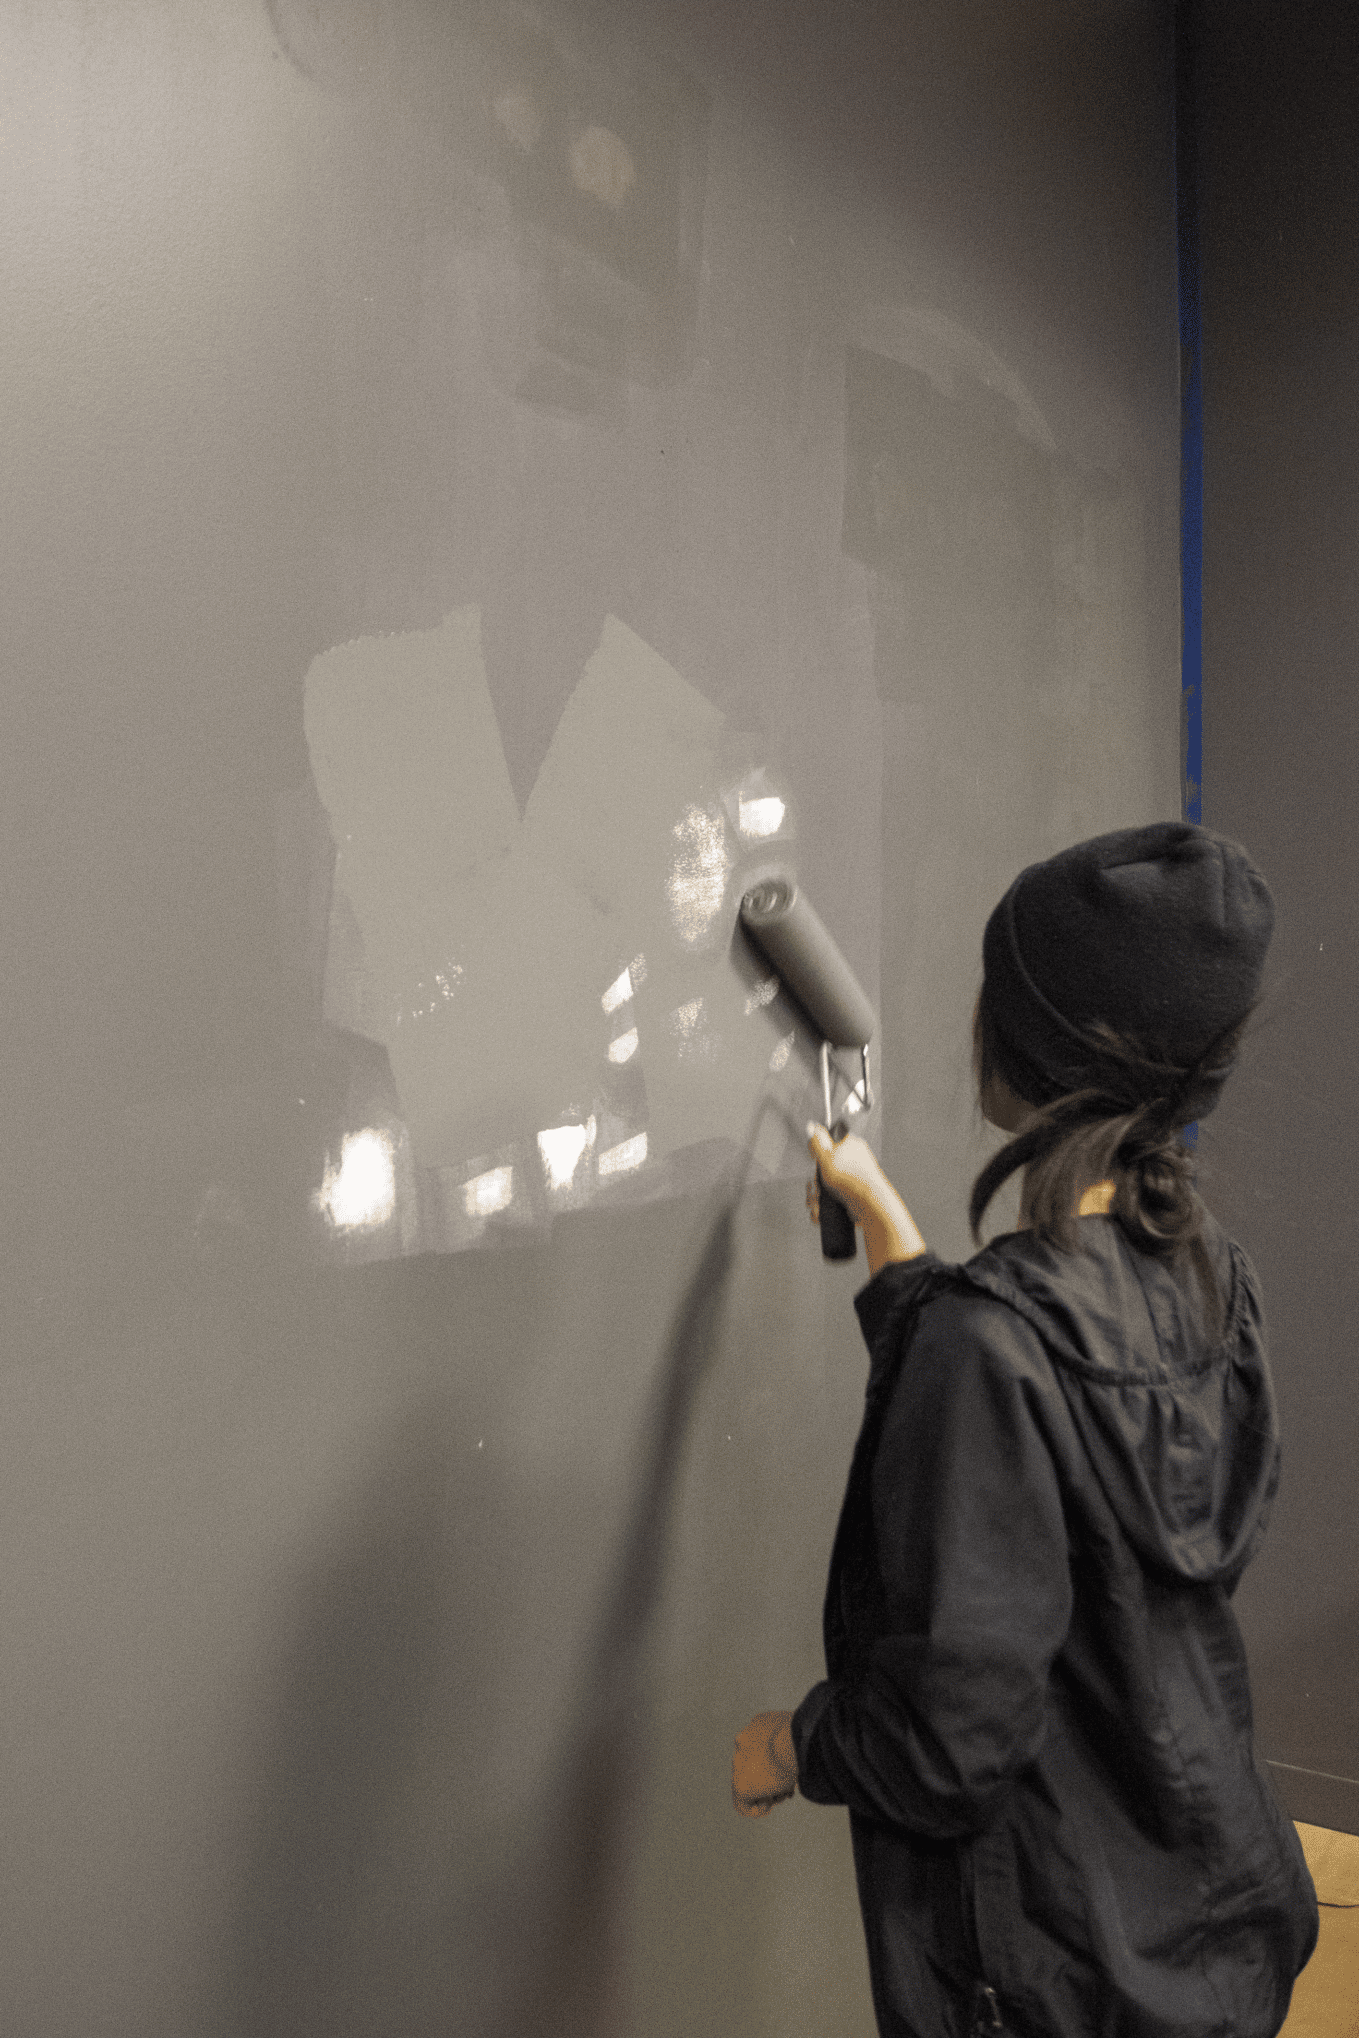
Setting time is approx 70 mins or allow at least 2 hrs before sanding and painting. Once dry finish all repairs with a final light sanding to ensure a satin smooth finish and seamless blending between the patch and the wall.
Cover with a coat of primer and let it dry.
Note: (The wall in this photo had a significant amount of damage and required several repairs to be made. Due to this, we opted to repaint the wall a new color)